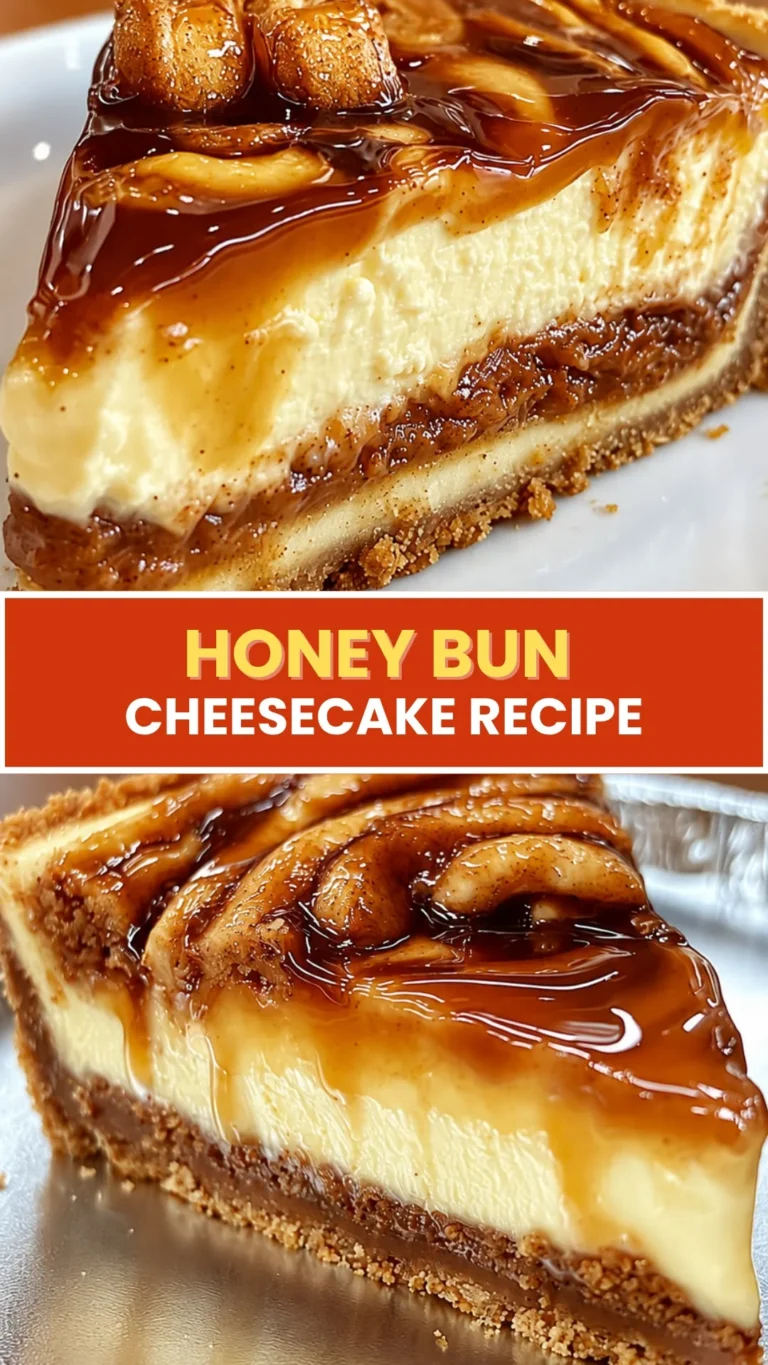
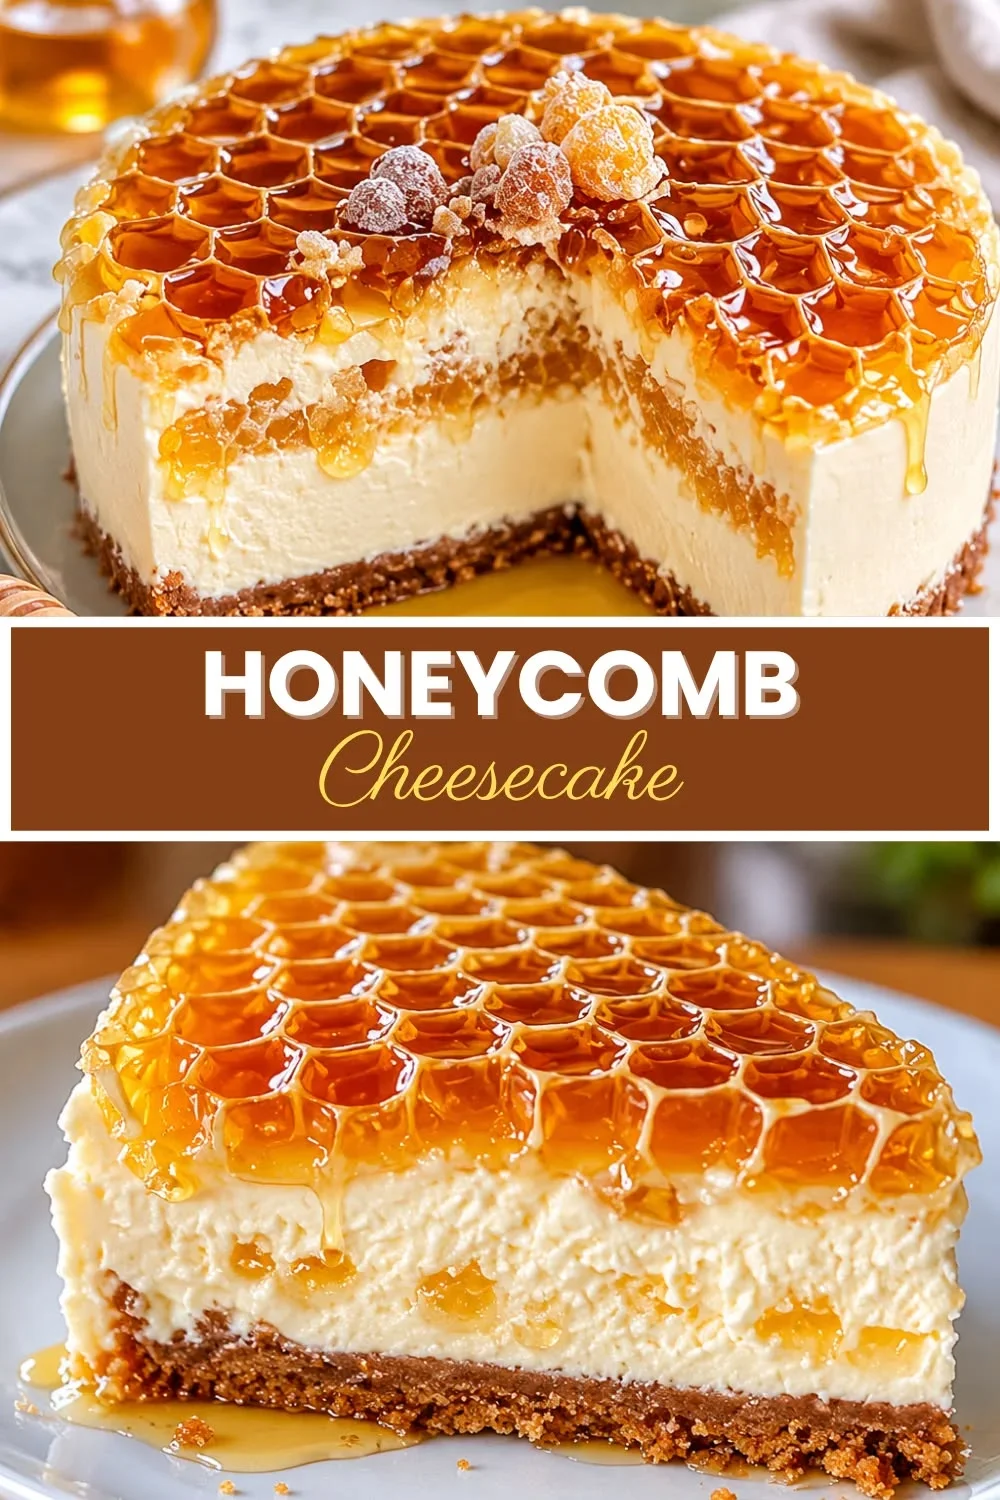
THE BEST N°1 Crunchy Honeycomb Cheesecake Recipe | Easy Baked Dessert with Nutty Brittle Topping
If you have ever wanted a showstopping dessert that looks like it came from a fancy bakery but can be made right in your own kitchen, this crunchy honeycomb cheesecake recipe is exactly what you need. It combines a silky smooth baked cheesecake with a golden, nutty brittle topping that shatters beautifully with every single bite. The contrast of textures is what makes this dessert truly unforgettable.
In this post, you will learn everything about making this incredible dessert from scratch, including how to nail the perfect baked cheesecake base, how to make honeycomb candy at home, and how to prep it ahead of time so you always have something impressive ready to serve. Whether you are hosting a dinner party or just want to treat yourself, this recipe delivers every single time.
We will also cover ingredient highlights, common mistakes to avoid, smart storage tips, and batch prep strategies so you can get the most out of your time in the kitchen. Stick around because this is one recipe you are going to come back to again and again.
Table of Contents
Personal Note
The first time I made a baked cheesecake with a honeycomb brittle topping, it was for a small gathering at my home during the holiday season. I was nervous because I had never made honeycomb candy before, and the idea of cooking sugar to exactly the right temperature felt intimidating. But the result was so magical, so perfectly golden and crunchy on top of that creamy, dense cheesecake, that I knew this recipe had to become a staple in my dessert rotation.
What I love most about this dessert is how it brings two completely different textures together in one bite. The creamy, slightly tangy cheesecake filling balanced against the airy, caramelized crunch of the honeycomb brittle creates a sensory experience that is genuinely hard to describe until you try it yourself. It feels indulgent without being overwhelming, and every slice looks absolutely stunning on a plate.
I have made this recipe countless times now, tweaking ratios and trying different nut combinations, and I am excited to share my most refined version with you today. This is the kind of dessert that earns you compliments for days after the event, and people will always ask you for the recipe.
Origins of the Dish
Cheesecake is one of the oldest desserts known to recorded history. Ancient Greeks on the island of Delos were making a simple version of cheesecake as far back as 776 BC, reportedly serving it to athletes competing in the original Olympic games. The earliest versions were made from fresh cheese, wheat, and honey, which is a fascinating parallel to the honeycomb topping we are celebrating in this modern recipe. When the Romans spread across Europe, they took the concept of cheesecake with them, and over centuries it evolved dramatically in both texture and flavor.
The baked New York-style cheesecake that most people recognize today was developed largely in the late 19th and early 20th centuries in the United States. Cream cheese, which was invented in 1872 by American dairyman William Lawrence, became the defining ingredient that gave baked cheesecake its rich, dense, and smooth character. By the mid-20th century, baked cheesecake had become a cultural icon in American dessert culture, celebrated in diners, bakeries, and home kitchens alike. It is now one of the most beloved desserts worldwide.
Honeycomb candy, also known as cinder toffee, sponge candy, or hokey pokey depending on where you are in the world, has its own rich and global history. The basic process involves cooking sugar and corn syrup to a high temperature and then adding baking soda, which causes a dramatic foaming reaction that creates thousands of tiny air bubbles throughout the candy. The result is a golden, crunchy, airy confection that dissolves on the tongue in a deeply satisfying way. Honeycomb candy has been a popular treat in British confectionery culture for centuries, and it remains a beloved ingredient in modern dessert making.
The pairing of honeycomb brittle with cheesecake is a more modern innovation, born out of the gourmet dessert movement that exploded in the early 2000s. Pastry chefs began experimenting with textural contrasts as a way to elevate classic desserts, and the combination of crunchy brittle with smooth, baked cheesecake became a signature technique in high-end bakeries and restaurants. Adding nuts to the brittle brought even more depth, introducing a toasty, savory edge that balanced the sweetness of the honeycomb perfectly. Today, this combination is a celebrated dessert technique that any home baker can master with the right guidance.
Why You’ll Love This Recipe
This crunchy honeycomb cheesecake recipe is designed to deliver maximum impact with straightforward, achievable techniques. Here is exactly why this recipe is going to become one of your favorites.
- Incredible texture contrast – The silky smooth baked cheesecake and the shattering honeycomb brittle create a combination that is genuinely next-level in every bite.
- Visually stunning – The golden, jewel-like honeycomb shards draped across a creamy cheesecake look like a professional pastry chef creation, perfect for special occasions and social media.
- Make-ahead friendly – Baked cheesecake actually tastes better after chilling overnight, which makes it ideal for planning ahead before a big event or dinner party.
- Customizable – You can swap the nuts, adjust the sweetness, change the crust, and add flavor variations to make this recipe completely your own.
- Crowd-pleasing every time – This dessert has universal appeal. Kids love the honeycomb candy, and adults appreciate the sophisticated flavor profile of the baked cheesecake.
- Batch prep ready – You can make multiple cheesecakes at once and freeze them, ensuring you always have an impressive dessert ready to go at a moment’s notice.
- No fancy equipment needed – You just need a springform pan, a stand or hand mixer, and a candy thermometer. No water bath anxiety required when you follow the right technique.
- Deeply satisfying flavor – The combination of tangy cream cheese, buttery crust, caramelized honeycomb, and toasted nuts creates a layered flavor experience that feels both complex and comforting.
- Scales easily – The recipe works for a standard 9-inch cheesecake or mini cheesecakes, so you can adapt it for small servings or a large centerpiece dessert.
- Straightforward honeycomb technique – Once you understand the simple steps for making honeycomb candy, you will wonder why you ever thought it was difficult. It is fast, fun, and deeply rewarding.
Health Benefits and Ingredient Highlights
While this is absolutely an indulgent dessert, understanding what goes into it helps you appreciate not just the flavor but also the role each ingredient plays. Some of these ingredients bring more to the table than you might expect.
Cream Cheese
Cream cheese is the backbone of any great baked cheesecake, and it contributes more than just richness. It is a source of fat-soluble vitamins like vitamin A, which plays a role in eye health and immune function. Full-fat cream cheese also contains conjugated linoleic acid (CLA), a naturally occurring fatty acid that some research suggests may support healthy metabolism when consumed as part of a balanced diet.
From a culinary perspective, the high fat content of cream cheese is what gives baked cheesecake its signature dense and velvety texture. It holds its structure during baking while remaining perfectly smooth when chilled. Using full-fat cream cheese rather than reduced-fat versions will always give you a superior result in terms of both flavor and texture, so do not be tempted to cut corners here.
Eggs
Eggs are the structural ingredient in baked cheesecake, acting as the binder that holds everything together during the baking process. They are packed with high-quality complete protein, containing all nine essential amino acids your body needs. Eggs also provide choline, a nutrient that is essential for brain health, and they deliver vitamins B12 and D, both of which are important for energy metabolism and bone health.
In this recipe, eggs need to be at room temperature before you add them to the batter. Cold eggs can cause the batter to seize or become lumpy, which can lead to a dense, uneven bake. Room temperature eggs incorporate smoothly and evenly, contributing to that gorgeous, crack-free cheesecake top that everyone wants to achieve.
Honey
Raw honey is one of the oldest natural sweeteners on the planet, and it brings genuine depth of flavor that plain sugar simply cannot match. Honey contains trace amounts of antioxidants, including flavonoids and phenolic acids, which help protect cells from oxidative stress. It also has a lower glycemic impact than refined white sugar when consumed in moderate amounts, making it a slightly smarter sweetener choice for desserts.
For the honeycomb brittle component of this recipe, honey plays a critical flavor role. Its complex floral notes infuse into the caramelized sugar to create a candy with remarkable depth. Darker, more robust honey varieties like buckwheat or wildflower will give you a more intense honeycomb flavor, while lighter varieties like clover will produce a more delicate sweetness. Choose based on how bold you want your brittle to taste.
Mixed Nuts (Almonds, Walnuts, Pecans)
The nutty brittle topping in this crunchy honeycomb cheesecake recipe gets its body from toasted nuts, and the type you choose matters both for flavor and nutritional value. Almonds are rich in vitamin E, magnesium, and monounsaturated fats that support heart health. Walnuts are one of the best plant-based sources of omega-3 fatty acids, which are linked to reduced inflammation and improved brain function. Pecans bring a buttery sweetness and are loaded with antioxidants, particularly ellagic acid.
Toasting the nuts before adding them to the brittle is a step you should never skip. Toasting activates the Maillard reaction within the nut proteins and natural sugars, deepening their flavor and creating a richer, more complex aroma. Even just five minutes in a dry skillet or oven completely transforms the taste of your nuts and elevates the final topping dramatically.
Butter
Butter serves multiple roles in this recipe, contributing to the crust, the cheesecake batter richness, and the honeycomb brittle. It is a natural source of fat-soluble vitamins A, D, E, and K2, with K2 in particular being important for directing calcium to bones rather than arteries. Grass-fed butter tends to have a higher concentration of these beneficial nutrients, so it is a worthwhile upgrade if it is available to you.
From a baking perspective, butter creates a cohesive, crumbly crust when combined with crushed graham crackers or digestive biscuits. It also adds a luscious mouthfeel to the finished cheesecake that you simply cannot replicate with oil or margarine. Use unsalted butter so you can control the overall salt level of your dessert precisely.
Sour Cream
Sour cream is the secret ingredient that takes baked cheesecake from good to absolutely extraordinary. It adds a subtle tanginess that cuts through the richness of the cream cheese and creates a more balanced, complex flavor profile. Sour cream also contains probiotics, the beneficial bacteria that support gut health and digestion, though heat from baking reduces their activity in this application.
The fat content in sour cream contributes to the ultra-smooth, creamy texture that defines a great baked cheesecake. It also helps prevent the cheesecake from becoming too dense or heavy by adding a slight lightness to the batter. Some bakers add sour cream to the top of the cheesecake in the last few minutes of baking to create a glossy, smooth surface that sets the stage perfectly for the honeycomb topping.
Ingredients
These quantities make one standard 9-inch baked cheesecake, serving approximately 10 to 12 people. All ingredients should be at room temperature unless otherwise noted.
For the Graham Cracker Crust:
- 2 cups (200g) graham cracker crumbs (or digestive biscuit crumbs for a British twist)
- 1/4 cup (50g) granulated sugar
- 1/2 cup (115g) unsalted butter, melted (substitute: coconut oil for a dairy-free crust)
- 1/4 teaspoon fine sea salt
For the Baked Cheesecake Filling:
- 32 oz (900g) full-fat cream cheese, softened (do not use whipped or reduced-fat)
- 1 cup (200g) granulated sugar
- 1/4 cup (60ml) sour cream, room temperature (substitute: full-fat Greek yogurt)
- 1/4 cup (60ml) heavy cream, room temperature
- 4 large eggs, room temperature
- 2 teaspoons pure vanilla extract
- 2 tablespoons all-purpose flour (substitute: cornstarch or rice flour for gluten-free)
- 1 tablespoon fresh lemon juice
- Zest of 1 lemon
For the Honeycomb Brittle Topping:
- 1 cup (200g) granulated sugar
- 1/4 cup (60ml) light corn syrup (substitute: golden syrup or pure honey)
- 2 tablespoons raw honey
- 3 tablespoons water
- 1 1/2 teaspoons baking soda, sifted
- 1 cup (120g) mixed nuts, roughly chopped and toasted (almonds, walnuts, and pecans work beautifully)
- 1/2 teaspoon flaky sea salt (such as Maldon) for finishing
- 1 tablespoon unsalted butter
Step-by-Step Instructions
Follow these steps carefully for a perfect result every time. Read through the entire recipe before you start so there are no surprises along the way.
- Preheat your oven to 325°F (163°C). Lightly grease the bottom and sides of a 9-inch springform pan with butter, then line the bottom with a circle of parchment paper. This makes removing the cheesecake much easier after it has chilled.
- Make the crust. Combine the graham cracker crumbs, granulated sugar, melted butter, and salt in a large bowl and stir until the mixture resembles wet sand. Every crumb should be moistened by the butter for a crust that holds together cleanly when sliced.
- Press the crust into the pan. Pour the crumb mixture into the prepared springform pan and use the bottom of a flat measuring cup or glass to press it firmly and evenly across the bottom and about 1 inch up the sides. Place it in the oven and bake for 10 minutes until lightly golden, then remove and set aside to cool slightly.
- Beat the cream cheese. In the bowl of a stand mixer fitted with the paddle attachment (or using a hand mixer), beat the softened cream cheese on medium speed for about 2 to 3 minutes until it is completely smooth with no lumps remaining. Scrape down the sides and bottom of the bowl frequently to ensure even mixing.
- Add the sugar and flour. Add the granulated sugar and flour to the cream cheese and beat on medium speed for another 2 minutes until fully incorporated and smooth. The mixture should look creamy and uniform at this stage.
- Mix in the sour cream, heavy cream, and vanilla. Add the sour cream, heavy cream, and vanilla extract and beat on low speed until just combined, about 30 seconds. Avoid over-mixing at this stage as incorporating too much air can cause the cheesecake to crack during baking.
- Add the eggs one at a time. With the mixer running on low speed, add the eggs one at a time, beating just until each one is incorporated before adding the next. Add the lemon juice and lemon zest with the final egg and mix briefly until combined. Over-beating the eggs is one of the most common causes of a cracked cheesecake top.
- Pour the filling into the crust. Pour the cheesecake batter over the cooled crust and use a spatula to smooth the top evenly. Tap the pan gently on the counter a few times to release any large air bubbles trapped in the batter.
- Bake the cheesecake. Place the cheesecake on the center rack of your preheated oven and bake for 55 to 65 minutes. The cheesecake is done when the edges are set and lightly puffed but the center 2 to 3 inches still has a slight wobble when you gently shake the pan. It will continue to set as it cools.
- Cool gradually in the oven. Turn off the oven and prop the door open slightly with a wooden spoon. Allow the cheesecake to cool in the oven for 1 hour. This gradual cooling process is essential for preventing cracks and ensures a smooth, even surface on your finished cheesecake.
- Chill the cheesecake overnight. Remove the cheesecake from the oven, run a thin knife around the edge of the pan to prevent sticking, and allow it to cool completely to room temperature. Then cover the pan with plastic wrap and refrigerate for a minimum of 6 hours, but overnight is strongly preferred for the best texture and flavor.
- Toast the nuts. When you are ready to make the brittle, spread the chopped nuts in a single layer on a baking sheet and toast them in a 350°F (175°C) oven for 5 to 7 minutes, stirring once halfway through, until golden and fragrant. Remove from the oven and set aside. Line a separate baking sheet with a silicone mat or generously oiled parchment paper and set it nearby.
- Make the honeycomb brittle. In a medium heavy-bottomed saucepan (do not use nonstick), combine the granulated sugar, corn syrup, honey, and water over medium heat. Stir gently just until the sugar dissolves, then stop stirring completely. Clip a candy thermometer to the side of the pot and let the mixture cook undisturbed until it reaches 300°F (149°C), which is the hard crack stage. This will take approximately 10 to 15 minutes.
- Add butter and baking soda. Once the syrup reaches 300°F, remove the pot from the heat immediately and carefully stir in the tablespoon of butter until melted. Then quickly add the sifted baking soda and stir vigorously for about 5 seconds. The mixture will foam up dramatically and turn a beautiful golden color. Work quickly at this stage because the candy will begin to set fast.
- Add the nuts and pour. Quickly fold in the toasted nuts, then pour the entire foaming mixture onto your prepared lined baking sheet. Do not spread or press it down, let it settle naturally so the honeycomb bubbles remain intact. Sprinkle with the flaky sea salt immediately while the surface is still tacky, then leave it completely undisturbed to cool and set for at least 30 minutes.
- Break the brittle into shards. Once the honeycomb brittle is completely cool and hardened, break it into irregular shards and pieces using your hands or the back of a heavy knife. Some pieces should be large and dramatic, while others can be smaller for filling gaps in the topping. The variety of sizes creates a more visually interesting presentation.
- Assemble and serve. Remove the chilled cheesecake from the springform pan and transfer it carefully to a serving plate or cake stand. Arrange the honeycomb brittle shards artfully across the top of the cheesecake, pressing some gently into the surface if needed. Add the topping just before serving so the brittle stays crunchy. Slice with a hot, clean knife for the neatest cuts and serve immediately.
Make It Ahead and Batch Prep Guide
This crunchy honeycomb cheesecake recipe is genuinely one of the most batch-prep-friendly desserts you can make. The cheesecake base itself actually improves with time in the refrigerator, as the flavors deepen and the texture becomes denser and more satisfying with each passing hour. Making it one to two days before you need it is not just acceptable, it is actually recommended for the best possible result. You can bake two cheesecakes at the same time in a standard oven if you place them on different racks and rotate them halfway through the baking time.
For the honeycomb brittle, it is best made on the day you plan to serve the cheesecake since humidity can cause it to soften over time. However, if you are working in a dry environment, the brittle can be made up to 48 hours in advance and stored in an airtight container at room temperature with a desiccant packet or a few grains of dry rice to absorb moisture. Keep the brittle and the cheesecake stored separately and assemble only when you are ready to serve.
If you are prepping for multiple events or want to stock your freezer, bake the cheesecakes in full, allow them to cool completely, and freeze them without the brittle topping. Wrap each cheesecake tightly in two layers of plastic wrap followed by a layer of aluminum foil to prevent freezer burn. Label each with the date and you can freeze them for up to 2 months. Thaw in the refrigerator overnight before adding the brittle topping and serving.
Mini cheesecakes are another excellent batch prep strategy. Using a standard muffin tin lined with cupcake liners, you can make a full batch of 24 mini cheesecakes from this recipe. Mini cheesecakes bake in just 20 to 25 minutes, chill faster, and can be individually wrapped and frozen for grab-and-serve convenience. Top each mini cheesecake with a single large shard of honeycomb brittle just before serving for a beautiful individual dessert presentation. mini cheesecake recipe
Common Mistakes to Avoid
- Using cold cream cheese – Cold cream cheese will not beat smoothly and will leave lumps in your batter that never fully incorporate. Always allow cream cheese to come to full room temperature, at least 1 to 2 hours on the counter, before you begin mixing.
- Over-mixing the batter after adding eggs – Beating too aggressively after adding the eggs incorporates excess air into the batter, which causes the cheesecake to puff up dramatically in the oven and then collapse and crack as it cools. Mix on low speed and stop as soon as each egg is incorporated.
- Opening the oven door during baking – Sudden temperature changes are the enemy of a smooth cheesecake. Resist the urge to open the oven door during the first 45 minutes of baking, as the temperature drop can cause cracks and uneven rising.
- Stirring the honeycomb mixture after it boils – Once the sugar syrup for the honeycomb starts to boil, stirring it causes sugar crystals to form and the mixture will seize and become grainy. Trust the candy thermometer and leave the mixture completely alone once it starts to bubble.
- Adding the brittle topping too early – Placing the honeycomb brittle on the cheesecake hours before serving allows the humidity from the cheesecake surface to soften and dissolve the candy. Always add the brittle topping right before you bring it to the table.
- Rushing the chilling time – A baked cheesecake that has not chilled for long enough will be soft, sticky, and difficult to slice cleanly. It will also not have developed its full flavor. Six hours is the absolute minimum, and overnight is what you should always aim for.
Notes, Tips and Variations
Substitutions
If you cannot find graham crackers for the crust, digestive biscuits, Oreo cookies (filling removed), or even shortbread cookies make excellent alternatives. Each will give the crust a slightly different flavor profile, with Oreos creating a chocolatey base that pairs beautifully with the honeycomb topping. For a gluten-free version, use certified gluten-free graham crackers or almond flour pressed into the base of the pan.
Corn syrup in the honeycomb brittle can be replaced with golden syrup for a slightly more butterscotch-like flavor, or with pure maple syrup for a deeper, more complex sweetness. Keep in mind that substituting maple syrup will slightly alter the color and flavor of your finished brittle but the results are still absolutely delicious. For a nut-free version, simply omit the nuts and let the honeycomb stand on its own as the topping.
Dietary Variations
To make a gluten-free version of this crunchy honeycomb cheesecake recipe, substitute the graham cracker crust with a mixture of almond flour, melted butter, and a little sugar pressed into the base. Replace the all-purpose flour in the filling with an equal amount of cornstarch. These small swaps will not affect the flavor or texture noticeably, and the result is a fully gluten-free cheesecake that everyone at the table can enjoy.
For a richer, more intense cheesecake experience, you can replace a portion of the sour cream with creme fraiche, which has a higher fat content and a more subtle tanginess. If you want a lighter texture, substitute one of the cream cheese blocks with the same weight of well-drained full-fat ricotta. The ricotta version will be slightly less dense but equally creamy and delicious, with a texture that is closer to a New York-style cheesecake.
Cooking Tips
A candy thermometer is non-negotiable for the honeycomb brittle. Guessing the temperature by color alone is unreliable, and the difference between a perfect brittle at 300°F and a burnt, bitter one at 320°F is just a matter of a minute or two. Invest in a reliable candy thermometer and your honeycomb will turn out perfectly every single time.
When baking the cheesecake, place a shallow pan of hot water on the lower rack of your oven (not under the cheesecake, just nearby). This adds gentle moisture to the oven environment without the complexity of a full water bath and helps prevent the top of the cheesecake from drying out or cracking. This technique is particularly helpful if you have an oven that runs hot or dry. baked cheesecake tips and tricks
Topping Ideas and Flavor Boosters
The honeycomb brittle topping is spectacular on its own, but you can easily customize this dessert to match the occasion or your personal flavor preferences. Here are more than ten ideas to inspire you.
- Dark chocolate drizzle – Melt 2 oz of dark chocolate and drizzle it over the honeycomb shards for a bittersweet contrast that elevates the entire dessert.
- Salted caramel sauce – Pour a generous drizzle of homemade or store-bought salted caramel over the cheesecake before adding the honeycomb for an extra indulgent layer.
- Toasted coconut flakes – Sprinkle golden toasted coconut alongside the brittle for a tropical flavor dimension that pairs surprisingly well with honey.
- Fresh berries – Scatter fresh raspberries, blueberries, or sliced strawberries around the honeycomb shards for a bright, fruity contrast to the rich cheesecake.
- Freeze-dried fruit powder – Dust freeze-dried raspberry or mango powder lightly over the finished cheesecake for a vivid color pop and concentrated fruit flavor.
- Edible gold leaf – Press small pieces of edible gold leaf onto the honeycomb shards for a truly luxurious and show-stopping presentation for special events.
- Espresso dust – Sprinkle fine espresso powder or crushed coffee beans over the top for a mocha-inspired flavor twist that complements the caramel notes of the honeycomb beautifully.
- Cinnamon sugar brittle – Add half a teaspoon of ground cinnamon to the honeycomb mixture just before pouring for a warmly spiced brittle that feels perfect for autumn and winter serving.
- Sesame seeds – Add a tablespoon of toasted sesame seeds to the brittle mixture along with the nuts for a subtle nutty, savory-sweet dimension inspired by Middle Eastern confectionery.
- Whipped cream rosettes – Pipe small rosettes of lightly sweetened whipped cream around the edge of the cheesecake and nestle smaller brittle pieces in each one for an elegant plated presentation.
- Lemon curd swirl – Dollop a few tablespoons of store-bought or homemade lemon curd on top of the cheesecake before adding the brittle for a bright, citrusy layer that cuts beautifully through the sweetness.
- Crushed honeycomb sprinkle – In addition to large shards, finely crush a portion of the brittle and use it as a sparkly, crunchy sprinkle across the entire surface of the cheesecake for extra visual texture.
Who This Recipe Is For
This recipe is designed to be inclusive and adaptable, but here are the specific groups who will get the most joy from making and eating this crunchy honeycomb cheesecake recipe.
- Home bakers who want to impress – If you want a dessert that looks professionally made without requiring professional skills, this is it.
- Dessert meal preppers – People who love to have high-quality desserts ready to serve without last-minute stress will adore the make-ahead nature of this recipe.
- Dinner party hosts – This cheesecake is a natural centerpiece dessert that sparks conversation and earns genuine compliments every time it is served.
- Cheesecake enthusiasts – Anyone who already loves baked cheesecake will be blown away by what the honeycomb brittle topping adds to the experience.
- Gift bakers – Mini versions of this cheesecake in individual gift boxes with a shard of brittle on top make an extraordinary edible gift for birthdays, holidays, or thank-you occasions.
- Candy-making beginners – If you have always been curious about making your own candy but felt intimidated, honeycomb brittle is one of the most forgiving and rewarding starting points.
- Parents baking with kids – The dramatic foaming reaction of the honeycomb candy is absolutely magical for children to watch (with adult supervision, of course). It makes the cooking process feel like edible science.
- Gluten-free bakers – With simple swaps in the crust and filling, this dessert is fully adaptable to a gluten-free lifestyle without sacrificing any of the flavor or texture.
Storage and Meal Prep Tips
Refrigerator
Store the baked cheesecake (without the brittle topping) covered tightly with plastic wrap or in an airtight cake container in the refrigerator for up to 5 days. The flavor actually improves significantly over the first 2 to 3 days as the cream cheese settles and the lemon notes mellow. Always store the brittle topping separately at room temperature in an airtight container to prevent it from absorbing moisture from the cheesecake and becoming sticky.
When you are ready to serve, remove the cheesecake from the refrigerator and allow it to sit at room temperature for about 15 to 20 minutes before slicing. Slightly warmer cheesecake is creamier and more flavorful than cheesecake served ice cold straight from the fridge. Add the honeycomb brittle topping at the very last moment before bringing it to the table.
Freezer
Baked cheesecake freezes exceptionally well. Once the cheesecake has fully chilled in the refrigerator, remove it from the springform pan and place it on a cardboard cake round. Wrap it tightly in two layers of plastic wrap, pressing the wrap against the surface to remove any air pockets. Then wrap the whole thing in a layer of heavy-duty aluminum foil. Freeze for up to 2 months without any loss of quality.
Individual slices can also be frozen separately for portioned convenience. Slice the chilled cheesecake, place the slices on a parchment-lined baking sheet, and freeze until solid, about 2 hours. Then wrap each slice individually in plastic wrap and store in a zip-lock freezer bag. Thaw individual slices in the refrigerator for 1 to 2 hours or at room temperature for 30 minutes before serving. Never freeze the honeycomb brittle – it must always be made fresh or stored at room temperature.
Reheating
Cheesecake is a cold dessert and is not designed to be reheated in the traditional sense. However, if you prefer a slightly warmer, softer slice, you can place a single slice on a microwave-safe plate and warm it on 50% power for 15 to 20 seconds. This takes the chill off without cooking the cheesecake further. Do not attempt to reheat the cheesecake in a conventional oven as it will become rubbery and lose its signature creamy texture.
For frozen cheesecake slices, the best method is always to thaw slowly in the refrigerator overnight. This gradual thawing ensures the texture remains smooth and creamy without any condensation forming on the surface. Avoid thawing on the counter for extended periods as this can lead to uneven softening and potential food safety concerns. Add the honeycomb brittle only after the slice has fully thawed.
Nutrition Facts
The following nutritional information is based on one serving of this crunchy honeycomb cheesecake recipe, with the brittle topping included. The recipe yields approximately 12 servings from one standard 9-inch cheesecake. These values are estimates and may vary based on specific brands and ingredient substitutions used.
| Nutrient | Per Serving |
|---|---|
| Calories | 485 kcal |
| Total Fat | 31g |
| Saturated Fat | 16g |
| Carbohydrates | 47g |
| Sugar | 38g |
| Dietary Fiber | 1.5g |
| Protein | 8g |
| Sodium | 310mg |
| Cholesterol | 115mg |
| Calcium | 95mg |
FAQs
Can I make the cheesecake without a water bath?
Yes, and this recipe is specifically designed to be made without a traditional water bath. By cooling the cheesecake very gradually in the oven with the door slightly ajar, and by placing a pan of hot water on a separate lower rack to add ambient humidity, you can achieve a smooth, crack-free top without the hassle of wrapping your pan in foil or dealing with leaking water baths. Many home bakers find this method more reliable and less stressful than a full water bath technique.
Why did my honeycomb brittle turn out sticky instead of crunchy?
Sticky honeycomb is almost always caused by one of two things: the sugar mixture did not reach a high enough temperature, or the brittle was exposed to humidity during cooling or storage. Make sure your candy thermometer is accurate and that the syrup genuinely reaches 300°F before you add the baking soda. After pouring, allow the brittle to set in a dry environment away from steam or moisture. If your kitchen is particularly humid, store the finished brittle with a desiccant packet in an airtight container.
Can I make this recipe without a candy thermometer?
It is strongly advised to use a candy thermometer for this recipe since the success of the honeycomb brittle depends on precise temperature. However, if you absolutely do not have one, you can test the syrup using the cold water test. Drop a small amount of the syrup into a glass of cold water. At the hard crack stage (300°F), the syrup will form brittle, rigid threads that snap cleanly. This method is less precise but can work in a pinch if you are experienced with candy making.
How far in advance can I make this cheesecake for a party?
You can bake the cheesecake up to 3 days in advance and store it covered in the refrigerator. The brittle topping should ideally be made the same day you plan to serve it, though it can be made up to 48 hours ahead if stored in an airtight container at room temperature. Assemble the cheesecake with the brittle topping no more than 30 minutes before serving to ensure the honeycomb stays perfectly crunchy and visually stunning. party dessert prep guide
What is the best way to get clean slices from a baked cheesecake?
The key to clean, restaurant-quality slices is a hot, dry knife. Before slicing, run your largest, sharpest knife under very hot water for a few seconds and then wipe it completely dry with a clean kitchen towel. Make each cut in one single smooth downward motion rather than sawing back and forth. Wipe and reheat the knife between every single slice. This technique removes the cream cheese residue that would otherwise drag through the next cut, giving you those picture-perfect, defined slices every time.
Conclusion
This crunchy honeycomb cheesecake recipe is proof that two already-great things can combine to create something truly extraordinary. The silky, tangy baked cheesecake paired with that golden, airy, nutty brittle topping delivers a dessert experience that is impossible to forget. Whether you are making it for a special occasion, meal prepping for the week, or simply indulging in a weekend baking project, this recipe rewards your effort with every single slice.
Do not be intimidated by the honeycomb candy component. Once you try it, you will realize it is one of the most satisfying things you can make in a kitchen. The drama of the foaming sugar, the gorgeous golden color, the sound of the brittle shattering into shards – it is a genuinely joyful cooking experience from start to finish. And the look on people’s faces when they see the finished cheesecake? Absolutely priceless.
Give this recipe a try and let us know how it turns out. Leave a comment below with your results, any variations you tried, and what toppings you used. If you made mini versions or added a chocolate drizzle or seasonal berries, we want to hear all about it. Happy baking, and enjoy every last crunchy, creamy, honeyed bite.