
THE BEST N°1 Heavenly Swirled Garlic Herb & Cheese Sourdough Bread Recipe
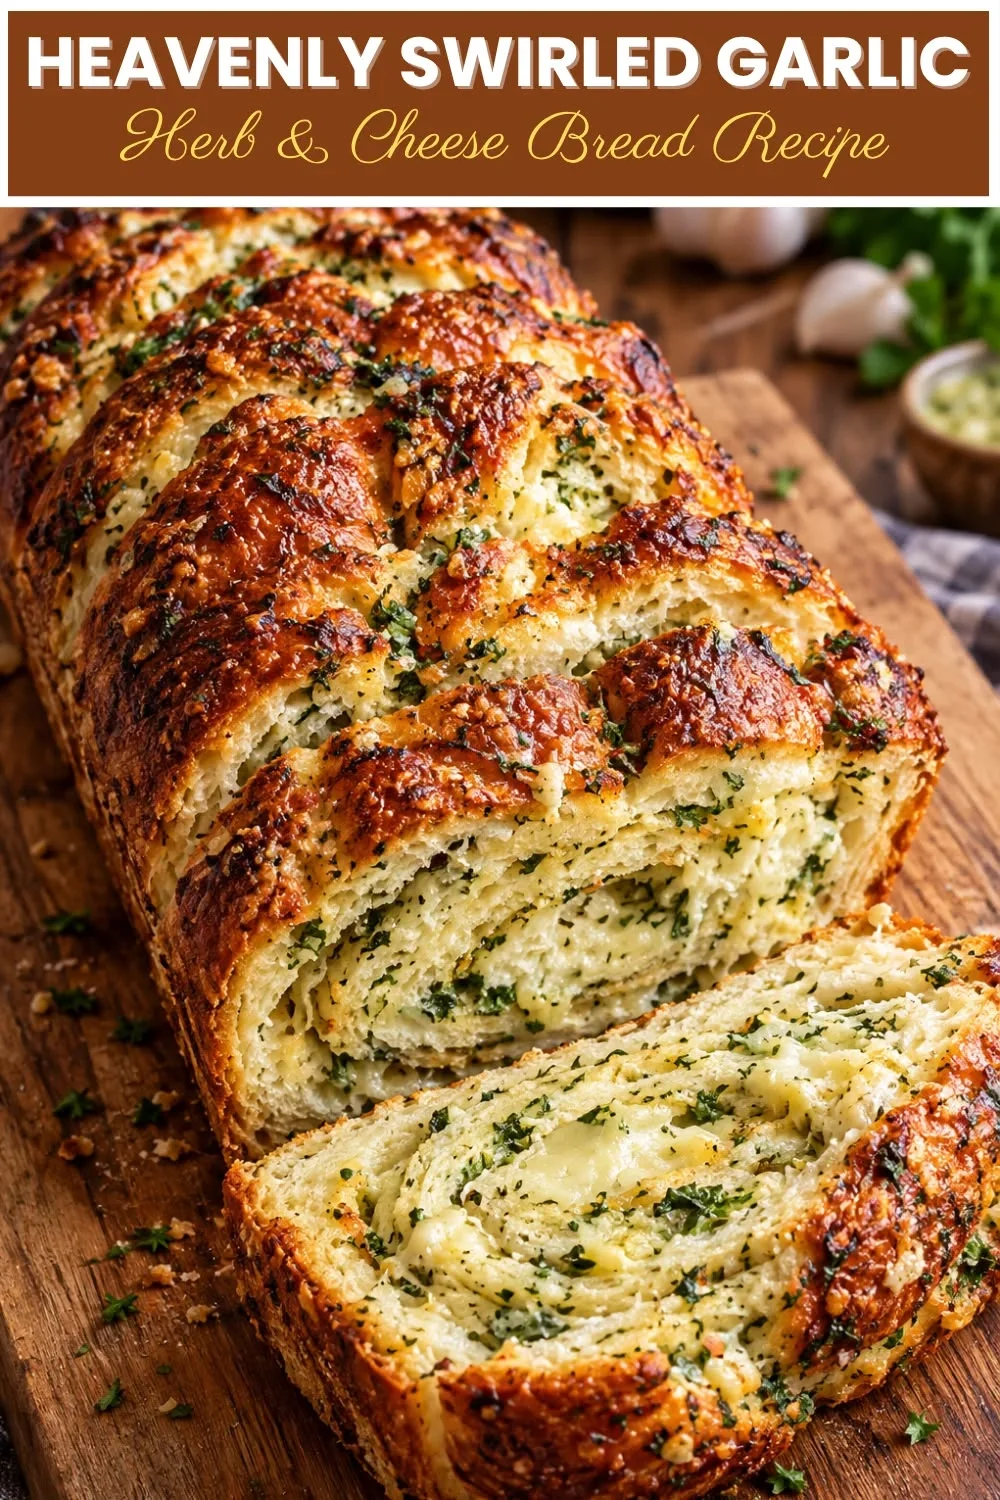
If you have ever pulled a loaf of bread from the oven and felt genuinely proud of what you created, you know there is nothing quite like homemade sourdough. This swirled garlic herb and cheese sourdough bread takes that satisfaction to a whole new level, combining a tangy, chewy crumb with golden ribbons of roasted garlic, fresh herbs, and melted cheese in every single slice.
This recipe is designed for real bakers – whether you are just starting your sourdough journey or you have been maintaining a starter for years. You will find everything here from the full ingredient list and step-by-step instructions to batch prep strategies and storage tips that actually work.
By the end of this post, you will know exactly how to make a bakery-worthy loaf at home, troubleshoot the most common problems, and even prep multiple loaves at once for the week ahead. Let us get into it.
Table of Contents
Personal Note
The first time I made a swirled sourdough, I honestly was not sure the filling would hold. I had visions of all that beautiful garlic and cheese pooling at the bottom of my Dutch oven and burning. What actually came out of the oven was a loaf so fragrant and visually stunning that I stood at my kitchen counter and ate three slices before it had even cooled properly.
That loaf became a weekend ritual in my kitchen. I started experimenting with different herb combinations – rosemary and thyme, then fresh basil with sun-dried tomatoes, then back to the classic garlic and sharp cheddar because nothing beats the original. Each variation taught me something new about how fillings interact with fermented dough.
What I want to pass on to you is not just a recipe but a technique that will open the door to endless creativity. Once you understand the swirl method and how sourdough behaves during shaping, every bread you bake after this one will feel more intuitive and more rewarding.
Origins of the Dish
Sourdough bread is one of the oldest forms of leavened bread in human history, with evidence of its existence dating back to ancient Egypt around 1500 BCE. The process of natural fermentation – where wild yeast and lactic acid bacteria in a starter culture leaven the dough – was the primary method of bread-making for thousands of years before commercial yeast became widely available in the 19th century. That ancient connection between baker and culture is part of what makes sourdough so compelling to modern home bakers.
The tradition of enriching bread with garlic, herbs, and cheese developed across many cultures independently. In Italy, focaccia loaded with rosemary and olive oil was a staple of communal ovens for centuries. In Eastern Europe, braided breads filled with herbs and farmer’s cheese were baked for celebrations and gatherings. In France, the combination of cultured butter, fine herbs, and bread formed the backbone of everyday eating. The idea of swirling these flavors directly into a sourdough loaf is a modern artisan evolution of these ancient traditions.
The artisan bread movement of the 1980s and 1990s, sparked in part by pioneering bakeries on the West Coast of the United States, brought sourdough back into the cultural spotlight. Bakers like Chad Robertson of Tartine Bakery in San Francisco helped elevate sourdough from a forgotten craft into an art form studied and replicated worldwide. His open-crumb country loaves inspired a generation of home bakers to invest in starters and high-quality ingredients. It was within this renaissance that filled and swirled sourdough loaves began appearing in bakeries and home kitchens as a natural next step.
Today, swirled garlic herb and cheese sourdough bread sits at the intersection of traditional fermentation craft and modern creative baking. It honors the slow, patient process of sourdough while adding layers of bold, savory flavor that make every loaf feel like a celebration. For home bakers who love to share food with family and friends, this bread represents exactly what artisan baking is all about – turning simple, quality ingredients into something truly extraordinary through skill and time.
Why You’ll Love This Recipe
This is not your average sourdough loaf. The garlic herb and cheese swirl transforms every slice into something you will genuinely look forward to eating, whether it is served alongside soup, used as toast, or eaten completely on its own.
- Incredible depth of flavor – The long fermentation of sourdough creates complex, tangy notes that pair beautifully with roasted garlic and sharp cheese.
- Stunning visual presentation – That gorgeous spiral of green herbs and golden cheese makes every slice look like it came from a high-end artisan bakery.
- No commercial yeast needed – Your sourdough starter does all the heavy lifting, giving you a loaf that is completely naturally leavened.
- Meal prep friendly – This bread bakes beautifully in batches and freezes exceptionally well, making it a smart addition to your weekly prep routine.
- Versatile serving options – Serve it as a dinner side, a party centerpiece, a sandwich base, or simply toasted with butter for breakfast.
- Customizable filling – Swap the cheese, change the herbs, or add sun-dried tomatoes, olives, or caramelized onions to make it your own.
- Beginner-accessible technique – The shaping method is explained in clear, step-by-step detail so even first-time sourdough shapers can nail the swirl.
- Long fermentation benefits – The extended cold proof enhances flavor and digestibility, giving you a loaf that is both complex and easier on the stomach than quick-rise breads.
- Crowd-pleaser every time – Whether you are bringing it to a dinner party or setting it on your family table, this loaf gets compliments without fail.
- Rewarding and educational – Each step teaches you something transferable about dough handling, fermentation timing, and flavor layering that will make you a better baker overall.
Health Benefits and Ingredient Highlights
Sourdough Starter and Fermented Flour
When flour ferments with a live sourdough starter, wild yeast and lactic acid bacteria break down phytic acid – a compound in grain that can bind to minerals and reduce their absorption. This fermentation process increases the bioavailability of minerals like iron, zinc, and magnesium naturally present in the flour. Studies have also shown that the acidity in sourdough slows starch digestion, resulting in a lower glycemic response compared to conventional bread.
The long fermentation also partially breaks down gluten proteins, which is why many people who experience mild gluten sensitivity find traditionally fermented sourdough easier to digest than commercially yeasted bread. This does not make sourdough gluten-free, but it does change the structure of the gluten in ways that the gut can handle more comfortably for some individuals.
Beyond digestion, the lactic acid bacteria in a healthy starter produce beneficial organic acids during fermentation that give sourdough its characteristic tang and also act as natural preservatives, extending the shelf life of your loaf significantly compared to store-bought bread.
Garlic
Garlic is one of the most studied functional foods in the world. It contains allicin, a sulfur compound that forms when garlic is crushed or chopped, and that compound has demonstrated antimicrobial, antiviral, and antioxidant properties in numerous studies. Roasting garlic for this recipe mellows its pungency and brings out a natural sweetness while still retaining many of its beneficial compounds.
Garlic is also rich in vitamin C, vitamin B6, and manganese, all of which support immune function, brain health, and metabolic processes. Regular consumption of garlic has been associated with modest reductions in blood pressure and improved cholesterol profiles in multiple clinical studies.
When garlic is incorporated into the swirl of this bread, it infuses the entire interior with its flavor during baking, ensuring every bite delivers both taste and those notable nutritional benefits.
Fresh Herbs – Rosemary, Thyme, and Parsley
Fresh rosemary is packed with rosmarinic acid, a powerful antioxidant and anti-inflammatory compound that has been studied for its potential role in supporting brain function and memory. Thyme contains thymol, an essential oil with well-documented antimicrobial properties, along with significant levels of vitamins C and A. Fresh parsley is a surprisingly rich source of vitamin K, which plays a critical role in bone health and blood coagulation.
Beyond their individual nutritional profiles, fresh herbs used in baking add aromatic complexity without adding significant calories, sodium, or fat. They are one of the most efficient ways to elevate the flavor of a dish while simultaneously boosting its micronutrient density.
Using fresh rather than dried herbs in this recipe makes a noticeable difference in both flavor vibrancy and color. The chlorophyll in fresh herbs holds up beautifully during the bake and creates those gorgeous green ribbons you see throughout the finished swirl.
Cheese – Sharp Cheddar or Gruyere
Aged cheeses like sharp cheddar and Gruyere are excellent sources of calcium, phosphorus, and protein. A single ounce of sharp cheddar provides approximately 200mg of calcium, contributing meaningfully toward the daily recommended intake of 1,000mg for most adults. Cheese also contains vitamin K2, a form of vitamin K associated with cardiovascular and bone health that is distinct from the K1 found in vegetables.
The fat content in cheese is what makes the filling melt so irresistibly during baking, creating those golden pockets and crispy cheese edges that form along the crust. From a baking science perspective, the fat from the cheese also slightly enriches the crumb in the areas where the swirl runs, giving those sections a slightly more tender texture.
Opting for a full-flavored aged cheese means you can use less of it while still achieving a bold, satisfying taste in every slice. This makes flavor efficiency a smart approach to both budget and calorie management in your baking.
Extra Virgin Olive Oil
Olive oil is used both in the filling and optionally brushed on the crust of this sourdough. It is rich in oleocanthal, a natural compound with anti-inflammatory properties similar in mechanism to ibuprofen, as well as oleic acid, a heart-healthy monounsaturated fat that has been extensively studied for its benefits to cardiovascular health.
In this recipe, olive oil serves as the medium that carries the garlic and herb flavors into the dough during shaping. It also helps the filling stay cohesive rather than dry out during the long bake, ensuring the interior remains moist and flavorful from edge to edge.
Ingredients
All quantities below make one standard 900g to 1kg loaf. Scale up for batch baking.
For the Sourdough Dough:
- 450g (3 3/4 cups) bread flour (substitute up to 100g with whole wheat flour for a nuttier flavor)
- 325g (1 1/3 cups) filtered water, lukewarm (around 75-78°F / 24-26°C)
- 100g (1/2 cup) active sourdough starter, fed and bubbly (use at peak – doubled in size, domed top)
- 9g (1.5 tsp) fine sea salt
- 1 tbsp extra virgin olive oil (optional, adds slight richness to the crumb)
For the Garlic Herb and Cheese Swirl Filling:
- 1 full head of garlic, roasted (substitute 3-4 cloves raw minced garlic for a sharper flavor)
- 2 tbsp extra virgin olive oil
- 2 tbsp fresh rosemary, finely chopped (substitute 1 tbsp dried rosemary)
- 2 tbsp fresh thyme leaves, stripped from stems
- 2 tbsp fresh flat-leaf parsley, finely chopped
- 1/4 tsp red pepper flakes (optional, adds gentle heat)
- 1/2 tsp freshly cracked black pepper
- 1/4 tsp fine sea salt
- 120g (about 1 cup loosely packed) sharp cheddar, coarsely grated (substitute Gruyere, Manchego, or a sharp provolone for variation)
- 30g (about 1/4 cup) grated Parmesan (substitute Pecorino Romano)
For Finishing:
- Rice flour, for dusting the banneton or proofing bowl
- 1 tbsp extra virgin olive oil, for brushing the crust before baking (optional)
- Flaky sea salt, for topping (optional)
Step-by-Step Instructions
Follow these steps in order and read through the entire process before you begin. Sourdough rewards preparation and patience above all else.
- Roast the garlic (1 day ahead or at least a few hours before baking). Preheat your oven to 400°F (200°C). Slice the top off a full head of garlic to expose the cloves, drizzle with 1 tsp olive oil, wrap tightly in foil, and roast for 40-45 minutes until the cloves are soft, golden, and caramelized. Allow to cool completely, then squeeze the roasted cloves from their skins into a small bowl and mash into a smooth paste. Store covered in the refrigerator until ready to use.
- Prepare the filling mixture. In a small bowl, combine the roasted garlic paste, 2 tbsp olive oil, fresh rosemary, thyme, parsley, red pepper flakes, black pepper, and 1/4 tsp salt. Stir well to form a cohesive herb oil. Set aside at room temperature. Keep the grated cheddar and Parmesan separate to add during shaping.
- Mix the dough – Autolyse phase. In a large mixing bowl, combine the bread flour and 300g of the lukewarm water (hold back 25g for later). Mix with your hand or a dough whisk until no dry flour remains. Cover the bowl with a damp towel or plastic wrap and let rest for 30-60 minutes. This resting period hydrates the flour fully and begins gluten development before any fermentation begins.
- Add the starter. After the autolyse, add your active sourdough starter to the dough. Using wet hands, work the starter into the dough using a pinch and squeeze motion until fully incorporated, about 2-3 minutes. The dough will feel loose and somewhat sticky at this stage, which is completely normal.
- Add the salt and remaining water. Dissolve the salt in the remaining 25g of water, then pour it over the dough. Use the same pinch and squeeze method to fully incorporate the salt until no water pools remain. If you are using olive oil in the dough, add it now and work it in using the same technique. This may take 3-4 minutes of kneading in the bowl.
- Bulk fermentation – Stretch and fold sets. Cover the dough and let it rest at room temperature (75-78°F / 24-26°C is ideal). Over the next 4 hours, perform 4 sets of stretch and folds, one every 30 minutes. For each set, grab one side of the dough, stretch it up as high as it will go without tearing, then fold it over to the opposite side. Rotate the bowl 90 degrees and repeat three more times to complete one full set. After all 4 sets, let the dough continue bulk fermenting undisturbed until it has increased in volume by 50-75%, shows bubbles on the surface and sides, and has a domed top. Total bulk fermentation time is typically 4-6 hours at 75-78°F, but may be longer in cooler kitchens.
- Pre-shape the dough. Lightly flour your work surface with bread flour. Gently turn the dough out from the bowl and use a bench scraper and your hands to shape it into a loose round. Do not press out the gas aggressively – you want to preserve some of the fermentation bubbles. Let the pre-shaped round rest uncovered on the bench for 20-30 minutes. This resting step, called the bench rest, allows the gluten to relax before final shaping.
- Roll out and add the filling. Using a rolling pin, gently roll the pre-shaped dough into a rough rectangle approximately 10 by 14 inches (25 by 35 cm), keeping the thickness even at around 1/2 inch. Spread the garlic herb oil filling evenly across the entire surface, leaving a 1-inch border along the top long edge. Scatter the grated cheddar and Parmesan evenly over the filling.
- Roll and shape the swirl. Starting from the bottom long edge, roll the dough tightly and evenly into a log shape, keeping the roll snug to prevent air pockets forming between the layers. Once fully rolled, pinch the seam firmly along the entire length to seal. Use your bench scraper to cut the log in half lengthwise, exposing the beautiful swirled layers inside. Twist the two halves around each other, keeping the cut layers facing outward and upward, then fold the twisted log into a round or oval shape that fits your banneton. Pinch and tuck the ends underneath to form a tidy package.
- Place in the banneton and proof. Dust your banneton or a floured bowl generously with rice flour. Place the shaped loaf into the banneton, seam side up. Cover tightly with a shower cap or plastic wrap and place in the refrigerator for a cold proof of 10-16 hours (overnight is ideal). Cold proofing enhances flavor development, makes scoring easier, and gives the loaf better oven spring.
- Preheat the oven and Dutch oven. When you are ready to bake, place your Dutch oven with its lid inside the oven and preheat to 500°F (260°C) for at least 45-60 minutes. The Dutch oven needs to be screaming hot before the loaf goes in. This high initial heat combined with the trapped steam from the dough creates the explosive oven spring and thick, crackling crust that makes sourdough so distinctive.
- Score and bake – covered phase. Remove the banneton from the refrigerator immediately before baking. Place a sheet of parchment paper over the top of the banneton and flip it over so the loaf lands seam-side down on the parchment. Using a sharp bread lame or razor blade, score the top of the loaf with a confident slash at a 30-45 degree angle, about 1/2 inch deep. If desired, brush lightly with olive oil and sprinkle with flaky sea salt. Carefully lower the loaf on the parchment into the hot Dutch oven, replace the lid, and bake at 500°F for 20 minutes.
- Bake uncovered – crust development phase. After 20 minutes, carefully remove the Dutch oven lid (be cautious of steam). Reduce the oven temperature to 450°F (230°C) and continue baking uncovered for 20-25 minutes, until the crust is a deep mahogany brown and the internal temperature reads 205-210°F (96-99°C) on an instant-read thermometer. The cheese on the edges of the swirl should be golden and slightly crispy.
- Cool before slicing. Remove the loaf from the Dutch oven and place it on a wire cooling rack. Resist the urge to slice immediately – this is the hardest part of the entire process. The interior of sourdough continues to set as it cools, and slicing too early will give you a gummy, undercooked-seeming crumb even if the loaf is fully baked. Wait at least 1 hour, and ideally 2 hours, before cutting. The reward for your patience is a perfectly set crumb with clearly defined swirl layers.
Make It Ahead and Batch Prep Guide
This swirled garlic herb and cheese sourdough bread is remarkably well-suited to batch baking. If you are going to invest the time in sourdough, doubling or tripling the recipe and baking multiple loaves in one session is the smartest approach. The hands-on time does not increase dramatically when you scale up, and you end up with weeks of incredible bread for minimal extra effort.
The easiest make-ahead strategy is to prepare the dough through shaping, place each loaf in its banneton, and refrigerate them all overnight. You can stagger the bakes the next morning, pulling one loaf at a time from the fridge and baking them consecutively in your Dutch oven. Since the oven stays hot between bakes and the remaining loaves continue their cold proof in the refrigerator, the quality of each loaf is consistent from first to last.
You can also prepare the garlic herb filling well in advance. The roasted garlic paste with herbs and olive oil keeps in an airtight container in the refrigerator for up to 5 days, so you can roast the garlic on a Sunday and have everything ready to assemble when your dough is proofed. This kind of component-based prep is exactly what makes baking day feel efficient rather than overwhelming. sourdough starter maintenance guide
For true batch meal prep, consider baking two loaves and immediately slicing and freezing one as soon as it has cooled completely. Wrap individual slices in parchment paper, place them in a zip-lock bag or airtight container, and freeze. Having pre-portioned slices in the freezer means you have artisan sourdough available on any morning without any planning or thaw time. Toast directly from frozen and you have a bakery-quality breakfast in under 5 minutes.
Common Mistakes to Avoid
- Using an underactive starter. This is the number one reason sourdough loaves fail to rise properly. Your starter must be fed, active, and at peak – meaning it has doubled in size, looks domed or slightly dome-collapsed on top, and smells pleasantly sour with a bubbly texture. If your starter is sluggish, your loaf will be dense and flat regardless of how perfectly you execute every other step.
- Overfilling the dough with cheese. More cheese sounds better, but too much filling makes it difficult to roll the dough tightly, creates excess moisture during baking that can make the interior gummy, and causes the cheese to leak out aggressively. Stick to the quantity specified and distribute it evenly for the best swirl and structure.
- Skipping the bench rest after pre-shaping. Rushing from pre-shape to final shaping causes the gluten to tear when you try to roll the dough out for the filling. The 20-30 minute bench rest lets the gluten relax fully, making the dough much more cooperative and less likely to spring back and thin out unevenly.
- Not preheating the Dutch oven long enough. A Dutch oven that has not been in the oven for at least 45-60 minutes will not be uniformly hot, and your loaf will not get the initial burst of heat it needs for proper oven spring. Setting a timer when you turn the oven on and committing to the full preheat is non-negotiable for a well-risen crust.
- Scoring too shallow or with a dull blade. A hesitant, shallow score will seal itself during baking and cause the loaf to burst unpredictably at weak points in the crust rather than opening cleanly along your score line. Use a fresh razor blade or sharp lame, make the cut confidently, and angle the blade at 30-45 degrees for a dramatic ear to form.
- Slicing the loaf while it is still hot. Cutting into sourdough before it has cooled for at least 1 hour results in a sticky, gummy crumb that smears rather than slices cleanly. The interior is still setting through carryover heat as the loaf cools, and interrupting that process destroys the crumb structure you worked so hard to build.
Notes, Tips and Variations
Substitutions
If you do not have bread flour, all-purpose flour works in this recipe but will give you a slightly less chewy, less structured crumb. The hydration works the same way, so no adjustments to water quantity are needed. For a whole grain variation, replace up to 20% of the bread flour (about 90g) with whole wheat or spelt flour – go beyond 20% and you may need to reduce water slightly, as whole grain flours absorb more liquid.
The cheese in the filling is flexible. Sharp cheddar gives you that classic sharp, slightly salty bite. Gruyere melts more smoothly and has a nuttier, more complex flavor. Manchego adds a firmer texture and slightly tangy note. For a bolder result, smoked cheddar or aged Gouda works beautifully. The only cheese to avoid is fresh mozzarella, which releases too much moisture during baking and can make the crumb wet.
Dietary Variations
To make a dairy-free version, substitute the cheddar with a firm, aged dairy-free cheese that melts reasonably well – brands that use cashew or sunflower seed bases tend to perform best in baking. The Parmesan can be replaced with 2 tbsp of nutritional yeast stirred into the herb oil, which adds a savory, umami-rich depth that mimics the saltiness of aged cheese without any dairy.
For a higher-fiber loaf, incorporate 50g of ground flaxseed into the dough by reducing the flour by the same amount. Flaxseed adds a mild nutty flavor that complements the garlic and herb filling well. If you prefer a richer dough, replace the olive oil in the dough with the same quantity of room-temperature butter for a slightly more tender crumb similar to a pain de mie.
Baking Tips
Use a kitchen scale rather than volume measurements wherever possible. Bread baking is a precise craft and even small inconsistencies in flour measurement – which is very common with cup measurements – can significantly affect the final texture and structure of the loaf. A reliable digital scale is the single best investment you can make as a home bread baker.
If you do not have a Dutch oven, you can bake this loaf on a preheated pizza stone or baking steel, adding steam by placing a metal pan of boiling water on the bottom rack of the oven for the first 20 minutes of baking. The crust will be slightly less dramatic than a Dutch oven bake, but the crumb and flavor will be equally excellent. best Dutch ovens for home baking
Temperature matters enormously in sourdough baking. If your kitchen is cold (below 70°F / 21°C), your bulk fermentation will take significantly longer. If it is warm (above 80°F / 27°C), it will speed up and you risk over-fermentation. Using an instant-read thermometer to monitor your dough temperature and adjusting water temperature accordingly is a technique that separates consistent bakers from those who get unpredictable results.
Topping Ideas and Flavor Boosters
Once you have mastered the base recipe, these additions and variations will keep your swirled sourdough fresh and exciting across many future bakes.
- Everything Bagel Seasoning – Sprinkle generously over the brushed-oil crust before baking for a sesame, poppy seed, and dried onion crust that pairs perfectly with the garlic filling inside.
- Sun-Dried Tomatoes – Add 60g of finely chopped oil-packed sun-dried tomatoes to the filling alongside the herbs for a tangy, slightly sweet contrast to the savory garlic and cheese.
- Kalamata Olives – Stir 50g of roughly chopped pitted Kalamata olives into the filling for a briny, Mediterranean-inspired dimension.
- Caramelized Onions – Spread 80g of slow-cooked caramelized onions across the dough before adding the cheese layer for a rich, deeply savory sweetness that complements the garlic beautifully.
- Crispy Prosciutto or Bacon Bits – Add a layer of cooked, crumbled prosciutto or bacon along with the cheese for a smoky, salty punch in every slice.
- Pesto Swirl – Replace the garlic herb oil filling with 60g of high-quality basil pesto and use Parmesan as the only cheese for a bright, herby alternative version.
- Jalapeños and Pepper Jack – Swap the cheddar for pepper jack cheese and add 2 tablespoons of finely diced pickled jalapeños for a spicy Southwest-inspired swirl.
- Lemon Zest – Add the finely grated zest of one lemon to the herb oil filling for a bright citrus note that lifts the richness of the cheese and garlic.
- Toasted Pine Nuts or Walnuts – Scatter 30g of lightly toasted pine nuts or chopped walnuts over the filling before rolling for a nutty crunch in every slice.
- Smoked Paprika Dust – Brush the crust with olive oil and dust with smoked sweet paprika before baking for a visually striking, deeply colored crust with a gentle smoky note.
- Truffle Oil Drizzle – Replace the standard olive oil in the filling with a high-quality truffle oil and use Gruyere cheese for an elevated, restaurant-worthy flavor profile.
Who This Recipe Is For
- Sourdough beginners who have successfully made a basic sourdough loaf and are ready to level up with a more visually impressive and flavorful variation.
- Experienced sourdough bakers looking for a reliable, crowd-pleasing swirled loaf recipe that can be customized endlessly across different seasons and occasions.
- Home bakers who meal prep and want a freezer-friendly bread that holds up beautifully and tastes just as good on day five as it did on day one.
- Garlic and cheese lovers who want all of those bold flavors baked directly into a loaf rather than just spread on top after the fact.
- Weekend bakers who enjoy a full-day baking project that fills the kitchen with the most incredible aroma and results in something genuinely worth showing off.
- Hosts and entertainers who want to bring something to a dinner party or gathering that looks and tastes like it came from a high-end artisan bakery.
- Parents and families who want to introduce children to the joy and science of bread baking through a recipe that is visually rewarding at every step of the process.
- Anyone avoiding store-bought bread who wants a homemade alternative that is free from preservatives, artificial additives, and commercial dough conditioners.
Storage and Meal Prep Tips
Refrigerator Storage
Contrary to popular belief, storing sourdough bread in the refrigerator is not ideal for maintaining crust quality. The cold air of a refrigerator will stale and dry out the crumb faster than room-temperature storage, and it softens the crust. If you need short-term storage of 2-3 days, keep the loaf cut-side down on a wooden cutting board, covered loosely with a clean kitchen towel or placed in a bread bag that allows a small amount of air circulation.
The natural acidity of sourdough acts as a preservative, so a well-baked sourdough loaf with good crust integrity will stay fresh at room temperature for 3-4 days without any special storage. The crust will soften slightly after day one but the crumb and flavor remain excellent. If the crust has softened more than you like, a few minutes in a 350°F (175°C) oven will revive it completely.
Freezer Storage
Sourdough freezes exceptionally well, and slicing before freezing is the most practical approach for meal prep purposes. Allow the loaf to cool completely to room temperature – at least 2 full hours after baking. Slice the entire loaf, wrap individual slices or pairs of slices in parchment paper, and pack them into a freezer-safe zip-lock bag with as much air removed as possible. Frozen this way, the slices maintain excellent quality for up to 3 months.
You can also freeze the entire loaf unsliced. Wrap it tightly in plastic wrap, then in a layer of aluminum foil to prevent freezer burn, and freeze for up to 3 months. Thaw at room temperature for 2-4 hours or overnight, then refresh the crust in a 400°F (200°C) oven for 8-10 minutes. The result is remarkably close to fresh-baked quality.
Reheating
For individual frozen slices, the best reheating method is to place them directly in the toaster straight from the freezer. The toaster’s direct heat dries out any surface moisture quickly and gives you a beautifully crisp, warm slice in 2-3 minutes. The garlic herb filling reheats perfectly, and the cheese regains its soft, melted quality even after freezing and toasting.
For reheating larger portions or a half loaf, wrap loosely in foil and place in a preheated 350°F (175°C) oven for 10-15 minutes. Remove the foil for the last 3-4 minutes to re-crisp the crust. Avoid microwaving sourdough if at all possible – it makes the crumb chewy and gummy rather than the tender, airy texture you want. easy sourdough discard recipes
Nutrition Facts
Approximate per serving, based on 12 slices per loaf. Nutritional values will vary based on exact ingredients and slice thickness.
| Nutrient | Amount Per Serving |
|---|---|
| Calories | 215 kcal |
| Total Fat | 7g |
| Saturated Fat | 2.8g |
| Carbohydrates | 30g |
| Dietary Fiber | 1.4g |
| Total Sugar | 0.5g |
| Protein | 8g |
| Sodium | 310mg |
| Calcium | 120mg |
| Iron | 2mg |
FAQs
Can I make this recipe without a Dutch oven?
Yes, you can. If you do not have a Dutch oven, place the shaped loaf on a parchment-lined baking sheet or preheated pizza stone in an oven set to 500°F (260°C). To create steam, place an empty metal baking pan on the bottom rack of the oven as it preheats, and when you slide the loaf in, carefully pour 1 cup of boiling water into the hot pan to generate immediate steam. Close the oven door quickly and bake for 20 minutes with steam, then remove the steam pan and continue baking for 20-25 minutes to develop the crust. The result will be excellent, though the crust may be slightly thinner than a Dutch oven bake.
How do I know when my sourdough starter is ready to use?
Your starter is ready to use when it has at least doubled in volume since its last feeding, has a domed or slightly collapsed top (meaning it has reached and just passed its peak), is visibly bubbly throughout, and has a pleasantly tangy or yeasty smell. The most reliable test is the float test – drop a small spoonful of starter into a glass of water. If it floats, it is aerated enough with gas to leaven your dough. If it sinks, give it more time or feed it again and wait until it peaks before using.
Why did my cheese filling leak out during baking?
Cheese leaking out of the loaf during baking usually happens for one of three reasons. First, the dough was not rolled tightly enough during the shaping step, leaving gaps where the filling can escape. Second, too much cheese was used, making it impossible to seal the layers properly. Third, the seam was not pinched firmly enough before placing the loaf in the banneton. Some minor cheese leakage at the base of the loaf is completely normal and results in a deliciously crispy cheese crust at the bottom – but if large amounts are escaping, focus on tighter rolling and a more secure seam next time. Chilling the filling slightly before spreading it can also help it stay in place during shaping.
Can I use dried herbs instead of fresh ones in the filling?
Yes, dried herbs work in this filling, but you will need to use roughly half the quantity specified for fresh herbs since dried herbs have a more concentrated flavor. So 2 tablespoons of fresh rosemary becomes 1 tablespoon of dried, and so on. The visual impact of the swirl will be slightly less vibrant with dried herbs, since the green color that fresh herbs contribute during baking will be less dramatic, but the flavor will still be excellent. If you have access to fresh herbs, they are strongly preferred for both flavor and aesthetic reasons.
Can I make this dough without a sourdough starter using commercial yeast?
Technically yes, but the result will be a very different bread. Using commercial instant yeast, you would use approximately 7g (one standard packet) and reduce the fermentation time to a single 1-2 hour bulk rise with no stretch and fold sets. Skip the overnight cold proof or reduce it to 1-2 hours. The swirled garlic herb and cheese filling will work just as well with a yeasted dough, and the loaf will be delicious. However, you will miss the complex tang, the chewy open crumb, the natural preservative qualities, and the digestive benefits that come specifically from long sourdough fermentation. If building your own starter is your goal, it only takes about 7-10 days of daily feedings to create an active, reliable starter from scratch.
Conclusion
This swirled garlic herb and cheese sourdough bread is one of those recipes that genuinely delivers on every promise. It is visually impressive, deeply flavorful, and built on the kind of slow, intentional process that makes homemade bread so satisfying to create. Whether you are baking your first filled sourdough or adding this to a well-worn rotation of artisan loaves, the techniques you practice here will make you a more confident, more capable baker every time you return to it.
Do not be discouraged if your first loaf is not perfect. Sourdough has a learning curve, and every bake teaches you something new about your starter, your kitchen environment, and your dough. The flavor of an imperfect homemade sourdough will still far outshine anything you can buy at a grocery store, and each loaf you bake brings you closer to the kind of intuitive understanding that makes bread-making feel effortless.
When you bake your loaf, share it. Put it on the table at dinner, bring it to a friend, or slice it into thick pieces and toast it slowly on a Sunday morning with a generous spread of salted butter. That is what this bread is for – made with patience, shared with generosity, and enjoyed fully. Happy baking.