THE BEST N°1 Butterfinger Pie with Peanut Butter | Easy No-Bake Dessert Recipe
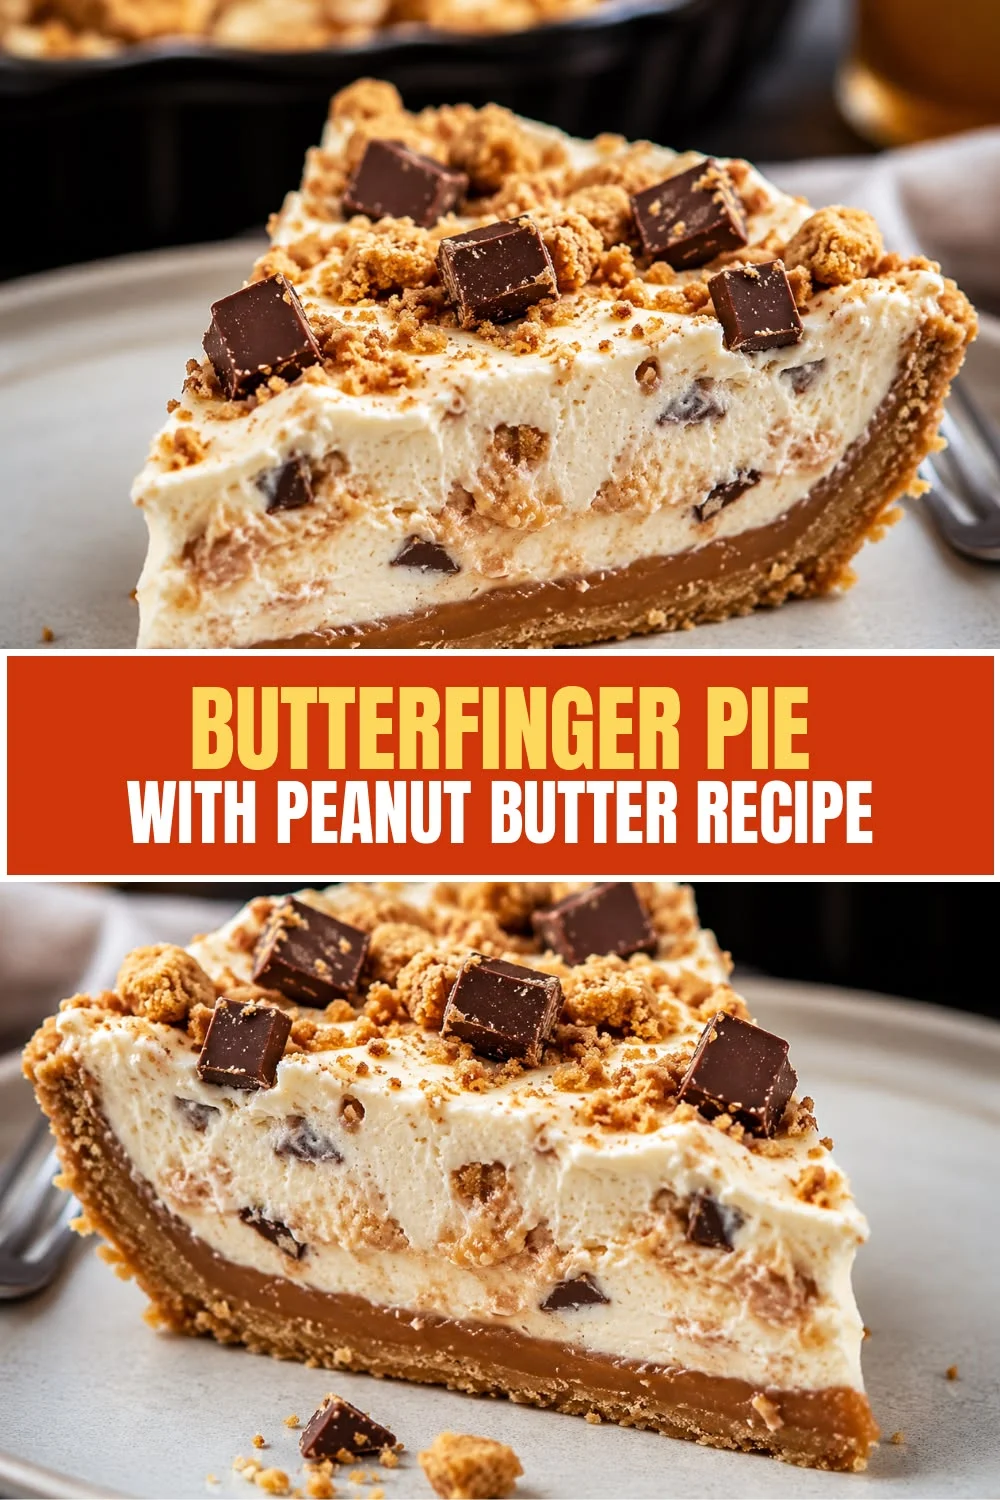
If you are looking for a show-stopping dessert that requires zero oven time and maximum flavor, this Butterfinger Pie with Peanut Butter is exactly what you need. It is creamy, crunchy, sweet, and utterly irresistible from the very first bite.
This post covers everything you need to know, from the full ingredient list and step-by-step instructions to batch prep tips, storage guides, and flavor variations. Whether you are making this for a party, a holiday table, or a quiet weekend treat, you will have all the tools to nail it.
Get ready to impress everyone at the table with minimal effort. This pie comes together in under 20 minutes of active prep time, and the freezer does the rest of the work for you.
Table of Contents
- Personal Note
- Origins of the Dish
- Why You’ll Love This Recipe
- Health Benefits and Ingredient Highlights
- Ingredients
- Step-by-Step Instructions
- Make It Ahead and Batch Prep Guide
- Common Mistakes to Avoid
- Notes, Tips and Variations
- Topping Ideas and Flavor Boosters
- Who This Recipe Is For
- Storage and Meal Prep Tips
- Nutrition Facts
- FAQs
- Conclusion
Personal Note
I first made this pie on a hot summer afternoon when turning on the oven felt absolutely out of the question. I had a bag of Butterfinger candy bars in the pantry, a tub of cream cheese in the fridge, and a serious craving for something indulgent. What happened next became one of my most requested recipes ever.
The combination of peanut butter and Butterfinger is one of those flavor pairings that just makes sense. It is bold, sweet, a little salty, and completely addictive. Every single time I bring this to a gathering, someone asks for the recipe before they even finish their slice.
What I love most about this recipe is how forgiving it is. You do not need to be a professional baker or have any fancy equipment. A hand mixer, a mixing bowl, and a freezer are all you really need to create something truly spectacular.
Origins of the Dish
The Butterfinger candy bar has been an American classic since 1923, originally created by the Curtiss Candy Company in Chicago. Its signature crispy, flaky peanut butter center coated in chocolate made it an instant favorite across the country. Over the decades, it became one of the top-selling candy bars in the United States, celebrated for its distinctive texture and rich peanut butter flavor.
The idea of incorporating candy bars into pies and desserts gained serious momentum during the 1980s and 1990s, when no-bake icebox pies became a staple of American home cooking. Homemakers across the country discovered that crushing candy bars into a creamy filling created a dessert that was far more impressive than the sum of its parts. Butterfinger was a natural fit for this trend, given how beautifully its crunchy texture contrasts with a smooth, creamy base.
Peanut butter pie itself has deep roots in Southern American cuisine, where simple, pantry-friendly desserts have always been celebrated. The icebox pie tradition, which relies on refrigeration rather than baking to set the filling, dates back to the early 20th century. When peanut butter became widely available and affordable, creative home cooks began incorporating it into these chilled pies to add richness and depth.
Today, the Butterfinger Pie with Peanut Butter represents the very best of American dessert culture: accessible, nostalgic, and completely over-the-top delicious. It has evolved through countless home kitchens and potluck tables, with each cook putting their own spin on the classic formula. This version stays true to the original spirit while adding a few tips and tricks to make it even more foolproof and flavorful.
Why You’ll Love This Recipe
There are so many reasons to fall head over heels for this pie. Here is a quick rundown of what makes it so special.
- No baking required – this is a true no-bake dessert that anyone can make regardless of skill level.
- Ready in under 20 minutes of prep – the freezer does most of the work, so you can prep it hours ahead.
- Crowd-pleasing flavor – the combination of peanut butter, chocolate, and Butterfinger wins every time.
- Incredibly creamy texture – the cream cheese and whipped topping create a mousse-like filling that melts in your mouth.
- Perfect for make-ahead prep – this pie actually gets better after sitting in the freezer overnight.
- Minimal ingredients – you only need a handful of simple, easy-to-find ingredients from any grocery store.
- Customizable – you can swap the candy bar, crust, or topping to suit your taste or what you have on hand.
- Great for all occasions – works for birthdays, potlucks, holidays, or a casual weeknight treat.
- Kid-friendly and adult-approved – this dessert bridges the gap between all ages and taste preferences.
- Visually impressive – the golden Butterfinger crumble on top looks stunning without requiring any decorating skills.
Health Benefits and Ingredient Highlights
While this is absolutely an indulgent dessert, several of its key ingredients bring genuine nutritional value to the table. Here is a closer look at what is inside every slice.
Peanut Butter
Peanut butter is one of the most nutrient-dense ingredients in this recipe. It is packed with plant-based protein, healthy monounsaturated fats, vitamin E, magnesium, and potassium. These nutrients support muscle function, heart health, and sustained energy levels throughout the day.
The healthy fats in peanut butter also help you feel satisfied and full, which means you are less likely to go back for a second slice, even though you will absolutely want to. Choosing a natural peanut butter with no added sugar or hydrogenated oils gives you the cleanest nutritional profile possible.
Peanut butter also delivers a good dose of niacin and folate, both of which are important for cellular energy production and overall metabolic health. It is a powerhouse ingredient hiding inside a very indulgent dessert.
Cream Cheese
Cream cheese is what gives this pie its signature rich, tangy, and velvety texture. It is a good source of fat-soluble vitamins like vitamin A, which supports immune function and skin health. The fat content in cream cheese also helps carry flavor, making every bite taste more luxurious.
Full-fat cream cheese creates the most stable, sliceable filling, which is especially important for a no-bake pie. It blends seamlessly with the peanut butter to create a silky base that holds its shape even after the pie has been sitting at room temperature for a little while.
Whipped Topping (Cool Whip)
Whipped topping is what transforms this pie from a dense peanut butter spread into a light, airy mousse. It adds volume to the filling without adding heaviness, creating a texture that feels almost cloud-like. If you prefer a more natural option, freshly whipped heavy cream works beautifully as a substitute.
The lightness of whipped topping also helps balance the richness of the cream cheese and peanut butter, so the overall pie never feels too heavy or overwhelming. It is the ingredient that brings everything into perfect harmony.
Butterfinger Candy Bars
Butterfinger bars are the star of this show, and they bring more than just sweetness. The candy bars contain peanut butter in their core, which amplifies the nutty flavor throughout the entire pie. Their unique crispy, flaky texture creates satisfying crunch in every single bite.
The chocolate coating on Butterfinger adds a layer of cocoa richness that balances the sweetness of the filling. When crushed and folded into the creamy base, the pieces soften slightly while still maintaining enough texture to be noticeable and delightful.
Graham Cracker Crust
A classic graham cracker crust brings a slightly sweet, honey-flavored crunch that pairs perfectly with the creamy filling above it. Graham crackers contain a small amount of whole grain, offering a bit of dietary fiber compared to a standard pastry crust. The butter used to bind the crust adds richness and helps it hold its shape when sliced.
Making your own crust from scratch gives you full control over the sweetness and texture, but a store-bought pre-made crust works just as well and saves you time. Either way, the crust is the sturdy, delicious foundation that holds this entire masterpiece together.
Powdered Sugar
Powdered sugar dissolves instantly into the cream cheese and peanut butter mixture, creating a completely smooth filling without any gritty texture. It sweetens the filling gently without overpowering the other flavors. Using powdered sugar rather than granulated sugar is a small but important detail that makes a big difference in the final texture.
Ingredients
Here is everything you need to make this Butterfinger Pie with Peanut Butter from scratch. All quantities are based on one standard 9-inch pie.
For the Crust:
- 1 and 1/2 cups graham cracker crumbs (about 12 full graham crackers, or use a store-bought pre-made crust)
- 1/3 cup granulated sugar
- 6 tablespoons unsalted butter, melted (substitute: coconut oil for a dairy-free crust)
For the Peanut Butter Filling:
- 8 oz full-fat cream cheese, softened to room temperature (substitute: dairy-free cream cheese for a lactose-free version)
- 1 cup creamy peanut butter (substitute: almond butter or sunflower seed butter for nut-free or alternative nut options)
- 1 and 1/2 cups powdered sugar, sifted
- 1 teaspoon pure vanilla extract
- 8 oz whipped topping like Cool Whip, thawed (substitute: 2 cups heavy whipping cream, whipped to stiff peaks)
For the Butterfinger Layer and Topping:
- 6 full-size Butterfinger candy bars (about 10.2 oz total), roughly crushed – divided
- 1/2 cup milk chocolate chips or melted chocolate for drizzling (optional but highly recommended)
- Extra whipped topping for garnish (optional)
Step-by-Step Instructions
Follow these simple steps and you will have a stunning Butterfinger Pie with Peanut Butter ready to impress. Each step is designed to be beginner-friendly and clear.
- Make the graham cracker crust. Combine graham cracker crumbs, granulated sugar, and melted butter in a medium bowl. Stir until the mixture resembles wet sand and holds together when pressed.
- Press the crust into the pan. Transfer the crumb mixture into a 9-inch pie pan. Use the bottom of a measuring cup or your fingertips to press it firmly and evenly across the bottom and up the sides.
- Chill the crust. Place the crust in the freezer for 15 minutes to firm up while you prepare the filling. This step prevents the crust from crumbling when you add the filling.
- Crush the Butterfinger bars. Place the candy bars in a zip-top bag and use a rolling pin to crush them into small pieces and crumbs. Set aside, reserving about one-third of the crushed candy for the topping.
- Beat the cream cheese. In a large mixing bowl, use a hand mixer on medium speed to beat the softened cream cheese for about 2 minutes until completely smooth and lump-free. Scrape down the sides of the bowl as needed.
- Add the peanut butter and sugar. Add the creamy peanut butter, sifted powdered sugar, and vanilla extract to the cream cheese. Beat on medium speed for another 2 to 3 minutes until the mixture is thick, smooth, and uniform.
- Fold in the whipped topping. Add the thawed whipped topping to the peanut butter mixture. Use a rubber spatula to gently fold it in with slow, sweeping motions. Stop folding as soon as no white streaks remain to keep the filling light and airy.
- Fold in the Butterfinger pieces. Add two-thirds of the crushed Butterfinger candy to the filling and fold gently to distribute. You want pieces throughout every bite without overworking the mixture.
- Fill the crust. Remove the chilled crust from the freezer. Spoon the peanut butter filling into the crust and spread it into an even layer using the back of a spoon or an offset spatula.
- Add the Butterfinger topping. Sprinkle the remaining crushed Butterfinger generously over the top of the pie. Press the pieces down very lightly so they adhere to the surface of the filling.
- Drizzle with chocolate (optional). Melt the chocolate chips in 30-second intervals in the microwave, stirring between each interval, until smooth. Use a spoon or piping bag to drizzle the melted chocolate over the top of the pie.
- Freeze the pie. Cover the pie loosely with plastic wrap or aluminum foil and freeze for at least 4 hours. For best results, freeze overnight to allow the filling to fully set and the flavors to meld together.
- Slice and serve. Remove the pie from the freezer and let it sit at room temperature for 5 to 10 minutes before slicing. Use a sharp knife dipped in warm water for clean, beautiful cuts. Serve immediately and enjoy.
Make It Ahead and Batch Prep Guide
This Butterfinger Pie with Peanut Butter is one of the best make-ahead desserts in your repertoire. The filling actually improves after sitting in the freezer overnight, as the Butterfinger pieces soften slightly into the creamy base and the flavors have time to fully develop and meld together.
You can easily make two or three of these pies at the same time without doubling your effort significantly. Prepare a large batch of the filling in one big bowl, divide it among multiple pre-made crusts, and freeze them all at once. This is a fantastic strategy for holiday baking season or when you are expecting a large crowd over multiple days.
For batch prep, consider buying Butterfinger bars in bulk and crushing them all at once. Store the excess crushed candy in an airtight container at room temperature for up to one week. This way, you have the key ingredient ready to go whenever inspiration strikes or a dessert emergency arises.
If you want to prep individual servings for portion control or easy serving, consider making this recipe in mini tart pans or a standard muffin tin lined with paper cupcake liners. Mini pies freeze and thaw just as well as a full-sized pie, and they are incredibly convenient for serving at parties or packaging as a take-home dessert gift. No-Bake Peanut Butter Cheesecake Cups
Common Mistakes to Avoid
Even the simplest recipes have their pitfalls. Here are the most common mistakes people make with this pie and exactly how to avoid them.
- Using cold cream cheese. Cold cream cheese will not blend smoothly and will leave lumps in your filling. Always bring it to room temperature for at least 30 minutes before mixing.
- Skipping the crust chilling step. If you skip the 15-minute freeze for the crust, it may crumble or shift when you add the filling. Those extra 15 minutes are absolutely worth it.
- Stirring instead of folding the whipped topping. Stirring will deflate the air bubbles that make the filling light. Always use a gentle folding motion with a rubber spatula to maintain that airy, mousse-like texture.
- Not sifting the powdered sugar. Unsifted powdered sugar can create small lumps in the filling. Take the extra 60 seconds to sift it and your filling will be perfectly smooth every time.
- Cutting the pie straight from the freezer. A fully frozen pie is difficult to cut cleanly and the texture will be too hard. Always let it rest at room temperature for at least 5 to 10 minutes before slicing.
- Adding the Butterfinger topping too early. If you add the crushed candy topping before freezing and then store the pie for more than one day, the topping will absorb moisture and lose its crunch. Add it fresh just before serving for the best texture.
Notes, Tips and Variations
Substitutions
If you cannot find Butterfinger bars, you can substitute with any peanut butter-flavored candy such as Reese’s Pieces, Nutter Butter cookies, or even peanut butter chocolate chips combined with crushed pretzels for a similar sweet-salty-crunchy effect. The spirit of the recipe stays the same even with a different candy.
For the crust, Oreo cookies, chocolate graham crackers, or even crushed Nutter Butters make excellent alternatives to classic graham crackers. Each option adds a slightly different flavor dimension that pairs beautifully with the peanut butter filling.
If you want to reduce the sweetness slightly, use natural peanut butter with no added sugar and reduce the powdered sugar to one cup. The pie will still be sweet and satisfying but with a more pronounced peanut flavor.
Dietary Variations
To make a dairy-free version, use dairy-free cream cheese, a plant-based whipped topping like So Delicious CocoWhip, and coconut oil in place of butter for the crust. Check the Butterfinger packaging as the formulation may vary, and look for a dairy-free chocolate bar for the drizzle.
For a gluten-free version, use certified gluten-free graham crackers for the crust. All other ingredients in this recipe are naturally gluten-free, making it an easy adaptation for guests with gluten sensitivities.
Cooking Tips
Use creamy peanut butter rather than chunky for the smoothest filling. Natural peanut butter works well but can sometimes cause the filling to be slightly less stable due to the oil separation. If using natural peanut butter, stir it very thoroughly before measuring.
For an even creamier filling, whip the cream cheese alone for a full 3 minutes before adding any other ingredients. This extra step aerates the cream cheese and creates a noticeably fluffier final texture. Creamy Peanut Butter Cheesecake Recipe
When drizzling chocolate, let the pie chill in the freezer for about 30 minutes first after adding the filling. This firms the surface so the chocolate drizzle sets quickly and creates a prettier pattern rather than sinking into the filling.
Topping Ideas and Flavor Boosters
Take your Butterfinger Pie with Peanut Butter to the next level with these creative topping ideas. Mix and match to create your own signature version.
- Whipped cream rosettes – pipe them around the edge of the pie for a classic, beautiful presentation.
- Mini Reese’s Peanut Butter Cups – halved and arranged on top for an extra peanut butter punch.
- Hot fudge drizzle – warm, thick hot fudge sauce takes this pie to pure indulgence territory.
- Caramel sauce drizzle – adds a buttery, golden sweetness that complements the peanut butter perfectly.
- Crushed pretzels – for an extra salty-sweet crunch that contrasts the creamy filling beautifully.
- Toasted peanuts – lightly salted and chopped, they add texture and deepen the nutty flavor.
- Sea salt flakes – a pinch of flaky sea salt right before serving enhances all the sweet flavors dramatically.
- Rainbow sprinkles – colorful and festive, perfect for birthday celebrations or parties with kids.
- Crushed Oreos – adds a chocolate cookie crunch that pairs incredibly well with peanut butter.
- Freeze-dried strawberries – crumbled over the top for a bright, fruity contrast to the rich filling.
- White chocolate drizzle – beautiful visually and adds a creamy, vanilla-sweet flavor note.
- Banana slices – thin slices arranged on top right before serving for a classic peanut butter-banana pairing.
Who This Recipe Is For
This pie is genuinely made for everyone, but here are the people who will love it most.
- Busy home cooks who want an impressive dessert without spending hours in the kitchen.
- Peanut butter lovers who cannot get enough of that rich, nutty flavor in every form possible.
- No-bake dessert enthusiasts who prefer to keep the oven off, especially during hot summer months.
- Party and potluck hosts who need a make-ahead dessert that travels well and serves a crowd.
- Holiday bakers looking for a quick, festive addition to their dessert table without the stress of baking.
- Parents and family cooks who want a kid-friendly treat that adults will love just as much.
- Beginner bakers who are just starting out and want a foolproof, high-reward first recipe to attempt.
- Candy bar fans who are always looking for creative ways to incorporate their favorite treats into recipes.
- Meal preppers who want to make a week’s worth of easy dessert portions for the freezer in one session.
Storage and Meal Prep Tips
Refrigerator
You can store this pie in the refrigerator instead of the freezer if you plan to serve it within two to three days of making it. Cover the pie tightly with plastic wrap or store it in a pie container with a lid to prevent it from absorbing any odors from the fridge.
When stored in the refrigerator, the filling will be softer and more mousse-like compared to the firmer, sliceable texture you get from freezer storage. Both textures are delicious, so choose based on your preference and timing. Keep in mind that the Butterfinger topping will soften more quickly in the refrigerator than in the freezer.
Freezer
For best results, store this pie in the freezer. Once the pie has fully set, wrap it tightly in a layer of plastic wrap followed by a layer of aluminum foil to prevent freezer burn. Stored this way, the pie will keep for up to two months in the freezer without losing quality.
If you are making individual portions in a muffin tin, pop the frozen mini pies out of the tin once solid, then transfer them to a zip-top freezer bag for easy long-term storage. Label the bag with the date so you always know how long they have been stored. Freezer-Friendly No-Bake Dessert Recipes
Reheating / Thawing
This pie does not require any reheating since it is a chilled dessert. To serve after freezing, simply remove the pie from the freezer and let it sit on the counter at room temperature for 5 to 10 minutes. This short rest time softens the filling just enough to slice cleanly without it falling apart.
If you want an even softer texture, let the pie thaw in the refrigerator for about one hour before serving. This produces a creamy, scoopable consistency that is wonderful when served with a drizzle of warm caramel or hot fudge sauce over the top.
Nutrition Facts
The following nutrition information is an estimate per serving, based on the pie being divided into 8 equal slices. Actual values may vary depending on specific brands and ingredient choices used.
| Nutrient | Per Serving (1 slice / 1/8 of pie) |
|---|---|
| Calories | 520 kcal |
| Total Fat | 32g |
| Saturated Fat | 13g |
| Total Carbohydrates | 52g |
| Dietary Fiber | 2g |
| Total Sugar | 38g |
| Protein | 10g |
| Sodium | 310mg |
FAQs
Can I use crunchy peanut butter instead of creamy?
You can, but the texture of the filling will be slightly different. Creamy peanut butter creates a perfectly smooth, uniform filling that slices cleanly. Crunchy peanut butter adds extra texture, which can be delicious, but the filling may be slightly less stable when sliced. If you love texture, go for crunchy, but expect a more rustic-looking slice.
Can I make this pie without a mixer?
A hand mixer or stand mixer is strongly recommended for getting the cream cheese perfectly smooth. If you absolutely do not have one available, make sure your cream cheese is at full room temperature and very soft, then beat it vigorously with a sturdy whisk or wooden spoon. The result may have a slightly less uniform texture, but it will still taste wonderful.
How far in advance can I make this pie?
This pie can be made up to two months in advance if stored in the freezer. For the freshest experience, aim to make it one to three days before you plan to serve it. The flavors develop beautifully overnight, making it a perfect make-ahead dessert for entertaining. Just hold off on adding the Butterfinger topping until right before serving for maximum crunch.
What if I cannot find Butterfinger bars?
If Butterfinger bars are not available in your area, the closest substitute is any crispy, peanut butter-filled chocolate candy. Alternatives include Reese’s Crunchy Peanut Butter Cups, Nutter Butter cookies with chocolate chips mixed in, or even crumbled peanut butter granola bars drizzled with melted chocolate. The candy bars are iconic but the recipe adapts well to creative substitutions.
Can I make this in a springform pan instead of a pie pan?
Absolutely, and a springform pan actually works beautifully for this recipe. It allows you to remove the sides completely before serving, which creates a dramatic, elegant presentation. Use a 9-inch springform pan and line the bottom with parchment paper for the easiest removal. The slicing and serving process becomes even simpler with a springform pan.
Conclusion
This Butterfinger Pie with Peanut Butter is the kind of dessert that becomes a legend in your household. It is easy enough for a Tuesday night yet impressive enough for the grandest holiday spread. The combination of a buttery graham cracker crust, silky peanut butter mousse filling, and those irresistible crunchy Butterfinger pieces is simply impossible to resist.
The best part is how adaptable this recipe is. Once you master the base, you can customize the toppings, switch up the crust, or experiment with different candy bars to keep things fresh every time you make it. The possibilities are genuinely endless, and every variation you try will be its own kind of wonderful.
Go ahead and make this pie this weekend. Share it with people you love, photograph that gorgeous cross-section, and come back to leave a comment letting me know how it turned out. You deserve a dessert this good, and trust me, so does everyone lucky enough to share a slice with you.