
THE BEST N°1 Sourdough Chocolate Chip Croissant Bread: Flaky, Buttery & Bakery-Worthy
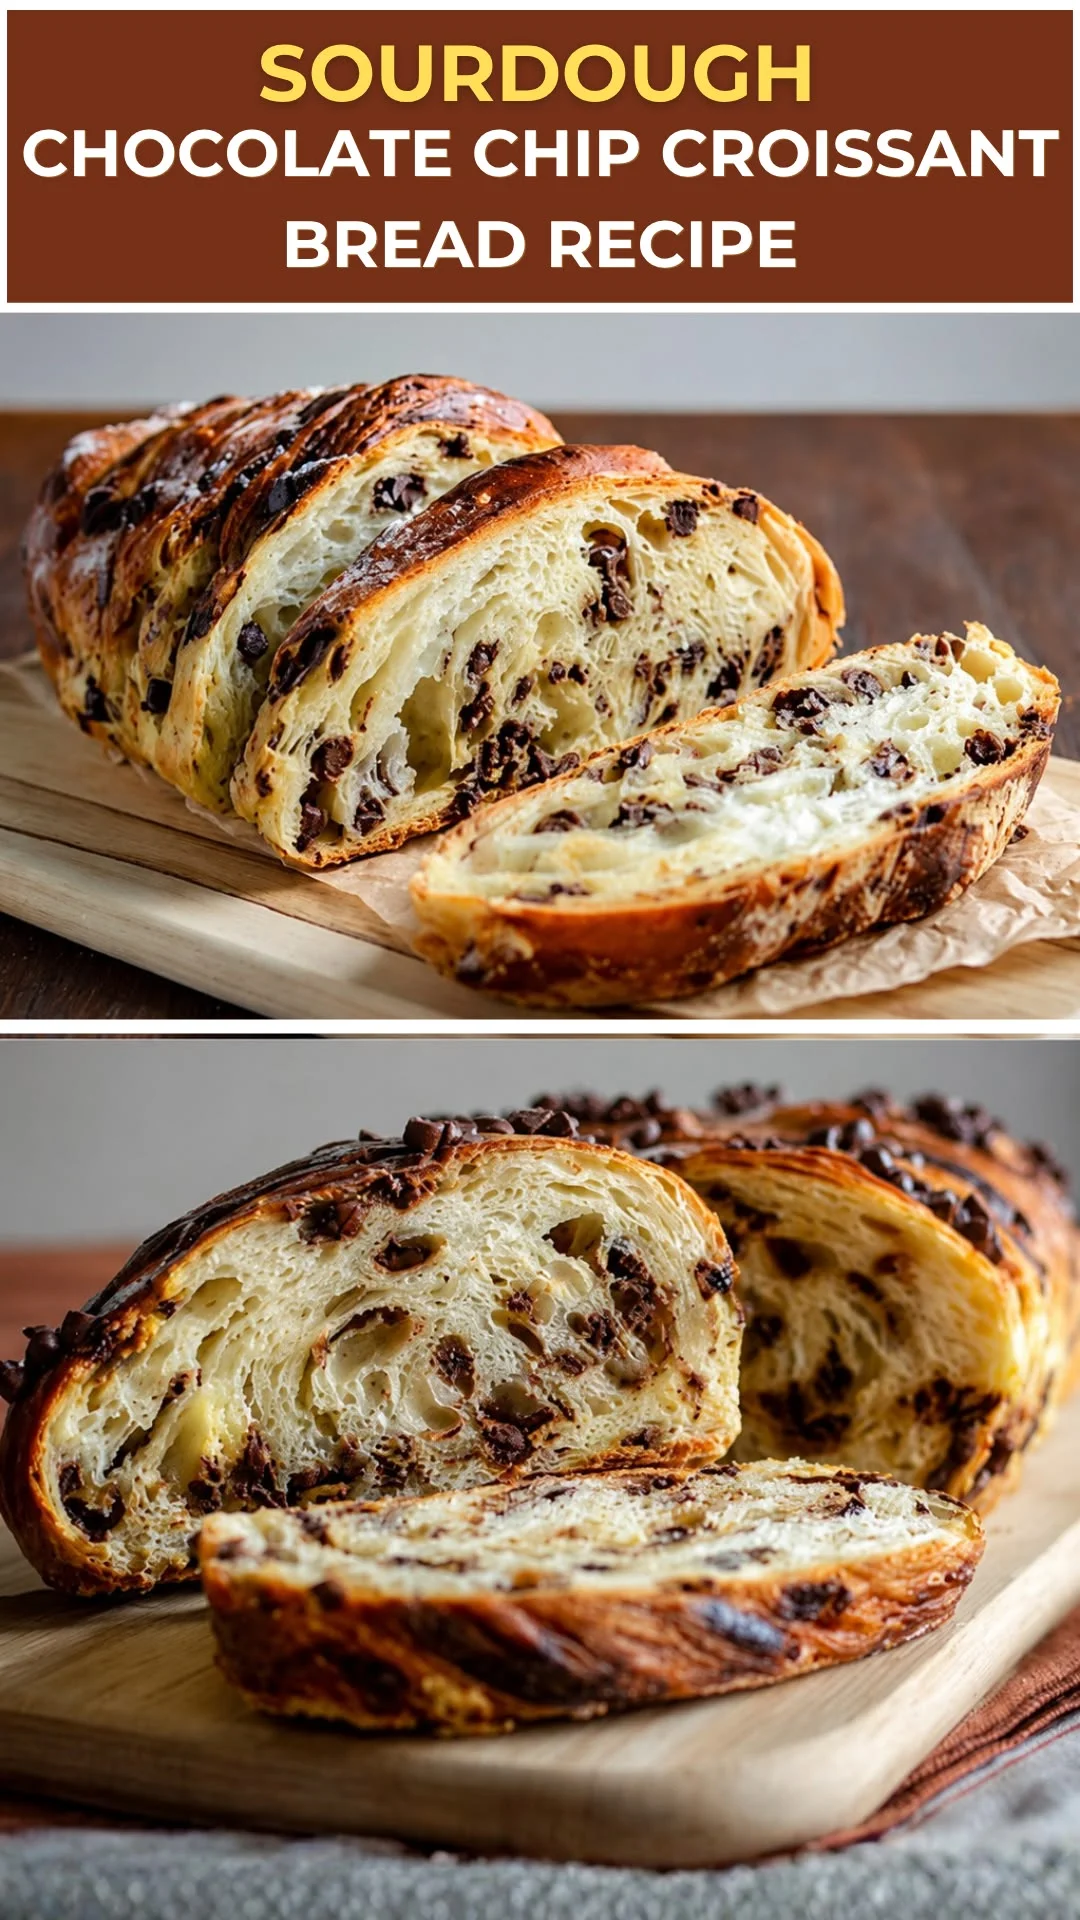
If you have ever dreamed of biting into something that tastes like a croissant, a sourdough loaf, and a chocolate chip cookie all at once, your dream has officially come true. This sourdough chocolate chip croissant bread is exactly what it sounds like – flaky, buttery, tangy, and loaded with melty chocolate in every single slice. It is the kind of bake that makes your kitchen smell like a Parisian bakery and makes everyone at the table ask for the recipe before they even finish their first piece.
This post covers everything you need to know to pull off this showstopper bake at home. You will find a full ingredient breakdown, step-by-step instructions written for real home bakers, batch prep guidance, storage tips, and answers to the most common questions bakers have when trying this recipe for the first time.
Whether you are an experienced sourdough baker or someone who just got their starter bubbling for the first time, this guide walks you through every detail so you can nail this recipe on your very first try. Get ready to impress yourself and everyone around you.
Table of Contents
Personal Note
I still remember the first time I tried laminating dough at home. It was a disaster – butter breaking through, layers tearing, and a finished loaf that looked nothing like what I had imagined. I almost swore off laminated doughs entirely.
But then I discovered what happens when you combine the gentle tang of a sourdough starter with a simplified croissant-style lamination and a generous handful of chocolate chips. The result was so good that I genuinely stood at my kitchen counter eating slice after slice before it had even fully cooled. It was the kind of baking win that makes all the failed attempts completely worth it.
This recipe is my love letter to ambitious home baking. It takes a little patience and planning, but every step is manageable and the payoff is absolutely extraordinary. I want you to feel that same moment of pride when you pull this loaf out of the oven and see those golden, flaky layers for yourself.
Origins of the Dish
To understand this recipe, you need to appreciate two separate and equally rich baking traditions: the ancient craft of sourdough bread and the more recent but wildly celebrated French croissant. Both have long histories that connect deeply to the culture of artisan baking, and this recipe is a joyful marriage of the two.
Sourdough bread is one of the oldest forms of leavened bread in the world, with evidence of its existence dating back over 5,000 years to ancient Egypt. The process relies on wild yeast and lactic acid bacteria that naturally ferment flour and water over time. This fermentation is what gives sourdough its signature tang, its open crumb structure, and its incredible depth of flavor that commercial bread simply cannot replicate. Sourdough baking experienced a massive global revival in recent decades, with home bakers embracing the meditative, almost ritualistic process of maintaining a starter and building long, slow ferments into their weekly routines.
The croissant, on the other hand, has a fascinating origin story that most people do not expect. While it is deeply associated with French baking culture, the croissant actually traces its roots back to Austria and a pastry called the kipferl. When Austrian artillery officer August Zang opened a Viennese bakery in Paris around 1838, the French bakers fell in love with his flaky, layered pastries and began adapting the technique using a laminated, butter-enriched dough. The result was the croissant as we know it today – a masterpiece of folded butter layers that create dozens of distinct, airy, golden flakes when baked. French pastry culture then elevated it into a daily ritual, enjoyed fresh every morning at local boulangeries across the country.
The idea of combining sourdough with croissant-style lamination is a relatively modern innovation born out of the artisan baking renaissance that swept through home kitchens and small bakeries in the 2010s and early 2020s. Bakers began asking what would happen if they replaced commercial yeast with a natural sourdough starter in laminated dough recipes. The answer turned out to be spectacular. The slow fermentation adds complexity to the flavor, and the lactic acid in the starter interacts beautifully with the butter during lamination, creating layers that are even more flavorful than traditional croissant dough. Adding chocolate chips to the mix is a natural and delicious evolution, bringing sweetness and richness to balance the subtle tang of the sourdough.
Today, sourdough chocolate chip croissant bread has become a genuine sensation in the home baking community, with bakers sharing their gorgeous cross-section photos online and inspiring thousands of others to try their hand at this ambitious and deeply rewarding bake. It represents everything that modern artisan home baking stands for – creativity, patience, quality ingredients, and the pure joy of making something extraordinary from scratch.
Why You’ll Love This Recipe
This is not just another bread recipe. This is a baking experience that delivers results so impressive you will want to make it every single weekend. Here is exactly why this recipe deserves a permanent spot in your baking rotation.
- Incredible layered texture – The lamination process creates dozens of flaky, buttery layers that shatter beautifully when you pull the bread apart, just like a real croissant.
- Deep, complex flavor – The sourdough starter adds a gentle tang that balances the richness of the butter and the sweetness of the chocolate chips in a way that commercial yeast simply cannot achieve.
- Bakery-quality results at home – You do not need a professional kitchen or special equipment to pull this off. A rolling pin, your refrigerator, and a loaf pan are the main tools you need.
- Flexible timeline – The dough cold-proofs overnight in your refrigerator, which means most of the hands-off work happens while you sleep. You can bake fresh in the morning without spending all day in the kitchen.
- Meal prep friendly – This bread freezes exceptionally well, so you can bake a batch on the weekend and have incredible toast, snacks, or breakfast slices ready all week long.
- Naturally leavened – No commercial yeast required. Just your active sourdough starter doing all the heavy lifting for rise, flavor, and structure.
- Crowd-pleasing and versatile – This bread works as a breakfast slice with butter, a dessert on its own, a snack with coffee, or even a base for a very indulgent French toast.
- Beginner-friendly lamination – Unlike traditional croissant dough, this bread-style format is more forgiving. If your layers are not perfectly even, the finished loaf still tastes absolutely amazing.
- Customizable to your taste – Swap the chocolate chips for dried fruit, add a layer of almond cream, or fold in a cinnamon sugar mixture for completely different but equally delicious results.
- An impressive gift – Wrap a cooled loaf in parchment and twine and you have one of the most thoughtful and impressive food gifts you can possibly bring to someone’s home.
Health Benefits and Ingredient Highlights
Every ingredient in this recipe was chosen with both flavor and function in mind. Understanding what each component brings to the table helps you make smart choices, appreciate the science behind the bake, and customize the recipe with confidence.
Sourdough Starter
Your sourdough starter is the heart of this recipe and far more than just a leavening agent. It is a living culture of wild yeast and beneficial bacteria that has been fermenting flour and water over time, developing a complex ecosystem that commercial yeast cannot replicate. The wild yeast provides the rise, while the lactic and acetic acid bacteria produce the flavor compounds that give sourdough its signature tang.
From a nutritional standpoint, the long fermentation process that sourdough baking involves has been shown to partially break down phytic acid, an antinutrient found in wheat that can inhibit the absorption of minerals like zinc, iron, and magnesium. This means that sourdough-leavened baked goods may be more digestible and nutritionally accessible than their commercially yeasted counterparts. The fermentation also lowers the glycemic response of the bread compared to standard white bread, which is a meaningful advantage for many people.
For the best results in this recipe, your starter should be active and bubbly – ideally used within 4 to 6 hours after its peak rise. A healthy, well-fed starter will give you the strongest flavor and the most reliable leavening power throughout the lamination and baking process.
Bread Flour
Bread flour is specifically chosen for this recipe because of its higher protein content, typically around 12 to 14 percent, compared to all-purpose flour which sits closer to 10 to 11 percent. That extra protein forms more gluten when combined with water, giving your dough the strength and elasticity it needs to hold up through the lamination process without tearing. Strong gluten development is essential when you are rolling, folding, and resting dough multiple times.
The structure that bread flour provides also means your finished loaf holds its layers more definitively during baking. Those beautiful, distinct flaky layers that make this bread so visually stunning rely on a strong gluten network to separate and puff up in the oven rather than collapsing into each other. Bread flour gives you that structure without making the crumb tough or chewy.
European-Style Butter
The butter you choose for lamination makes an enormous difference in the final result. European-style butter, which contains at least 82 to 84 percent butterfat compared to the standard American butter at around 80 percent, is the gold standard for laminated doughs. That extra fat content gives European butter a more pliable texture when cold, which means it bends and layers with your dough rather than shattering or breaking through it. It also has a deeper, more pronounced flavor that comes through in every single bite.
Butter is also an excellent source of fat-soluble vitamins, particularly vitamin A and vitamin K2. The fat in butter serves an important function in baking beyond just flavor – it creates the steam that separates and puffs the layers during baking, turning your laminated dough into that gloriously flaky, honeycomb-like crumb structure you are aiming for. Do not skimp on butter quality here. It is the single ingredient that will make the biggest difference between a good loaf and an extraordinary one.
Dark Chocolate Chips
Dark chocolate chips – ideally 60 to 72 percent cacao – bring more than just sweetness to this bread. At that cacao percentage, chocolate chips contain flavonoids, which are plant-based antioxidants that have been studied for their role in supporting cardiovascular health and reducing oxidative stress. The more cacao in your chocolate, the higher the concentration of these beneficial compounds.
From a flavor perspective, dark chocolate provides a slight bitterness that beautifully counterbalances the buttery richness and the mild tang of the sourdough. When chocolate chips melt and then solidify during baking and cooling, they create pockets of concentrated chocolate flavor throughout the loaf that hit differently in every bite. Using high-quality chocolate chips rather than generic baking morsels will reward you with better melt, better flavor, and a more luxurious finished product.
Whole Milk
Whole milk contributes to the richness and tenderness of the final crumb. The fat in whole milk coats gluten strands during mixing, which softens the dough slightly and prevents the crumb from becoming too tough or chewy. It also adds a natural sweetness and a mild creaminess that complements the chocolate beautifully.
Milk proteins, particularly casein and whey, also contribute to the browning of the crust during baking through the Maillard reaction. This is part of why milk-enriched breads tend to develop a deeper, more golden, and more flavorful crust than water-based doughs. If you want that rich, burnished exterior that looks like it came from a professional bakery, whole milk is your ally.
Eggs
Eggs play multiple roles in this recipe. The yolks add richness, color, and fat that tenderizes the crumb and gives the finished bread a beautiful golden interior. The whites contribute structure through their proteins, which help the dough hold its shape during baking. Eggs also act as an emulsifier, helping the fat from the butter blend more cohesively with the water-based components of the dough.
The egg wash applied before baking is what gives this bread its signature deep golden-brown, glossy crust. Without it, the crust would be pale and matte rather than the stunning, lacquered finish that makes this loaf look like it belongs in a bakery display case. Eggs are genuinely one of the most multifunctional ingredients in all of baking.
Ingredients
These quantities make one standard 9×5 inch loaf. All measurements are given by weight where possible for the most accurate results.
For the Dough:
- 350g (about 2 3/4 cups) bread flour (substitute all-purpose flour in a pinch, though results will be slightly less structured)
- 100g (about 1/3 cup + 2 tbsp) active sourdough starter, fed and at peak rise
- 150ml (about 2/3 cup) whole milk, warmed to around 75°F (substitute oat milk for a dairy-free version)
- 2 large eggs, room temperature
- 40g (about 3 tbsp) granulated sugar
- 8g (about 1 1/2 tsp) fine sea salt
- 30g (about 2 tbsp) unsalted butter, softened (this goes into the initial dough, not the lamination block)
For the Butter Block (Lamination):
- 200g (about 14 tbsp) high-quality European-style unsalted butter, cold (substitute regular unsalted butter if European-style is unavailable, though the lamination will be slightly trickier)
For the Filling:
- 150g (about 3/4 cup) dark chocolate chips, 60-72% cacao (substitute semi-sweet or milk chocolate chips based on preference)
- 1 tsp pure vanilla extract
- Pinch of flaky sea salt for sprinkling inside and on top
For the Egg Wash:
- 1 large egg
- 1 tbsp whole milk (or heavy cream for an even richer finish)
Optional finishing touches:
- Pearl sugar or coarse turbinado sugar for sprinkling on top before baking
- Extra chocolate chips for pressing on the surface just before baking
Step-by-Step Instructions
Read through all the steps before you begin. This is a multi-stage recipe that spans two days, and understanding the full process before you start will make everything feel much more manageable.
- Feed your starter (12 hours before mixing). Feed your sourdough starter with equal weights of flour and water. Let it sit at room temperature until it is bubbly, active, and at its peak rise – it should pass the float test where a small spoonful dropped into water floats to the surface.
- Mix the initial dough (Day 1, morning). In a large mixing bowl, combine the bread flour, warm milk, active starter, eggs, sugar, and salt. Mix everything together until a rough dough forms, then add the softened butter and continue mixing until it is fully incorporated and the dough is smooth. This takes about 8 to 10 minutes by hand or 5 to 6 minutes with a stand mixer using a dough hook.
- Develop the gluten with stretch and folds. Over the next 2 hours, perform 4 rounds of stretch and folds spaced 30 minutes apart. For each round, grab one side of the dough, stretch it upward, and fold it over the center. Rotate the bowl 90 degrees and repeat until all four sides have been stretched. This builds strength without over-kneading.
- Chill the dough. After the final stretch and fold, shape your dough into a tight rectangle, wrap it in plastic wrap, and refrigerate it for at least 2 hours and up to overnight. You want the dough to be very cold before you begin lamination so the butter stays firm and distinct from the dough layers.
- Prepare the butter block. Place your cold European-style butter between two sheets of parchment paper. Using a rolling pin, pound and roll the butter into a flat, even square about 7 to 8 inches across and approximately 1/4 inch thick. Return it to the refrigerator for 20 minutes if it gets too soft during this process.
- Encase the butter in the dough. Remove your dough from the refrigerator and roll it out into a rectangle roughly twice the size of your butter block on a lightly floured surface. Place the butter block in the center of the dough rectangle and fold the sides of the dough over the butter like an envelope, pinching all the edges tightly to seal the butter inside completely.
- First lamination fold (Letter Fold). Gently roll the dough-encased butter into a long rectangle, about 8 inches wide and 18 to 20 inches long. Work slowly and evenly to avoid tearing. Fold the top third of the dough down to the center, then fold the bottom third up over it, like folding a business letter. Wrap the dough in plastic and refrigerate for 30 minutes.
- Second lamination fold. Remove the dough from the refrigerator and repeat the rolling and folding process from step 7. Always start rolling with the open seam facing you. Wrap and refrigerate again for 30 minutes.
- Third lamination fold with chocolate. On this final fold, after rolling out the dough rectangle, scatter the dark chocolate chips evenly over the surface in a single layer. Drizzle the vanilla extract lightly over the chips and add a small pinch of flaky sea salt. Perform your letter fold as usual, enclosing the chocolate chips inside the layers of dough and butter. Wrap and refrigerate for 30 minutes.
- Shape the loaf. Remove the laminated dough from the refrigerator. Roll it out one final time into a rectangle approximately 8 inches wide and 12 inches long. Starting from the short end, roll the dough tightly into a log, like a cinnamon roll. Tuck the ends under and place the shaped log seam-side down into a well-buttered 9×5 inch loaf pan.
- Cold proof overnight. Cover the loaf pan loosely with plastic wrap and refrigerate overnight, anywhere from 8 to 14 hours. This slow cold proof develops flavor and gives the sourdough starter time to leaven the dough gently through all those butter layers. This is where the magic happens.
- Check the dough in the morning. When you take the loaf out of the refrigerator, the dough should have risen noticeably in the pan and look slightly puffed. It will not look dramatically risen like a standard bread dough because the butter layers resist movement, but you should see clear signs of lift. If it has not risen enough, let it sit at room temperature for 1 to 2 hours before baking.
- Preheat your oven. Preheat your oven to 375°F (190°C). Place a rack in the middle of the oven and make sure nothing is above the loaf pan that could block the heat from browning the top evenly.
- Apply the egg wash. Whisk together the egg and milk until fully combined. Using a pastry brush, apply a generous, even layer of egg wash over the entire top surface of the loaf. If you are using pearl sugar or extra chocolate chips on top, press them gently onto the surface now.
- Score the loaf (optional but recommended). Using a sharp knife or bread lame, score the top of the loaf down the center with one confident, decisive slash. This allows the bread to expand upward in a controlled way and creates a beautiful visual crack that shows off the layers inside.
- Bake the bread. Place the loaf in the preheated oven and bake for 35 to 40 minutes, until the top is a deep, even golden brown and an instant-read thermometer inserted into the center reads at least 190°F (88°C). If the top browns too quickly before the center is cooked through, tent the loaf loosely with aluminum foil and continue baking.
- Cool completely before slicing. This is the hardest step but the most important one. Remove the loaf from the oven and let it cool in the pan for 10 minutes, then transfer it to a wire rack and let it cool for at least 1 to 2 hours before slicing. Slicing too early allows steam to escape, which collapses the layers and makes the crumb gummy. Patience here pays off enormously.
Make It Ahead and Batch Prep Guide
This sourdough chocolate chip croissant bread is genuinely one of the best recipes to batch prep because almost every stage can be stretched, paused, or extended to fit your schedule. The dough benefits from cold time at multiple stages, which means your refrigerator is actually doing a lot of the work for you. With a little planning, you can stagger your effort across two or three days without feeling rushed at any point.
One of the most powerful batch prep strategies is to make two or three loaves at once during your lamination session. The work involved in rolling and folding a single batch is nearly identical to rolling and folding two or three batches at the same time. You can complete all three folds for multiple dough portions simultaneously, refrigerating each one between folds, and then shape them and pop them into loaf pans for the overnight cold proof side by side. You are doubling or tripling your output for only a modest increase in active effort.
You can also freeze the shaped, unbaked loaves after the cold proof if you need to extend your timeline. Once the dough has proofed in the refrigerator overnight, wrap the loaf pan tightly in plastic wrap and then in foil and freeze it for up to 3 weeks. When you are ready to bake, transfer the loaf directly from the freezer to a cold oven (do not preheat), set the oven to 375°F, and add 15 to 20 extra minutes to the baking time. This method works remarkably well and gives you fresh-baked loaves on demand without any additional day-of prep work.
For weekly meal prep, bake your loaves on Sunday, slice them once fully cooled, and store slices in an airtight container in the refrigerator for up to 4 days or in the freezer for up to 2 months. Pre-sliced and frozen, individual pieces can go straight from the freezer into a toaster or a 300°F oven for 8 to 10 minutes and come out tasting remarkably fresh. This makes weekday breakfasts, afternoon snacks, or dessert moments effortless without sacrificing quality.
Common Mistakes to Avoid
Laminated sourdough is a forgiving but technique-sensitive bake. Here are the six most common mistakes that home bakers make and exactly how to avoid them.
- Using an under-active starter: If your sourdough starter is not at peak activity when you mix it into the dough, you will not get enough leavening power to push through the dense butter layers. Always use your starter within 4 to 6 hours of peak rise and make sure it passes the float test before incorporating it.
- Letting the butter get too warm during lamination: If the butter block warms up to the point where it starts melting into the dough rather than staying as distinct layers, you will lose your lamination entirely. Work quickly, keep your kitchen cool if possible, and return the dough to the refrigerator the moment it feels soft or the butter starts smearing.
- Rolling too aggressively: Pressing down hard with your rolling pin during lamination is one of the quickest ways to tear the dough and let the butter break through the surface. Always roll with firm, even pressure from the center outward, and never force the dough if it starts resisting. Let it rest in the fridge for 15 minutes if the gluten feels too tight to roll.
- Skipping the rest periods between folds: The 30-minute refrigerator rests between each lamination fold are not optional. They are essential for keeping the butter cold and for allowing the gluten to relax so the dough can be rolled out again without tearing. Rushing through the folds without resting is the single most common source of lamination failure.
- Slicing the bread too early: It is incredibly tempting to cut into this loaf the moment it comes out of the oven. Resist the urge. The interior needs at least 1 to 2 hours to fully set as it cools. Cutting too early creates a gummy, underset crumb that collapses and loses all its layered structure. The wait is genuinely worth it.
- Using regular American-style butter for the lamination block: Standard American butter has a higher water content and lower fat percentage than European-style butter. This makes it harder to pound into a pliable, consistent block, and it tends to break and crack when cold rather than bending smoothly with the dough. Investing in European-style butter for the lamination block makes an enormous difference in the ease and quality of your results.
Notes, Tips and Variations
Substitutions
If you do not have bread flour on hand, all-purpose flour will work as a substitute but expect slightly less structure in your layers and a softer crumb. You can also try using a blend of all-purpose and whole wheat flour (about 80 percent all-purpose to 20 percent whole wheat) for a nuttier, more complex flavor profile.
For a dairy-free version, replace whole milk with full-fat oat milk or almond milk and use a high-quality vegan butter (look for one with a high fat content, at least 78 percent) for the lamination block. Dairy-free lamination is trickier but absolutely achievable with the right butter substitute. Make sure your dairy-free butter is very cold before you begin and work extra quickly to prevent it from softening.
Chocolate chip substitutes include chopped dark chocolate bars (which melt more dramatically and create larger pockets of chocolate), cacao nibs for a less sweet and more intensely flavored option, or white chocolate chips for a sweeter, creamier variation that pairs beautifully with the sourdough tang.
Dietary Variations
To make this bread egg-free, replace the eggs in the dough with flax eggs (1 tbsp ground flaxseed mixed with 3 tbsp water, rested for 5 minutes) and skip the egg wash, using a milk wash (any plant-based milk works) instead for browning. The texture will be slightly less rich but still delicious and visually appealing.
For those reducing sugar, you can cut the granulated sugar in the dough by half without significantly affecting the texture or the fermentation. The chocolate chips will still provide plenty of sweetness in every slice. You can also use coconut sugar as a one-to-one substitute for a slightly more caramel-forward flavor note.
Baking Tips
If your kitchen runs warm (above 72°F), your butter will soften faster during lamination. Try chilling your work surface by placing a bag of ice on it for a few minutes before you begin rolling. A marble pastry board is also an excellent investment for laminated doughs because it stays cool naturally and gives your butter the best chance of staying firm.
Use a digital kitchen scale for all measurements in this recipe. Baking by weight rather than volume is the single most impactful change you can make to improve the consistency of your results, especially in a precision-sensitive recipe like this one. A good kitchen scale costs less than a bag of European butter and pays for itself many times over in better bakes.
If your loaf comes out with uneven layering or visible butter pockets (where the butter has pooled rather than layering evenly), do not panic. The bread will still taste incredible. Those butter pockets often create extra-flaky, richly flavored spots that are actually a delight to discover when you slice into the loaf. Imperfect lamination is still beautiful lamination.
Topping Ideas and Flavor Boosters
This bread is stunning on its own but it is also an incredible canvas for toppings and flavor additions. Here are some of the best ways to elevate it even further.
- Pearl sugar on top – Pressed onto the egg-washed surface before baking, pearl sugar adds a gorgeous crunch and a subtle sweetness to every bite of the crust.
- Flaky sea salt finish – A sprinkle of Maldon or fleur de sel over the top just before baking amplifies the chocolate flavor dramatically and creates that irresistible sweet-salty contrast.
- Cinnamon sugar layer – Mix 2 tablespoons of sugar with 1 teaspoon of cinnamon and scatter it over the dough along with the chocolate chips during the third fold for a warmly spiced variation.
- Orange zest in the dough – Add the zest of one large orange to the initial dough mixture. Chocolate and orange is a classic pairing that works beautifully against the sourdough tang.
- Almond paste layer – Spread a thin layer of almond paste or frangipane over the dough before adding your chocolate chips for a richer, more indulgent filling that echoes traditional French pastries.
- Espresso powder in the dough – Adding 1 teaspoon of instant espresso powder to the flour deepens the chocolate flavor without adding any coffee taste. It is a subtle but powerful trick that professional pastry chefs use regularly.
- Hazelnut praline paste – Swirl a thin layer of hazelnut praline paste (or even high-quality chocolate-hazelnut spread) over the dough alongside the chocolate chips for a Nutella-inspired variation that is absolutely divine.
- Dried cherries or cranberries – Mixed into the chocolate chips, tart dried fruit adds a chewy texture and a bright, fruity counterpoint to the rich chocolate and butter.
- Chopped toasted hazelnuts or pecans – Scattered alongside the chocolate chips, toasted nuts add crunch, nuttiness, and a beautiful textural contrast to the soft, layered crumb.
- Brown butter glaze – Once the loaf has cooled slightly, drizzle a simple brown butter glaze (browned butter, powdered sugar, and a splash of milk) over the top for an extra layer of nutty, caramel-like richness.
- Cardamom sugar dusting – After baking, dust the warm loaf with a mixture of powdered sugar and ground cardamom for a Scandinavian-inspired finishing touch that pairs unexpectedly well with the sourdough tang.
Who This Recipe Is For
This recipe was designed with a wide range of bakers in mind. Here is a quick look at who will benefit most from making this loaf.
- Sourdough bakers ready to level up – If you have mastered basic sourdough loaves and are looking for your next challenge, this recipe is the perfect next step. It uses all your existing sourdough skills while introducing the exciting new technique of lamination.
- Home bakers who love French pastry – If croissants and pain au chocolat are your bakery weaknesses, this recipe gives you that same indulgent experience in a more manageable bread format without requiring professional croissant-shaping skills.
- Weekend baking enthusiasts – The multi-day timeline is perfectly suited to a weekend baking project. Start on Friday evening, laminate on Saturday morning, and bake fresh on Sunday morning for a completely awe-inspiring weekend bake.
- Meal preppers who want quality over convenience – If you are someone who meal preps thoughtfully and wants your weekly food to be genuinely exceptional rather than just functional, this bread elevates every breakfast and snack moment all week long.
- Gift givers and host bakers – This loaf makes one of the most impressive and thoughtful homemade gifts you can bring to a dinner party, holiday gathering, or a friend who needs cheering up. It looks stunning and tastes even better.
- Chocolate lovers – If chocolate in any form is your weakness, this bread delivers it in the most luxurious possible package: surrounded by flaky, buttery, tangy sourdough layers.
- Process-oriented bakers – If you are the kind of baker who genuinely enjoys the meditative, step-by-step nature of a complex bake, this recipe will be deeply satisfying from start to finish.
Storage and Meal Prep Tips
Refrigerator
Once fully cooled, wrap your sourdough chocolate chip croissant bread tightly in plastic wrap or store it in an airtight container. It will keep at room temperature for up to 2 days, after which the crumb begins to dry out and the layers lose some of their distinct texture. Refrigerating the bread after day 2 extends its quality by another 2 days, for a total of up to 4 days of good eating from bake day.
To refresh a slice that has been refrigerated, pop it in a 300°F oven for 6 to 8 minutes or in a toaster oven until warmed through. This brief re-warming reactivates the butter in the layers and brings back much of the original flakiness and aroma. Eating it straight from the refrigerator cold is also genuinely delicious, especially for a quick morning snack.
Freezer
This bread freezes beautifully and is one of the best reasons to bake multiple loaves at once. Slice the fully cooled loaf and lay the slices flat on a parchment-lined baking sheet. Freeze them until solid (about 2 hours), then transfer them to a zip-top freezer bag or an airtight container. Label with the date and use within 2 months for the best quality.
You can also freeze the whole unsliced loaf. Wrap it tightly in two layers of plastic wrap and then in foil. When ready to use, thaw it overnight in the refrigerator and then warm the whole loaf in a 300°F oven for 15 to 20 minutes to refresh it before slicing and serving.
Reheating
From frozen, individual slices can go directly into a toaster on a medium setting (about 2 cycles) or into a 300°F oven for 10 to 12 minutes until warmed through and slightly crispy on the outside. Avoid using a microwave to reheat this bread, as microwave reheating creates steam that makes the layers soggy and tough rather than flaky and crisp.
For the ultimate reheating experience, place a slice in a dry skillet over medium-low heat for 2 to 3 minutes per side. The direct contact with the pan re-crisps the exterior layers and warms the chocolate inside until it is just slightly melty. It is the closest you can get to the fresh-from-the-oven experience when reheating.
Nutrition Facts
The following nutrition information is estimated per slice, based on the recipe making approximately 10 slices. Actual values will vary based on specific brands used and exact portion sizes.
| Nutrient | Per Serving (1 slice) |
|---|---|
| Calories | 385 kcal |
| Total Fat | 22g |
| Saturated Fat | 13g |
| Total Carbohydrates | 40g |
| Dietary Fiber | 2g |
| Total Sugar | 12g |
| Protein | 7g |
| Sodium | 280mg |
This bread is an indulgent bake, not a low-calorie one, and that is exactly what it is meant to be. The high fat content comes primarily from the European-style butter used in lamination, which is also the source of the extraordinary flavor and texture. Enjoy it mindfully as the special treat it is designed to be.
FAQs
Can I make this recipe without a sourdough starter?
You can substitute the sourdough starter with a combination of 50g of all-purpose flour, 50g of water, and 3/4 teaspoon of instant yeast. Whisk them together and let the mixture sit for 15 minutes until bubbly, then use it in place of the active starter in the recipe. The flavor will be noticeably less complex and you will lose the characteristic sourdough tang, but the lamination technique and chocolate chip filling will still produce a genuinely delicious and flaky loaf. Easy Sourdough Starter Guide for Beginners
What if my butter breaks through the dough during lamination?
Butter breaking through the dough is one of the most common challenges in laminated dough baking, and it almost always comes down to temperature. If the butter is too cold and hard, it will crack and pierce through the dough when you roll it. If it is too warm, it will smear into the dough instead of layering. The ideal temperature for both the butter and the dough during lamination is around 60 to 65°F. If you see butter breaking through, stop immediately, refrigerate the dough for 20 to 30 minutes, and then continue. Smaller tears can be pinched closed with your fingers and the dough patched by pressing it gently back together.
How do I know when my loaf is fully baked?
The most reliable way to check doneness is with an instant-read thermometer. Insert it into the center of the loaf and look for a reading of at least 190°F (88°C), ideally closer to 195°F. At this temperature, the interior is fully set and the crumb has finished its structure. Visual cues like a deep golden-brown crust are helpful but not foolproof, because a loaf can look done on the outside while still being undercooked in the center. Always confirm with the thermometer.
Why did my loaf not rise much overnight?
If your loaf showed very little rise during the cold proof, the most likely cause is either an under-active starter or a refrigerator that is running very cold (below 36°F). When you take the loaf out of the refrigerator, give it 2 to 3 hours at room temperature before assessing whether it needs to go into the oven. Laminated doughs rise more slowly than regular bread doughs because the butter layers resist movement, so you should expect a more modest rise than you might be used to with a standard sourdough loaf. A modest but visible puff, combined with a dough that feels light and slightly jiggly when you gently shake the pan, is a good sign that it is ready to bake.
Can I use this same laminated sourdough dough base for other recipes?
Absolutely, and this is one of the most exciting aspects of mastering this dough. Once you are comfortable with the lamination process, you can use the same base dough to make cinnamon sugar swirl loaves, jam-filled pastry rolls, individual laminated buns with various fillings, or even twisted pastry pulls that bake up beautifully. The technique transfers across dozens of different recipes and flavor combinations. Think of this recipe as your gateway into the world of laminated sourdough baking. Sourdough Cinnamon Sugar Laminated Loaf Recipe
Conclusion
This sourdough chocolate chip croissant bread is one of those recipes that genuinely changes how you think about home baking. It proves that with the right ingredients, clear instructions, and a little patience, you can produce something that looks and tastes like it came from a world-class bakery right in your own kitchen. Every step of the process – from feeding your starter to pulling that golden, flaky loaf out of the oven – is satisfying in its own right.
Do not be intimidated by the multi-day timeline or the lamination technique. Break the process down into its individual stages, trust the recipe, and remember that even imperfect lamination produces extraordinary bread. The first time you slice into this loaf and see those layers, smell that buttery chocolate aroma, and take that first bite, you will understand exactly why this bake has earned its place as one of the most celebrated recipes in the home baking community. The Ultimate Guide to Sourdough Bread Baking at Home
Now go feed that starter, soften that butter, and get ready to bake the most impressive loaf of your life. You have everything you need right here. Share your results in the comments below – I genuinely cannot wait to hear how your bake turns out.