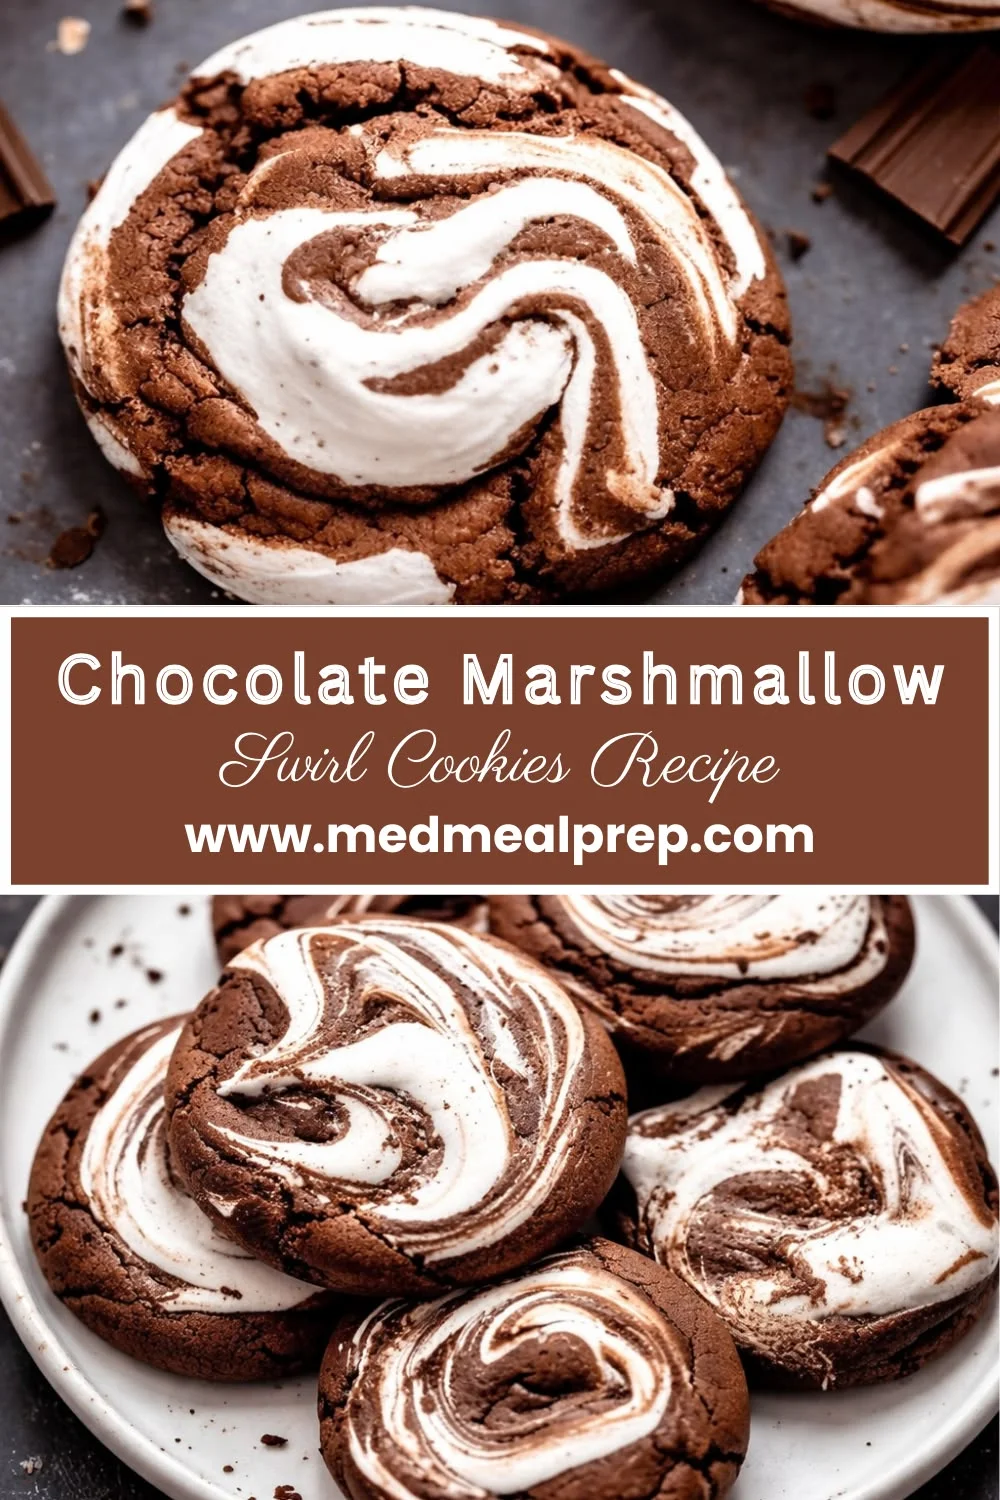
THE BEST N°1 Chocolate Marshmallow Swirl Cookies – Soft, Fudgy and Irresistible
If you have ever wanted a cookie that delivers pure, crowd-pleasing joy in every single bite, these Chocolate Marshmallow Swirl Cookies are exactly what you need. They are soft, fudgy, deeply chocolatey, and loaded with gooey marshmallow ribbons that melt right into the dough as they bake.
In this post, you will get the full story behind this indulgent treat, a breakdown of every key ingredient, a foolproof step-by-step recipe, and all the meal prep tips you need to keep a batch ready whenever the craving hits. Whether you are baking for a family gathering, a holiday cookie box, or just a quiet weeknight dessert, this recipe has you completely covered.
On MedMealPrep.com, we believe that even indulgent desserts can be made with quality ingredients and mindful choices. These cookies use real cocoa, good-quality chocolate, and simple pantry staples – all things you can feel good about putting on the table.
Table of Contents
Personal Note
Growing up around a Mediterranean table, dessert was never just an afterthought. It was a celebration – something you made with care, shared generously, and savored slowly. Sweets in Mediterranean culture tend to lean toward honey, nuts, and dark chocolate, and that is exactly what inspired the deep cocoa base of these cookies.
The first time I swirled marshmallow into a chocolate cookie dough, I was honestly skeptical. But the moment that first batch came out of the oven – puffed, glossy, with those golden marshmallow ribbons caramelizing across the top – I was completely sold. It reminded me of the kind of dessert that would disappear from a platter within minutes at a family gathering.
These Chocolate Marshmallow Swirl Cookies have become one of my most-requested recipes, and I am so excited to walk you through every single detail so yours turn out absolutely perfect the very first time.
Origins of the Dish
Chocolate cookies as we know them today have a relatively modern history, but chocolate itself has been a prized ingredient for thousands of years. The ancient Mesoamerican civilizations of the Olmec, Maya, and Aztec people consumed cacao in liquid form long before it ever became the solid chocolate we bake with today. When Spanish explorers brought cacao back to Europe in the 16th century, it quickly became a luxury ingredient across Mediterranean trading ports in Spain, Italy, and the south of France.
Chocolate eventually made its way into European pastry kitchens, where it was combined with local ingredients like almonds, olive oil, and spices that were already staples of Mediterranean cooking. Dark chocolate confections became especially popular in countries like Spain and Italy, where bitter cocoa was balanced with honey or sugar to create rich, dense sweets. These early chocolate treats were quite different from the soft, butter-based cookies popular in American baking – but they laid the flavor foundation that inspires recipes like this one.
Marshmallow, on the other hand, has its own fascinating backstory. The original marshmallow confection was made from the root of the marsh mallow plant – a botanical ingredient used medicinally in ancient Egypt, Greece, and Rome. Mediterranean herbalists prized the mallow plant for its soothing properties. Over centuries, confectioners began using the root extract to create soft, pillowy sweets, and by the 19th century, French pâtissiers had refined marshmallow into the light, airy form we recognize today.
The pairing of chocolate and marshmallow became iconic through 20th-century American baking culture, where campfire s’mores and hot cocoa topped with marshmallows became beloved traditions. But the combination of dark, bittersweet chocolate with soft, sweet marshmallow actually echoes something very Mediterranean in spirit – the contrast of bold, earthy flavors with delicate sweetness. These Chocolate Marshmallow Swirl Cookies honor that contrast in every single bite.
Why You’ll Love This Recipe
There are so many reasons to add this recipe to your permanent rotation. Here is a quick breakdown of what makes these cookies truly special.
- Incredibly soft and fudgy texture – The dough is designed for maximum chewiness with a brownie-like center that stays moist for days.
- Stunning visual appeal – Those golden marshmallow swirls on top make every single cookie look like it came from a bakery display case.
- Deep, rich chocolate flavor – A combination of cocoa powder and melted chocolate creates layers of chocolate intensity you just cannot get with cocoa alone.
- Beginner-friendly – No special equipment is required beyond a hand mixer or stand mixer and a standard baking sheet.
- Crowd-pleasing every time – Kids, adults, and everyone in between consistently adores this combination of chocolate and marshmallow.
- Great for batch prep – The dough freezes beautifully, so you can always have cookies ready to bake on demand.
- Customizable – Add nuts, swap in different chocolate chips, or use flavored marshmallows to make these your own.
- Perfect for gifting – These cookies hold up well in boxes and tins, making them ideal for holiday gifts or cookie swaps.
- Made with real ingredients – No artificial shortcuts here. Real butter, real cocoa, and real chocolate make all the difference in flavor and texture.
- Ready in under 30 minutes – From mixing bowl to cooling rack, the whole process is quick and satisfying.
Health Benefits and Ingredient Highlights
While these cookies are certainly a treat, each key ingredient brings something meaningful to the table. Here is a closer look at what goes into these cookies and why it matters.
Dark Chocolate and Cocoa Powder
Dark chocolate and unsweetened cocoa powder are the flavor backbone of this recipe. Both are rich in flavanols – naturally occurring plant compounds that have been studied for their antioxidant activity. Using real cocoa and quality dark chocolate means you are getting genuine, complex chocolate flavor rather than a flat, sugary imitation.
Cocoa powder also contributes a slight bitterness that balances the sweetness of the marshmallow and sugar perfectly. When you reach for cocoa, choose Dutch-process or a high-quality natural cocoa for the deepest color and richest taste. The difference in your final cookie is noticeable and absolutely worth it.
Eggs
Eggs serve two critical functions in this dough. The yolks add richness, fat, and that signature fudgy texture, while the whites provide structure and help the cookies hold their shape as they bake. Using room-temperature eggs helps them incorporate more smoothly into the batter, giving you a more even, consistent dough.
Eggs are also a complete protein source and contain essential nutrients like choline, which supports brain and liver health. In a dessert context, eggs do a lot of heavy lifting – binding the dough, adding moisture, and contributing to that gorgeous chewy texture you are going for.
Butter
Butter is what gives these cookies their melt-in-your-mouth tenderness and rich flavor. Browning the butter slightly before adding it to the dough is an optional but highly recommended step – it creates a nutty, caramel-like depth that makes the chocolate notes even more pronounced. Good-quality unsalted butter gives you the most control over the final flavor.
Fat is an essential macronutrient, and in baking, it plays a structural role that cannot simply be eliminated. Butter contributes to the soft, chewy crumb that sets these cookies apart from dry, crumbly alternatives. If you are working within dietary preferences, see the substitution notes in the Tips section below.
Marshmallows
Marshmallows are the star of the show in this recipe. As they bake, they soften, puff, and create golden, caramelized ribbons across the top of each cookie. The contrast between the dark, fudgy cookie and the sticky-sweet marshmallow is what makes every bite so compelling and irresistible.
Mini marshmallows work best for swirling into the dough, as they distribute more evenly and melt at a faster rate than standard-size marshmallows. You can also press a few extra on top just before baking for that bakery-worthy visual finish that photographs beautifully and tastes even better.
All-Purpose Flour
Flour provides the structure that holds everything together. The key with these cookies is not over-measuring your flour, as too much will make the cookies dense and dry rather than soft and fudgy. Spoon the flour into your measuring cup and level it off, or better yet, use a kitchen scale for precision.
If you need a gluten-free version, a good 1-to-1 gluten-free baking flour blend works well in this recipe without significantly changing the texture. See the Dietary Variations section for more details on this swap.
Brown Sugar
Brown sugar is what gives these cookies their signature chewiness and caramel undertone. The molasses in brown sugar retains moisture in the dough, which is why these cookies stay soft for days after baking. Packing your brown sugar firmly when measuring ensures you get the right amount of sweetness and moisture in every batch.
Using a combination of brown and white sugar also helps control the spread of the cookies. More brown sugar means a thicker, chewier cookie, while more white sugar leads to a slightly crispier edge. This recipe is balanced to give you the best of both – chewy center, slightly crisp edges, and that unmistakable fudgy middle.
Ingredients
Here is everything you need to make one batch of approximately 24 cookies. All measurements are standard US cups and spoons unless otherwise noted.
- 1 cup (225g) unsalted butter, softened to room temperature (or slightly browned for extra depth)
- 1 cup (200g) packed light brown sugar
- 1/2 cup (100g) granulated white sugar
- 2 large eggs, room temperature
- 2 teaspoons pure vanilla extract
- 1/2 cup (115g) melted dark chocolate (70% cacao or higher recommended)
- 2/3 cup (65g) unsweetened Dutch-process cocoa powder (natural cocoa works as a substitute)
- 1 and 3/4 cups (220g) all-purpose flour (substitute 1-to-1 gluten-free baking blend if needed)
- 1 teaspoon baking soda
- 1/2 teaspoon fine sea salt
- 1 and 1/2 cups (85g) mini marshmallows, divided (reserve 1/2 cup for topping)
- 1 cup (170g) semi-sweet or dark chocolate chips (optional but highly recommended)
Step-by-Step Instructions
Follow these steps carefully for perfectly soft, fudgy Chocolate Marshmallow Swirl Cookies every single time. Each step includes notes to help you understand the why behind the technique.
- Preheat your oven to 350°F (175°C). Line two large baking sheets with parchment paper or silicone baking mats. Having everything ready before you start mixing makes the whole process smoother and prevents the dough from sitting too long before baking.
- Melt your dark chocolate. Place chopped dark chocolate in a heatproof bowl over a pot of simmering water, or microwave in 30-second increments, stirring between each interval. Set aside to cool slightly while you prepare the rest of the dough. You want it warm but not hot when it goes into the batter.
- Cream the butter and sugars. In a large mixing bowl, beat the softened butter, brown sugar, and granulated sugar together using a hand mixer or stand mixer on medium-high speed for about 3 minutes. The mixture should look pale, fluffy, and significantly increased in volume. This step is critical for the right cookie texture.
- Add the eggs and vanilla. Add the eggs one at a time, beating well after each addition. Add the vanilla extract and mix until fully combined. Scrape down the sides of the bowl as needed to make sure everything is evenly incorporated.
- Mix in the melted chocolate. Pour the slightly cooled melted chocolate into the butter mixture and beat on low speed until fully combined. The dough will turn a rich, deep brown color and will smell absolutely incredible at this stage.
- Whisk together the dry ingredients. In a separate bowl, whisk together the flour, cocoa powder, baking soda, and salt until evenly combined. This prevents any pockets of baking soda or salt from ending up in your cookies and ensures an even rise.
- Combine wet and dry ingredients. Add the dry ingredients to the wet ingredients in two additions, mixing on low speed just until no dry streaks remain. Do not over-mix at this stage, as over-working the dough can make your cookies tough rather than tender.
- Fold in the chocolate chips and marshmallows. Using a rubber spatula, gently fold in the chocolate chips and 1 cup of the mini marshmallows. You want the marshmallows distributed throughout but not completely broken down – a few visible pieces in the dough are perfect.
- Chill the dough for 30 minutes. Cover the bowl with plastic wrap and refrigerate the dough for at least 30 minutes. Chilling firms up the fat and helps the cookies hold their shape during baking, resulting in thicker, fudgier cookies rather than flat, spread-out ones.
- Scoop and portion the dough. Use a medium cookie scoop (about 1.5 tablespoons) to portion the dough onto the prepared baking sheets, spacing each cookie about 2 inches apart. The dough will be fairly firm after chilling, which is exactly what you want.
- Top with reserved marshmallows. Press 3-4 mini marshmallows on top of each cookie ball before baking. This creates that beautiful golden marshmallow swirl effect on the surface as the cookies bake and the marshmallows puff and caramelize.
- Bake for 10-12 minutes. Place the baking sheets in the preheated oven and bake for 10 to 12 minutes. The edges should look set and the centers should still appear slightly underdone – this is correct. The cookies will continue to firm up as they cool on the pan.
- Cool on the baking sheet. Allow the cookies to cool on the baking sheet for 5 minutes before transferring to a wire rack. Removing them too early can cause them to break apart, as they need time to set up in the residual heat of the pan.
- Enjoy warm or at room temperature. These cookies are extraordinary when still slightly warm, with the marshmallow still gooey and the chocolate chips barely set. If you can wait, they are equally wonderful at room temperature the next day when the flavors have had time to develop and deepen.
Make It Ahead and Batch Prep Guide
One of the biggest advantages of this recipe is how beautifully it lends itself to batch preparation. Making a double batch of dough and storing it strategically means you can have fresh-baked cookies ready in minutes on any given day of the week. This is exactly the kind of smart, efficient approach that works so well within a meal prep routine.
To prep the dough ahead, simply follow the recipe through step 9 (chilling), then portion the dough into balls and freeze them on a parchment-lined baking sheet until solid – about 2 hours. Transfer the frozen dough balls to a zip-lock freezer bag or airtight container and store for up to 3 months. When you are ready to bake, place the frozen dough balls directly on a parchment-lined baking sheet, top with fresh marshmallows, and bake from frozen at 350°F for 13-15 minutes. No thawing required.
If you prefer to prep baked cookies in advance, these hold up extremely well for 4-5 days at room temperature in an airtight container. Baking a large batch on Sunday and storing them properly means you have a ready-made dessert or sweet snack available all week without any additional effort. This is especially useful when you are prepping for gatherings, school lunches, or care packages. Chocolate Chip Cookie Prep Guide
For the most organized approach, label your freezer bags with the date and the baking instructions so that anyone in your household can pull out a portion and bake them without needing to look up the recipe. You can even separate the dough balls into smaller portions – say, 6 per bag – so you are always baking exactly as many as you need without wasting any. This is batch prep working at its most practical and efficient level.
Common Mistakes to Avoid
Even experienced bakers run into issues with chocolate cookies. Here are the most common mistakes to watch out for so your results are perfect every single time.
- Skipping the dough chill. This is the most impactful mistake you can make. Unchilled dough spreads too much in the oven, leaving you with flat, crispy cookies instead of thick and fudgy ones. Always chill for at least 30 minutes – overnight chilling gives you even better results.
- Over-measuring the flour. Scooping the flour directly from the bag with your measuring cup packs in far more than you need and leads to dense, dry cookies. Always spoon the flour into the cup and level it off, or use a kitchen scale for accuracy.
- Using cold eggs and butter. Cold butter will not cream properly with the sugar, and cold eggs can cause the melted chocolate to seize up. Always bring your butter and eggs to room temperature before you start. Set them out 30-60 minutes before baking.
- Adding marshmallows too early to the top. If you top the cookies before putting them in the oven and then forget to watch them, the marshmallows can over-brown and turn bitter. Keep an eye on the oven during the last 2 minutes of baking – marshmallows go from golden to burnt quickly.
- Over-baking the cookies. Because these are fudgy cookies, they will look underdone when they are actually done. Pull them when the edges are set and the center still looks slightly soft. Trust the process – they firm up as they cool and the texture will be perfect.
- Using low-quality cocoa or chocolate. This is a recipe where ingredient quality genuinely matters. Cheap cocoa powder produces a dull, flat chocolate flavor. Invest in a quality Dutch-process cocoa and a good dark chocolate bar for melting, and you will taste the difference immediately.
Notes, Tips and Variations
Substitutions
If you need to swap out butter, you can use an equal amount of coconut oil in its solid state. The cookies will have a slightly different texture – a bit crisper on the edges – but the flavor will still be rich and delicious. Vegan butter sticks are another solid option that behaves more similarly to dairy butter in this type of dough.
For an egg-free version, use one flax egg per large egg needed. To make a flax egg, combine 1 tablespoon of ground flaxseed with 3 tablespoons of water and let it sit for 5 minutes until gelatinous. The cookies will be slightly less chewy but still very tasty. If marshmallows are a concern for dietary reasons, vegan marshmallows made without gelatin are widely available and work just as well in this recipe.
Dietary Variations
To make these cookies gluten-free, substitute the all-purpose flour with a quality 1-to-1 gluten-free baking flour blend. Look for a blend that includes xanthan gum, as this helps replicate the binding properties of gluten and keeps the cookies from crumbling. Bob’s Red Mill 1-to-1 and King Arthur Measure for Measure are two reliable options that work very well in this recipe.
For a dairy-free version, use your favorite dairy-free butter alternative and replace the dark chocolate and chocolate chips with dairy-free chocolate. Brands like Enjoy Life make excellent dairy-free chocolate chips that melt and bake beautifully. Pair with vegan marshmallows and you have a fully plant-based cookie that is just as indulgent as the original.
Cooking Tips
For the absolute fudgiest results, try under-baking your cookies by just 1 minute and allowing them to cool completely on the pan. The carry-over heat finishes the baking process and you end up with an almost brownie-like center that is impossibly soft and moist. This technique works especially well when the dough has been chilled overnight.
If you want an extra layer of visual drama, immediately after pulling the cookies from the oven, use the back of a spoon to gently swirl any melted marshmallow across the surface. This creates a beautiful marbled effect and ensures the marshmallow caramelizes evenly across the top. Sprinkle a pinch of flaky sea salt over each cookie at this stage for a flavor combination that is absolutely next level. Double Chocolate Fudge Brownie Cookies
Topping Ideas and Flavor Boosters
These cookies are delicious on their own, but the right topping can take them from great to truly spectacular. Here are over ten ideas to customize your batch and keep things exciting.
- Flaky sea salt – A pinch of Maldon or fleur de sel on top right after baking amplifies the chocolate flavor and balances the sweetness of the marshmallow beautifully.
- Crushed graham crackers – Press a few crumbles on top before baking for a full s’mores experience in cookie form.
- Chopped toasted hazelnuts – Hazelnuts and chocolate are a classic Mediterranean pairing that adds crunch and a nutty richness to every bite.
- Chopped pistachios – Add color, crunch, and a slightly salty contrast that complements the sweet marshmallow swirl perfectly.
- Drizzle of white chocolate – Once the cookies have cooled, a thin drizzle of melted white chocolate adds visual contrast and a creamy sweetness.
- Caramel drizzle – A light drizzle of salted caramel sauce over the cooled cookies creates a rich, indulgent flavor layering that is hard to resist.
- Espresso powder dusting – A very light dusting of fine espresso powder over the top of each cookie before baking intensifies the chocolate flavor without adding any coffee taste to the cookie itself.
- Rainbow or flavored marshmallows – Swap in strawberry, vanilla, or fruit-flavored mini marshmallows for a fun color pop and a subtle flavor twist.
- Peanut butter chips – Fold in peanut butter chips along with or instead of the chocolate chips for a classic chocolate-peanut butter flavor combination.
- Freeze-dried raspberry pieces – A sprinkle of crushed freeze-dried raspberries on top before baking adds a tart, fruity note that cuts through the richness of the chocolate.
- Coconut flakes – Lightly toasted shredded coconut pressed on top gives these cookies a tropical touch and a satisfying chewy crunch.
- Cinnamon sugar – A light dusting of cinnamon sugar before baking adds warmth and a hint of spice that pairs beautifully with dark chocolate.
Who This Recipe Is For
These Chocolate Marshmallow Swirl Cookies are genuinely for almost everyone. Here is a quick look at who will love this recipe most.
- Busy home bakers who want an impressive result with a manageable level of effort and a straightforward ingredient list.
- Parents and caregivers looking for a crowd-pleasing treat that kids will go absolutely wild for at school events, birthday parties, and after-school snack time.
- Meal preppers who want to have a freezer-friendly sweet treat on hand for the week without having to bake every single day.
- Holiday bakers who need a standout addition to their Christmas cookie boxes, Eid dessert trays, or Thanksgiving dessert spreads.
- Beginner bakers who want a recipe that is forgiving, well-explained, and produces results that look and taste professional.
- Chocolate lovers who need a cookie that goes beyond the standard chocolate chip and delivers a genuinely deep, intense chocolate experience.
- Gifters and entertainers looking for a homemade treat that photographs beautifully and impresses guests without requiring hours in the kitchen.
- Gluten-free and dairy-free bakers who can easily adapt this recipe with the substitutions listed above and still get excellent results.
Storage and Meal Prep Tips
Refrigerator
Baked cookies can be stored in an airtight container at room temperature for up to 5 days. If your kitchen runs warm or you prefer a firmer texture, store the container in the refrigerator for up to 7 days. Bring the cookies back to room temperature before serving, or warm them in the microwave for 10-15 seconds to revive that fresh-baked gooeyness.
Unbaked dough can be stored in the refrigerator in an airtight container for up to 3 days. The extended chill actually improves the flavor of the dough as the ingredients have more time to meld together. Some bakers specifically prefer a 48-hour refrigerator chill over a quick 30-minute chill for this reason.
Freezer
Both the baked cookies and the unbaked dough balls freeze extremely well. For baked cookies, allow them to cool completely, then layer them between sheets of parchment paper in a freezer-safe container or zip-lock bag. Freeze for up to 3 months. Thaw at room temperature for about 30 minutes before eating, or warm in the oven at 300°F for 5-7 minutes.
For unbaked dough balls, freeze on a parchment-lined baking sheet until solid, then transfer to a freezer bag. Label with the date and baking instructions. Bake from frozen at 350°F for 13-15 minutes, adding the marshmallow topping just before they go in the oven. This is honestly the best way to always have a freshly baked cookie available without any fuss. Ultimate Cookie Freezer Prep Guide
Reheating
The quickest reheating method is the microwave. Place one cookie on a microwave-safe plate and heat on medium power for 10-15 seconds. This softens the chocolate chips and makes the marshmallow gooey again, bringing the cookie right back to that fresh-from-the-oven texture and taste.
For a crispier reheat that warms the cookie all the way through without drying it out, use the oven. Preheat to 300°F, place the cookies on a baking sheet, cover loosely with foil, and warm for 5-8 minutes. Remove the foil for the last minute if you want the marshmallow to get slightly golden again. This method works best for larger quantities.
Nutrition Facts
The following values are estimated per serving, with one serving equal to one cookie from a batch of approximately 24 cookies. Values will vary based on specific brands and any substitutions made.
| Nutrient | Per Cookie (1 serving) |
|---|---|
| Calories | 210 kcal |
| Total Fat | 10g |
| Saturated Fat | 6g |
| Total Carbohydrates | 29g |
| Fiber | 2g |
| Total Sugar | 19g |
| Protein | 3g |
| Sodium | 115mg |
These values are based on the standard recipe using full-fat butter, all-purpose flour, and semi-sweet chocolate chips. Choosing a higher-percentage dark chocolate for the chips can reduce the sugar content slightly while increasing the antioxidant flavanol content. Using a gluten-free flour blend does not significantly alter the calorie or macronutrient content.
FAQs
Can I use large marshmallows instead of mini marshmallows?
Yes, you can use large marshmallows, but you will need to cut them into quarters before folding them into the dough. Mini marshmallows are strongly recommended because they distribute more evenly throughout the dough and melt more predictably during baking. Large marshmallows can create very uneven pockets of marshmallow and may not caramelize as nicely on top of the cookie as mini ones do.
Why did my cookies spread too much and come out flat?
The most likely cause is that the dough was not chilled long enough before baking. When the fat in the dough is warm, it melts quickly in the oven and causes excessive spreading before the structure of the cookie sets. Make sure to chill the dough for a minimum of 30 minutes – and ideally 1-2 hours. Also check that your butter was softened and not melted when you creamed it, as melted butter also contributes to flat cookies.
Can I make the dough the night before?
Absolutely, and this is actually highly recommended. The dough keeps beautifully in the refrigerator for up to 3 days, and an overnight chill allows the flavors to deepen and develop significantly. Many bakers report that a 24-48 hour refrigerator rest produces a noticeably richer, more complex-tasting cookie. Just cover the bowl tightly with plastic wrap or transfer the portioned dough balls to an airtight container before refrigerating.
How do I prevent the marshmallows from burning on top?
The key is keeping a close eye on your oven during the final 2 minutes of baking. Marshmallows toast quickly, and the difference between golden and burned can be less than a minute. If your oven runs hot, reduce the temperature by 10-15°F and check the cookies a minute early. You can also place the baking sheet on a higher oven rack if the marshmallows are browning too fast on top while the bottom of the cookie still needs more time.
Can I double this recipe for a large batch?
Yes, this recipe doubles perfectly without any adjustments to the method. Simply multiply all ingredients by two. You may need to work in batches when creaming the butter and sugar if your mixing bowl is not large enough to handle double the volume comfortably. The chilling time remains the same, and you can bake multiple trays in rotation while the remaining dough stays cold in the refrigerator.
Conclusion
These Chocolate Marshmallow Swirl Cookies truly deliver on every single promise – soft, fudgy, deeply chocolatey, and finished with gooey caramelized marshmallow that makes every bite feel like a special occasion. Whether you are making a single batch for your household or prepping a large quantity for the freezer, this recipe fits seamlessly into a smart, organized approach to baking and meal prep.
The beauty of a recipe like this is that it rewards you over and over again. Make the dough once, freeze the portions, and enjoy fresh-baked cookies on demand all month long without any of the mess or effort of starting from scratch every time. That is the kind of kitchen efficiency that genuinely improves your week.
I hope this recipe becomes a staple in your baking rotation the way it has in mine. If you try it, I would love to hear how yours turned out – leave a comment below, share your photos, and let me know if you tried any of the topping variations. Happy baking, and enjoy every single gooey, chocolatey bite.