THE BEST N°1 Air Fryer Onion Straws Recipe – Crispy, Addictive & Better Than Restaurant Style!
If you’ve ever bitten into a perfectly crispy onion straw at a restaurant and thought “I wish I could make these at home,” you’re about to have a life-changing moment. These air fryer onion straws come out shatteringly crisp, golden, and absolutely addictive – without a drop of deep-fry oil sitting heavy in the pan or in your stomach.
This post covers everything you need to know to nail this recipe on your very first try. You’ll get the full ingredient breakdown, step-by-step instructions, batch prep tips, storage advice, and even a deep dive into why this classic American side dish tastes so incredible when it hits the air fryer basket.
Whether you’re making these as a snack, a topping for burgers and soups, or just something to devour straight off the tray, this guide has you fully covered. Let’s get into it.
Table of Contents
Personal Note
The first time I made onion straws in my air fryer, I honestly expected them to be “pretty good.” What I didn’t expect was to eat half the batch standing over the counter before they even made it to the plate. That crunch – the kind that echoes a little when you bite – was everything.
I’d been making deep-fried onion rings for years, but the cleanup, the oil splatter, and the way they’d sit like a brick after eating always held me back from making them regularly. The air fryer completely changed that equation for me. Same satisfaction, far less mess, and I don’t feel like I need a nap afterward.
These onion straws have become one of my most-requested recipes. I’ve brought them to cookouts, put them on homemade burgers, crumbled them over green bean casserole, and yes, eaten them plain with a cold dipping sauce on a Friday night. If there’s one air fryer recipe you make this month, make it this one.
Origins of the Dish
Fried onions have been part of American cooking for well over a century. The onion ring as we know it is commonly traced back to a 1933 Crisco advertisement that published a recipe for “French Fried Onion Rings.” That ad sparked a widespread home-cooking trend, and restaurants quickly caught on. By mid-century, battered and fried onion products were fixtures across diners and steakhouses from coast to coast.
Onion straws are the thinner, more delicate cousin of the classic onion ring. Rather than thick rounds dipped in a heavy batter, straws are sliced into thin strips or half-rings, coated in a lighter seasoned flour mixture, and fried until they shatter when you bite into them. The thinner cut means more surface area for crunch and more even caramelization of the onion underneath.
Steakhouses popularized onion straws as a topping for burgers and steaks, particularly in the American South and Midwest. Restaurants like Outback Steakhouse and Longhorn Steakhouse made blooming onions and onion straws iconic side dishes throughout the 1990s and 2000s. That era of indulgent comfort food deeply shaped what Americans think of as “treat yourself” cooking.
Today, the air fryer has brought this classic back into home kitchens in a much more practical way. You no longer need a deep fryer or a vat of oil to get that authentic restaurant-quality crunch. The circulating hot air in an air fryer mimics the effect of deep frying by creating a dry, intense heat environment that crisps the coating beautifully. It’s the same great dish – just smarter to make and easier to enjoy regularly.
Why You’ll Love This Recipe
This recipe delivers maximum crunch with minimal effort, and it works for almost every occasion you can think of. Here’s exactly why these air fryer onion straws deserve a permanent spot in your recipe rotation.
- Incredibly crispy texture – The air fryer circulates heat evenly around every single straw, giving you that golden, shatteringly crisp coating without drowning them in oil.
- Uses far less oil – A light spray of cooking oil is all you need, compared to cups of oil required for deep frying. That means fewer calories and far less mess.
- Ready in under 20 minutes – From slicing to serving, you can have a full batch on the table in about 18 minutes flat. Perfect for last-minute snacking or a quick side dish.
- Budget-friendly ingredients – Onions, flour, and a handful of spices cost almost nothing. This is a high-impact recipe with a very low grocery bill.
- Endlessly versatile – Eat them as a snack, pile them on burgers, crumble them over soups and salads, or use them as a side dish alongside any protein.
- Easy to customize – Adjust the spice level, swap the flour for a gluten-free option, or add parmesan for an Italian-inspired twist. The base recipe is incredibly flexible.
- Better reheating than deep-fried – Deep-fried onion straws turn soggy quickly. Air fryer versions reheat beautifully in the air fryer in just 3-4 minutes and come back crispy.
- Great for meal prep – You can prep the coated onion straws ahead of time and cook them in batches throughout the week for quick meal additions.
- Kid and crowd approved – These are universally loved. Picky eaters, spice-lovers, and everyone in between will reach for a second handful without hesitation.
- No deep-fry smell or cleanup – One of the biggest wins of using the air fryer is that your kitchen won’t smell like a fast food restaurant for the rest of the day.
Health Benefits and Ingredient Highlights
Every ingredient in this recipe plays a role – not just in flavor, but in how the final texture and nutritional profile come together. Let’s break down what you’re actually eating when you make these air fryer onion straws.
Onions
Onions are the obvious star here, and they bring a lot more to the table than just flavor. They’re a solid source of quercetin, a natural antioxidant compound that has been studied for its role in reducing inflammation and supporting cardiovascular health. One medium onion contains roughly 44 calories and provides vitamin C, vitamin B6, and folate.
Onions also contain prebiotic fiber, specifically fructooligosaccharides (FOS), which feed beneficial gut bacteria and support digestive health. Cooking onions does reduce some of the raw quercetin content, but the remaining antioxidant activity and prebiotic fiber still contribute meaningful nutritional value to the dish.
For this recipe, yellow or sweet onions work best. Yellow onions have a balanced sharpness that softens beautifully in the air fryer, while sweet onions like Vidalia offer a milder, slightly sugary flavor that pairs perfectly with savory spice coatings.
All-Purpose Flour (or Gluten-Free Alternative)
The flour coating is what creates that signature crispy shell around each straw. All-purpose flour is the most commonly used option because it creates a light but sturdy crust when exposed to high air fryer heat. It adheres well to buttermilk-dipped onions and crisps evenly without burning at standard cooking temperatures.
If you’re looking for a lighter alternative, rice flour is an excellent swap. It produces an even crispier, more delicate texture than all-purpose flour and is naturally gluten-free. Almond flour can work too, though it creates a slightly denser, nuttier coating. Each option changes the texture slightly, but all deliver great results in the air fryer.
Buttermilk
Buttermilk is the secret weapon in this recipe. The mild acidity in buttermilk helps tenderize the outer layer of the onion slightly while also acting as a glue that helps the flour coating stick much better than plain milk or water would. That’s why restaurant onion straws have such a thick, even, well-adhered crust.
From a nutrition standpoint, buttermilk is lower in fat than you might expect. Traditional cultured buttermilk typically contains around 100 calories per cup with about 2 grams of fat. It also provides calcium, potassium, and a small amount of protein. If you don’t have buttermilk on hand, mixing 1 cup of regular milk with 1 tablespoon of white vinegar and letting it sit for 5 minutes gives you a solid homemade substitute.
Smoked Paprika
Smoked paprika does double duty in this recipe – it adds a rich, slightly smoky flavor that mimics the depth you’d get from deep-fried food, and it contributes to that gorgeous golden-red color on the finished straws. It’s made from dried and smoked red peppers, which gives it a distinct earthiness that regular sweet paprika just doesn’t have.
Paprika is also a good source of vitamins A, E, and B6. The capsaicin in paprika has been studied for its potential to support metabolism and reduce inflammation. Even in small amounts, smoked paprika elevates a recipe dramatically and costs almost nothing per serving.
Garlic Powder
Garlic powder delivers consistent, evenly distributed garlic flavor throughout the coating without the risk of raw garlic pieces burning in the air fryer. It’s a pantry staple that punches well above its weight in terms of flavor contribution. A little goes a long way, and it creates a savory, umami-rich base note that makes these straws taste more complex than their simple ingredient list suggests.
Garlic in any form contains allicin, a sulfur compound that has been linked to immune support, anti-inflammatory effects, and cardiovascular benefits in various studies. While garlic powder has slightly lower allicin content than fresh garlic, it still retains meaningful levels of beneficial compounds and antioxidants that add nutritional value to the dish.
Cooking Oil Spray
The light mist of cooking spray you apply before air frying is what separates a truly crispy result from a dry, floury one. The spray creates a thin, even layer of fat on the surface of the coating, which conducts heat efficiently and triggers the Maillard reaction – the chemical process responsible for golden color and deep, roasted flavor.
Avocado oil spray is the top recommendation here because of its high smoke point (around 500°F), which is well above the 400°F you’ll typically use in the air fryer. It also has a neutral flavor that doesn’t compete with the seasoning blend. Olive oil spray works too, though it has a lower smoke point and can occasionally impart a slightly bitter flavor at high heat.
Ingredients
This recipe makes approximately 4 servings as a side dish or snack. Here’s everything you need to make the best air fryer onion straws you’ve ever tasted.
- 2 large yellow onions (sweet onions like Vidalia also work great)
- 1 cup buttermilk (substitute: 1 cup milk + 1 tablespoon white vinegar, let sit 5 minutes)
- 1 cup all-purpose flour (substitute: rice flour for extra crunch, or a 1:1 gluten-free flour blend)
- 1/2 cup cornstarch (this is key for maximum crispiness – do not skip)
- 1 teaspoon smoked paprika (substitute: sweet paprika if you don’t have smoked)
- 1 teaspoon garlic powder
- 1/2 teaspoon onion powder
- 1/2 teaspoon cayenne pepper (reduce to 1/4 teaspoon or omit for milder flavor)
- 1 teaspoon salt, divided
- 1/2 teaspoon black pepper
- Cooking oil spray (avocado oil spray preferred, olive oil spray also works)
Step-by-Step Instructions
Follow these steps closely and you’ll have perfectly crispy, golden air fryer onion straws every single time. These instructions are written for complete beginners, but experienced cooks will also find the tips valuable.
- Slice the onions into thin straws. Cut each onion in half from root to stem, then peel off the outer skin. Slice each half into very thin strips, about 1/8 inch thick. You want them thin and consistent so they cook evenly – uneven cuts lead to some straws burning while others stay soft.
- Soak the onion straws in buttermilk. Place all your sliced onions into a large bowl and pour the buttermilk over them. Sprinkle in 1/2 teaspoon of the salt and stir to combine. Let them soak for at least 10 minutes – this step tenderizes the onions slightly and helps the coating stick properly.
- Mix the dry coating. In a separate shallow bowl or a zip-lock bag, combine the all-purpose flour, cornstarch, smoked paprika, garlic powder, onion powder, cayenne pepper, the remaining 1/2 teaspoon of salt, and the black pepper. Whisk or shake together until the spices are fully incorporated throughout the flour.
- Coat the onion straws. Working in small batches, lift the onion straws out of the buttermilk with a fork or your fingers, letting the excess liquid drip off. Drop them into the flour mixture and toss to coat thoroughly. Press the coating gently onto each strand to make sure it adheres well. Shake off any truly excess flour so you don’t get clumps.
- Preheat your air fryer. Set your air fryer to 400°F (200°C) and let it preheat for 3 minutes. Preheating is critical for crispy onion straws – putting them into a cold air fryer leads to a steaming effect instead of a frying effect, which results in a soft, chewy texture instead of the crunch you want.
- Arrange the straws in the basket. Lightly spray your air fryer basket with cooking oil spray. Arrange the coated onion straws in a single layer in the basket, making sure they’re not piled on top of each other. Overlapping straws will steam rather than crisp – work in batches if needed rather than crowding them.
- Spray the tops with oil. Give the tops of the coated straws a generous, even spray of cooking oil. This is what activates the crisping process and gives them that deep golden color. Don’t skip this step – under-oiled straws come out pale and powdery looking.
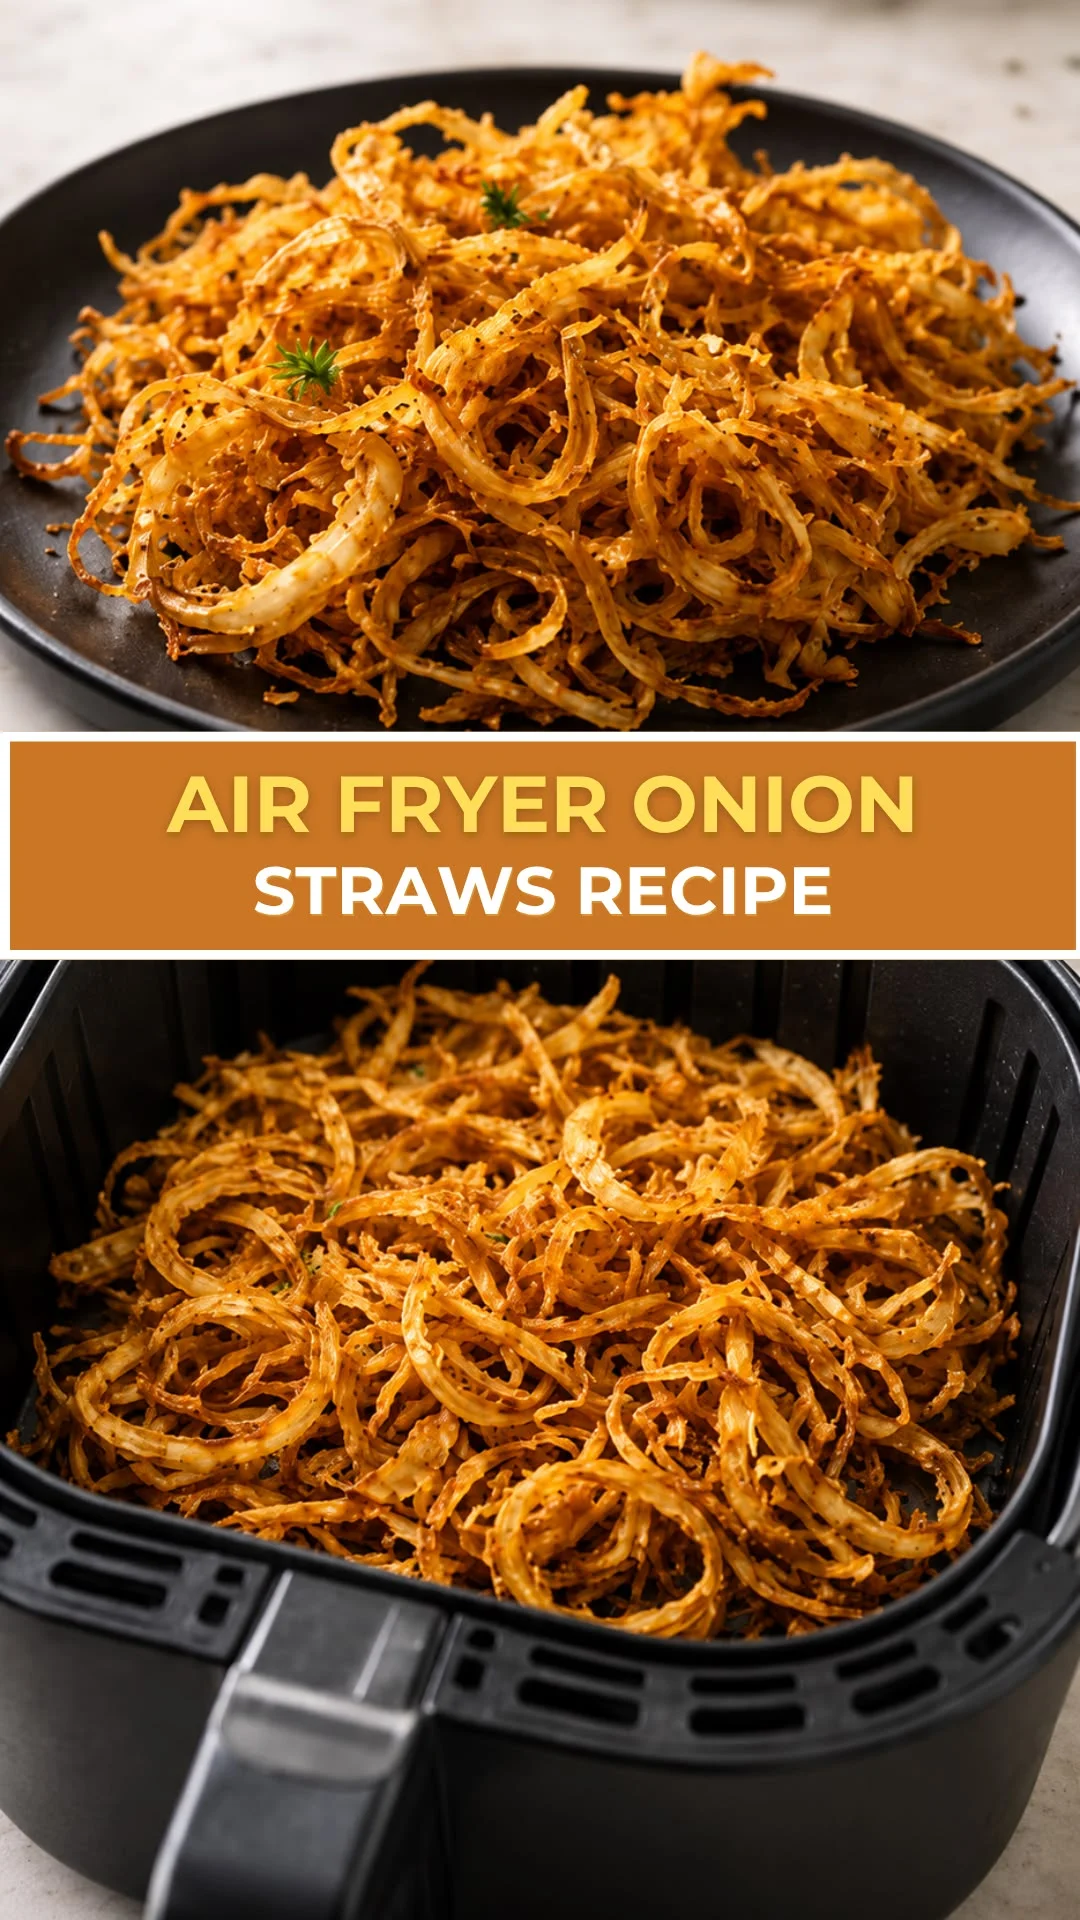
- Air fry the first batch. Cook at 400°F for 8-10 minutes, shaking the basket gently at the 5-minute mark to redistribute the straws. Keep a close eye on them during the last 2-3 minutes because the thin straws can go from golden to overcooked quickly. They’re done when they’re deep golden brown and visibly crisp.
- Season immediately. As soon as each batch comes out of the air fryer, transfer them to a wire rack or a plate lined with paper towels. Season lightly with a pinch of additional salt while they’re still hot – this is when the seasoning sticks best and brings out the full flavor of the straws.
- Repeat with remaining batches. Continue coating and cooking the remaining onion straws in batches. Keep finished batches in a warm oven (200°F) while you cook the rest if you want to serve everything at the same time. Serve immediately for the best possible crunch.
Make It Ahead and Batch Prep Guide
Air fryer onion straws are a fantastic meal prep item because you can prepare multiple components in advance and cook them quickly when needed throughout the week. The key is knowing which parts of the process hold well in advance and which parts need to be done fresh.
The best make-ahead strategy is to slice your onions and soak them in buttermilk in a covered container in the refrigerator. They can sit in the buttermilk soak for up to 24 hours without any negative effects – in fact, a longer soak tends to produce a more tender, flavorful onion underneath the crispy coating. Just make sure the container is sealed tightly so the buttermilk smell doesn’t transfer to other items in your fridge.
You can also pre-mix the dry coating and store it in an airtight jar or zip-lock bag at room temperature for up to 2 weeks. This means on a busy weeknight, your only job is to drain the onions, dredge them through the pre-made flour mixture, and toss them in the air fryer. The whole process takes less than 10 minutes when the components are already prepped.
If you want to batch cook fully finished onion straws, cook multiple batches back to back and store them as instructed in the storage section below. For the best results when serving a crowd, cook each batch right before serving rather than storing them. Air fryer onion straws are truly at their best within the first 15-20 minutes of cooking. Air Fryer Crispy Zucchini Fries
Common Mistakes to Avoid
Even a simple recipe like this one has a few easy-to-make errors that can tank your results. Avoid these pitfalls and your onion straws will come out perfect every time.
- Skipping the buttermilk soak: The soak is not optional. Without it, the flour coating won’t adhere properly and you’ll end up with patches of coating falling off in the air fryer. Even a 5-minute soak is better than nothing, but aim for 10-15 minutes minimum.
- Crowding the basket: This is the number one mistake people make with any air fryer recipe. Piling the straws on top of each other traps steam between them, which makes the coating soft and chewy instead of crispy. Always cook in a single layer, even if it means doing 3-4 batches.
- Skipping the oil spray: Some people assume air fryer recipes don’t need any oil at all. For this recipe specifically, you need that light coat of oil on the surface to trigger browning and crisping. Without it, your onion straws come out pale, floury, and disappointingly soft.
- Not preheating the air fryer: Placing onion straws into a cold air fryer essentially steams them during the initial heat-up phase. This partially cooks the coating in a moist environment before the dry heat can crisp it up, resulting in a gummy texture that never quite recovers.
- Slicing the onions too thick: Thick onion pieces don’t cook through in the time it takes for the coating to crisp up. You end up with a well-browned outside and a nearly raw, crunchy onion inside. Thin, consistent slices – no thicker than 1/8 inch – are essential for the right texture ratio.
- Not shaking the basket mid-cook: Air fryers have a heat element at the top and the air circulates downward. The straws on the top of the pile get hit with more direct heat than those below. Shaking at the halfway mark ensures all the straws get equal exposure and cook evenly from all sides.
Notes, Tips and Variations
Substitutions
If you don’t have buttermilk, the simplest swap is 1 cup of regular whole milk with 1 tablespoon of white vinegar or lemon juice stirred in. Let it sit for 5 minutes and it will curdle slightly and function exactly like buttermilk in this recipe. Plain Greek yogurt thinned with a little water also works well and adds a subtle tang.
For a gluten-free version, swap the all-purpose flour 1:1 with a certified gluten-free flour blend or use rice flour. Rice flour is actually preferred by many air fryer cooks because it produces an extra-crispy, almost crackly coating that holds up well even after a few minutes of sitting. Keep the cornstarch in the mix regardless of which flour you use – it’s the cornstarch that gives you maximum crispiness.
If you want a dairy-free version, use unsweetened oat milk or almond milk with a tablespoon of apple cider vinegar as your soaking liquid. The acidity does the same job as buttermilk in helping the coating stick and tenderizing the onion surface slightly.
Dietary Variations
For a lower-carb version, replace the all-purpose flour with a combination of 3/4 cup almond flour and 1/4 cup coconut flour. Reduce the cornstarch to 2 tablespoons or omit it entirely since almond flour already has a lower carb content. The texture will be slightly less crispy but still very satisfying, and the coating will have a nutty, slightly richer flavor.
To make a spicy version, double the cayenne, add 1/2 teaspoon of chili powder, and include a pinch of crushed red pepper flakes in the dry coating mix. For a smoky barbecue-inspired flavor, add 1 teaspoon of brown sugar and an extra 1/2 teaspoon of smoked paprika to the dry mix. That little bit of sugar caramelizes in the air fryer and creates an incredible depth of flavor.
Cooking Tips
Use a wire rack inside your air fryer basket if your model supports one. Elevating the straws allows hot air to circulate underneath them as well as above, which speeds up cooking time and produces even crispier results. If your air fryer doesn’t have a rack insert, just shake the basket more frequently during cooking.
The double-dip method dramatically improves your coating thickness and crunch. After the first buttermilk-and-flour dredge, dip the coated straws back into the buttermilk briefly, then back into the flour again before air frying. This builds a thicker crust that shatters when you bite through it – exactly what you want for a restaurant-quality result.
Temperature matters more than timing. Air fryers vary significantly in power and airflow, so always judge doneness by color rather than strictly by time. You’re looking for a deep golden brown – not pale yellow (under-cooked) and not dark brown (over-cooked). Start checking at 7 minutes and adjust from there for your specific model. Air Fryer Sweet Potato Fries
Topping Ideas and Flavor Boosters
These air fryer onion straws are incredibly versatile. Here are over 10 ways to use them and upgrade them with toppings and flavor additions.
- Ranch seasoning blend: Add 1 teaspoon of ranch powder to the dry coating for tangy, herby straws that taste incredible as a standalone snack.
- Parmesan cheese: Toss freshly cooked straws with 2 tablespoons of finely grated parmesan while they’re still hot for a salty, savory finish.
- Everything bagel seasoning: Sprinkle liberally over the finished straws for a sesame, poppy seed, and garlic kick that pairs amazingly well with dipping sauces.
- Old Bay seasoning: Swap out the smoked paprika and cayenne for an equal amount of Old Bay for a classic seafood-shack-style seasoning profile.
- Chili lime zest: Squeeze fresh lime juice over the finished straws and sprinkle with chili powder for a bright, tangy Mexican-inspired version.
- Truffle salt: Finish with a pinch of truffle salt instead of regular salt for an elevated, restaurant-worthy flavor that makes these feel fancy without any extra effort.
- Sriracha drizzle: Drizzle lightly over a serving of onion straws just before eating for a sweet-hot contrast that’s genuinely addictive.
- Fresh herbs: Scatter fresh thyme, chives, or flat-leaf parsley over the finished straws for a bright, aromatic finishing touch that also adds visual appeal.
- Dipping sauces: Serve alongside chipotle mayo, comeback sauce, creamy horseradish, spicy ketchup, blue cheese dressing, or classic ranch for dipping.
- Burger topper: Pile a generous handful of crispy onion straws onto your next homemade air fryer burger for a crunch factor that completely transforms the sandwich.
- Soup garnish: Crumble over French onion soup, creamy tomato soup, or loaded baked potato soup for a homemade crouton-style topping with way more flavor.
- Salad crouton replacement: Use a small handful of crumbled onion straws in place of croutons on a Caesar or Cobb salad for a gluten-friendly, flavor-packed alternative.
Who This Recipe Is For
This recipe genuinely works for a wide range of people and cooking situations. Here’s a quick look at who will love these the most.
- Air fryer beginners who want a simple, high-reward recipe that builds confidence and shows off what the appliance can really do.
- Meal preppers who want versatile components that can be added to multiple different meals throughout the week without extra cooking effort.
- Families with kids who need snack options that are crowd-pleasing, easy to customize for different spice tolerances, and significantly lighter than fast food alternatives.
- Home entertainers who want an impressive, restaurant-quality appetizer or side dish they can produce quickly and serve to guests without standing over a hot stove all evening.
- Budget-conscious cooks who want maximum flavor impact from minimal ingredients. Two onions and a handful of pantry staples produce enough straws to serve four people generously.
- Gluten-free eaters who can easily adapt the recipe with a 1:1 gluten-free flour blend or rice flour without sacrificing any of the crunch or flavor.
- Burger and sandwich lovers who want to upgrade their homemade burgers with a crispy, flavorful topping that rivals anything you’d get in a sit-down restaurant.
- Anyone trying to eat out less who wants that “treat yourself” restaurant indulgence feeling at home, with far less oil and at a fraction of the cost.
Storage and Meal Prep Tips
Refrigerator
Once fully cooked and cooled to room temperature, store leftover onion straws in an airtight container lined with a paper towel. The paper towel absorbs any residual moisture and helps the straws maintain as much of their original texture as possible. Store in the refrigerator for up to 3 days.
Avoid stacking them too tightly or sealing them while still warm – trapped steam will cause the coating to soften significantly. Spread them out on a baking sheet to cool fully before transferring to a storage container for best results.
Freezer
You can freeze cooked air fryer onion straws, though the texture will be noticeably less crispy after thawing compared to fresh. Spread them in a single layer on a parchment-lined baking sheet and freeze for 1-2 hours until solid, then transfer to a zip-lock freezer bag. They’ll keep well in the freezer for up to 1 month.
For better freezer results, consider freezing the uncooked, coated onion straws instead of the cooked ones. Freeze them on a sheet pan until solid, then bag them. When you’re ready to eat, air fry them straight from frozen at 400°F for 12-14 minutes – no thawing needed and they come out much crispier than pre-cooked and frozen straws. Air Fryer Chicken Tenders Recipe
Reheating
The air fryer is the only reheating method worth using for onion straws. Place refrigerated straws in a single layer in your preheated air fryer basket and cook at 375°F for 3-4 minutes. They’ll come back to nearly their original crispiness, which is something a microwave or conventional oven simply cannot achieve.
Never reheat onion straws in the microwave. The microwave heats by creating steam from within the food, which is the exact opposite of what you need to restore crispiness. Microwave-reheated onion straws turn completely soft and rubbery within 30 seconds. The air fryer is the only tool for the job here.
Nutrition Facts
The following nutrition estimates are based on one serving (approximately 1/4 of the total recipe) prepared using all-purpose flour and a light coating of avocado oil spray. Actual values may vary based on specific brands, onion size, and exact oil usage.
| Nutrient | Per Serving |
|---|---|
| Calories | 185 kcal |
| Protein | 4g |
| Total Carbohydrates | 34g |
| Total Fat | 4g |
| Dietary Fiber | 2g |
| Total Sugars | 5g |
| Sodium | 420mg |
For comparison, a typical restaurant serving of deep-fried onion straws can contain 400-600 calories per serving with 25-35 grams of fat. The air fryer version delivers all of that flavor satisfaction at roughly half the calories and a fraction of the fat – making it a genuinely smarter choice without any compromise on taste.
FAQs
Can I use a different type of onion for air fryer onion straws?
Yes, absolutely. Yellow onions are the standard choice because their balanced flavor and firm texture hold up well during cooking. Sweet onions like Vidalia produce a milder, slightly sweeter result that many people prefer. Red onions work too and give a beautiful color contrast, though they have a slightly sharper flavor that intensifies in the air fryer. White onions tend to be more pungent and are less commonly used for this recipe, but they will still produce crispy straws if that’s what you have on hand.
Why are my onion straws not crispy?
The most common reasons for soft onion straws in the air fryer are overcrowding the basket, skipping the oil spray, or not preheating the appliance. All three of these issues prevent the dry, intense circulating heat from reaching the coating surface properly. Make sure you’re cooking in a true single layer with space between the straws, that you’ve applied a generous spray of oil to the tops before cooking, and that your air fryer has been preheated to 400°F for at least 3 minutes before you add the straws.
Can I make air fryer onion straws without buttermilk?
Yes, there are several effective substitutes. The simplest is to mix 1 cup of regular milk with 1 tablespoon of white vinegar or lemon juice and let it sit for 5 minutes until it curdles slightly. You can also use plain Greek yogurt thinned with 2-3 tablespoons of water, or unsweetened plant-based milk with apple cider vinegar for a dairy-free version. All of these options provide the acidity needed to help the coating adhere and slightly tenderize the onion surface.
How do I keep air fryer onion straws crispy after cooking?
The best way to maintain crispiness is to transfer cooked straws immediately to a wire rack rather than a plate or paper towel. A wire rack allows air to circulate under the straws so the bottom doesn’t steam against a flat surface. If you’re cooking multiple batches and need to hold the finished ones, place them on a wire rack in a 200°F oven – the low, dry heat will keep them warm and crispy without overcooking them. Avoid covering them with foil, which traps steam and softens the coating.
What dipping sauce goes best with air fryer onion straws?
This comes down to personal preference, but some combinations work especially well. Chipotle mayo (equal parts mayonnaise and canned chipotle peppers in adobo sauce, blended smooth) is a fan favorite because the smoky heat complements the smoked paprika in the coating perfectly. Classic ranch dressing is universally popular. Comeback sauce – a Southern staple made from mayo, ketchup, hot sauce, garlic powder, and Worcestershire – is another excellent option. For something unexpected, try a simple honey sriracha dip or even a creamy blue cheese dressing if you’re serving these alongside wings.
Conclusion
There’s a reason this recipe has become a staple in air fryer households everywhere – it delivers restaurant-quality crunch with pantry staple ingredients and almost zero cleanup. These air fryer onion straws are the kind of recipe that makes people genuinely excited about cooking at home, and once you’ve made them, you’ll never go back to paying restaurant prices for something this easy to recreate in your own kitchen.
Whether you’re making them as a snack, a side dish, a burger topping, or a soup garnish, this recipe delivers every single time. The key steps – the buttermilk soak, the cornstarch-heavy coating, the single-layer cooking, and the oil spray – each play a specific role in creating that perfect crunch. Follow the steps as written your first time, then feel free to experiment with the flavor variations and toppings that sound most exciting to you.
Go slice some onions and get your air fryer preheating. Your new favorite recipe is about 20 minutes away, and it’s going to be even better than you’re expecting.