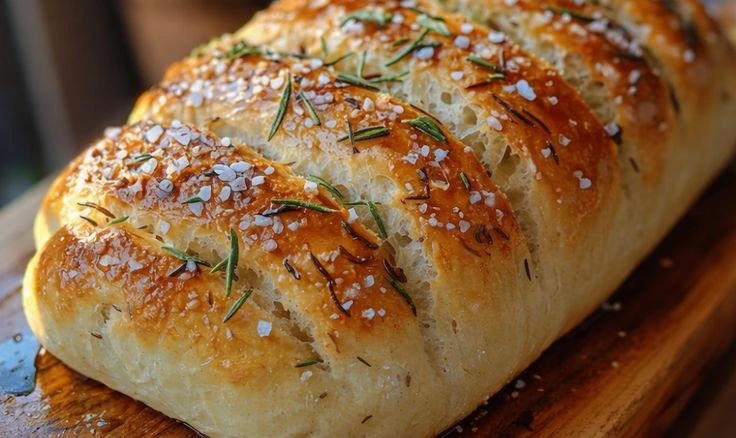
THE BEST N°1 Crusty Artisan Bread Recipe (Easy Bakery-Style Loaf at Home!)
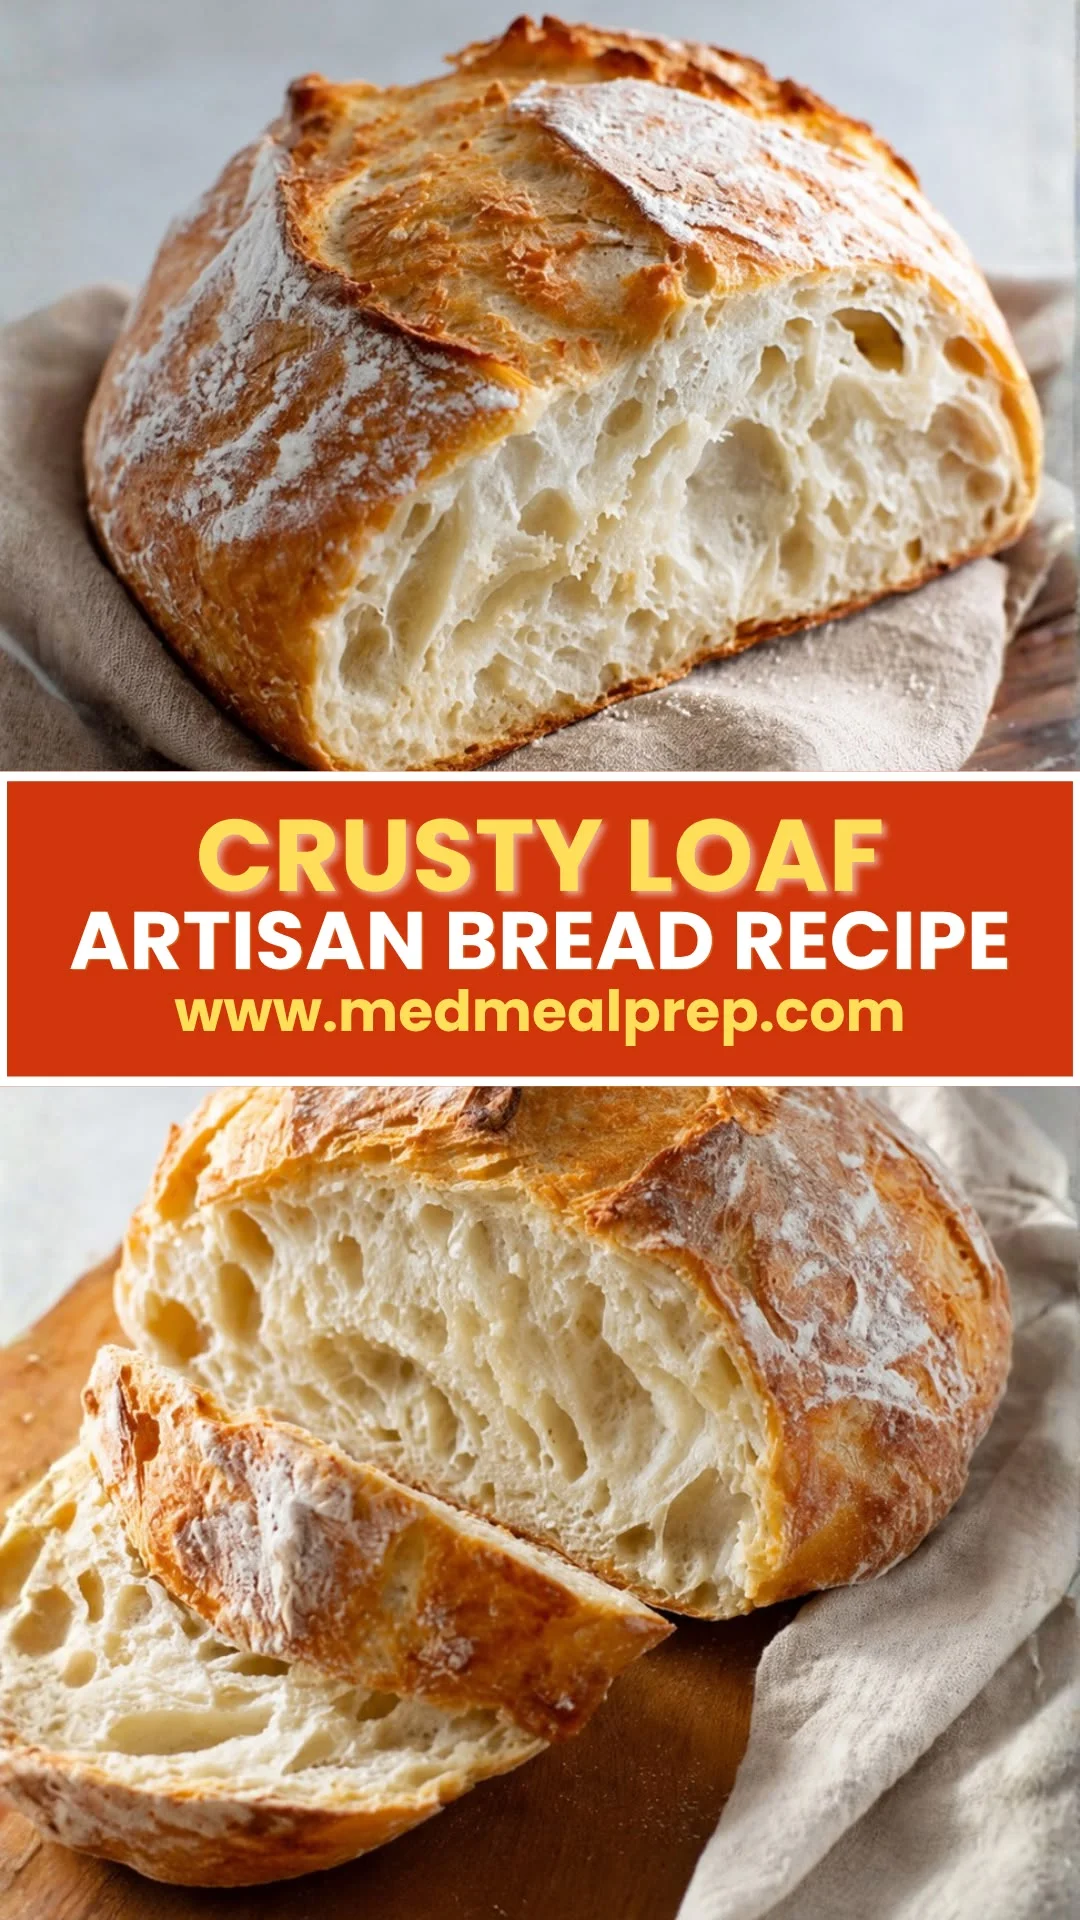
There is something almost magical about pulling a crusty artisan bread recipe out of your own oven – a golden, crackly loaf that smells like a Mediterranean bakery and looks like it took a professional all day to make. The truth? You only need four basic ingredients and a little patience to get there. This recipe is proof that great bread does not require a culinary degree or expensive equipment.
In this post, you will find everything you need to bake a bakery-style loaf at home from scratch. We cover the origins of artisan bread in Mediterranean food culture, the health benefits of each ingredient, step-by-step beginner-friendly instructions, batch prep tips, storage guidance, and much more.
Whether you are meal prepping for the week or baking for a family dinner, this crusty artisan bread recipe will become a staple in your kitchen. Let’s get into it.
Table of Contents
Personal Note
The first time I baked homemade bread, I was completely intimidated. I had eaten incredible crusty loaves at a small family-run bakery on the coast of southern Italy, and I was convinced that kind of bread could only be made by someone with decades of experience and a wood-fired stone oven. I was wrong.
Once I started exploring Mediterranean-style cooking and meal prep, I realized that great bread is fundamentally humble. It relies on simple, honest ingredients – flour, water, salt, and yeast – prepared with care and time. That philosophy is at the heart of how people eat along the Mediterranean coast, and it changed how I think about food entirely.
Now I bake a loaf almost every weekend. It fills the kitchen with an incredible aroma, pairs beautifully with olive oil, hummus, roasted vegetables, and fresh herbs, and it makes weekday meals feel just a little more special. I hope this recipe does the same for you.
Origins of the Dish
Bread is one of the oldest foods in human history, and the Mediterranean region sits at the center of that story. Archaeological evidence from ancient Egypt, the Fertile Crescent, and the Levant shows that people were baking leavened bread as far back as 14,000 years ago. The basic process – fermenting a mixture of grain and water and then baking it over heat – spread across the entire Mediterranean basin and became the foundation of daily life in countless cultures.
In ancient Greece and Rome, bread was not just a food – it was currency, religion, and culture all at once. Roman bakers, known as pistores, operated large communal ovens called fornax that served entire neighborhoods. The bread they produced was dense, chewy, and often studded with seeds or grains, bearing a remarkable resemblance to the rustic artisan loaves we bake today. The Roman word for bread, panis, gave rise to the Italian word pane and the Spanish pan, both still in everyday use.
Across North Africa, the Middle East, and the Iberian Peninsula, different regional bread traditions developed in parallel. Moroccan khobz, Turkish ekmek, Lebanese kaak, and Italian pane di casa all share the same ancient DNA – a simple dough of grain and water, shaped by hand and baked to a crackling crust. What we now call artisan bread is simply a return to that original, slow-fermented tradition, before commercial bread production stripped away flavor in the name of speed and shelf life.
The modern artisan bread movement, which exploded in the late 20th century thanks to bakers like Chad Robertson and Jim Lahey, was really a rediscovery of Mediterranean and European heritage baking. The no-knead method popularized by Lahey in 2006 closely mirrors the slow, hydration-heavy techniques used by village bakers across Italy, France, and Spain for generations. When you bake a crusty artisan bread recipe at home, you are participating in one of humanity’s oldest and most satisfying traditions.
Why You’ll Love This Recipe
This is not just another bread recipe. It is a reliable, repeatable, endlessly adaptable loaf that fits perfectly into a Mediterranean meal prep lifestyle. Here is why home bakers keep coming back to it.
- Only four ingredients – flour, water, yeast, and salt. No additives, no preservatives, no mystery ingredients.
- No kneading required – the long, slow rise does all the work for you while you go about your day.
- Incredibly versatile – pair it with olive oil, mezze spreads, soups, stews, or roasted vegetables for a full Mediterranean meal.
- Beginner-friendly – if you can stir ingredients together, you can make this bread. No stand mixer needed.
- Bakery-quality crust – baking in a Dutch oven traps steam and produces that signature shatter-crunch crust you love.
- Great for meal prep – one batch gives you enough bread for multiple days of meals and snacks.
- Freezer-friendly – slice and freeze for instant access to fresh-tasting bread any day of the week.
- Lower in additives than store-bought – you control every single ingredient that goes into your loaf.
- Deeply satisfying to make – there is a real sense of accomplishment in creating something this good from scratch.
- Endlessly customizable – add olives, rosemary, za’atar, sesame seeds, or sun-dried tomatoes to change the flavor profile completely.
Health Benefits and Ingredient Highlights
The Mediterranean diet is consistently ranked as one of the healthiest eating patterns in the world, and bread – real, traditionally made bread – has always been part of it. The ingredients in this crusty artisan bread recipe are simple, but each one brings something meaningful to the table.
Bread Flour (or All-Purpose Flour)
Bread flour has a higher protein content than all-purpose flour, typically around 12-14%, which develops more gluten during fermentation. More gluten means a chewier, more structured crumb and a loaf that holds its shape beautifully during baking. If you use whole wheat or spelt flour as part of the mix, you also get the benefit of additional fiber, B vitamins, and minerals like magnesium and iron.
In Mediterranean food traditions, whole grain and minimally processed flours have always been preferred over heavily refined options. Using even a portion of whole grain flour in your artisan loaf aligns your baking with the nutritional principles of the Mediterranean diet, which emphasizes whole foods over processed alternatives.
Water
Water is the silent hero of bread baking. The ratio of water to flour, called hydration, determines the texture of your crumb. A higher hydration dough, like the one in this recipe, produces a more open, airy crumb with those gorgeous irregular holes you see in great artisan loaves. It also allows the natural enzymes in the flour to work more effectively during the long fermentation process.
Using filtered or room-temperature water is ideal, especially if your tap water is heavily chlorinated. Chlorine can interfere with yeast activity, which may affect your rise time and final texture. This is a small detail, but it matters when you are relying on just four ingredients.
Active Dry Yeast (or Instant Yeast)
Yeast is a living organism that ferments the sugars in flour, producing carbon dioxide gas that makes the dough rise. Beyond leavening, yeast fermentation also creates the complex flavor compounds that give artisan bread its characteristic depth – that slight tang and rich, wheaty aroma that store-bought bread simply cannot replicate.
The long, cold fermentation used in this recipe allows yeast to work slowly over many hours, which develops significantly more flavor than a quick same-day rise. Research also suggests that longer fermentation may partially break down phytic acid in the flour, which can improve the bioavailability of minerals like zinc, iron, and magnesium. That is a genuine nutritional advantage, not just a flavor one.
Sea Salt
Salt does more than season bread – it strengthens gluten structure, controls fermentation speed, and dramatically enhances the flavor of every other ingredient. Without salt, bread tastes flat and lifeless, no matter how good your technique is. In Mediterranean cooking, sea salt is the default choice, appreciated for its clean mineral flavor and unrefined character.
Using a quality sea salt or kosher salt in your dough gives you control over sodium levels without the need for added preservatives. When used in the right proportion, about 1.8-2% of the flour weight, salt supports both flavor and structure without making the bread taste salty. It is one of the most important variables in bread baking, and getting it right makes a noticeable difference in every bite.
Olive Oil (Optional but Recommended)
While the base recipe does not require olive oil in the dough itself, brushing or drizzling the baked loaf with extra virgin olive oil is a deeply Mediterranean finishing touch. Olive oil is the cornerstone of Mediterranean cuisine – rich in monounsaturated fats, particularly oleic acid, which is associated with reduced inflammation and improved cardiovascular health.
Extra virgin olive oil also contains polyphenols – powerful antioxidants that support heart health, brain function, and healthy aging. Pairing your freshly baked artisan bread with a good olive oil for dipping is not just delicious, it is genuinely good for you in the context of a balanced Mediterranean diet. Mediterranean olive oil dipping sauce recipe
Ingredients | Crusty Artisan Bread Recipe
This crusty artisan bread recipe uses a short, honest ingredient list. Here is everything you need to make one standard loaf, roughly 8-10 slices.
- 3 cups (360g) bread flour – (substitute up to 1 cup with whole wheat flour or spelt flour for added fiber and a nuttier flavor)
- 1 1/2 teaspoons fine sea salt – (kosher salt works equally well; avoid iodized table salt if possible)
- 1/4 teaspoon active dry yeast – (or 1/8 teaspoon instant yeast for a longer cold ferment; use 1 teaspoon if you want a shorter same-day rise)
- 1 1/2 cups (355ml) warm water – (temperature should be around 100-110°F / 38-43°C; too hot will kill the yeast, too cold will slow the rise)
- Extra virgin olive oil for serving – (optional but highly recommended for a true Mediterranean experience)
That is all. Five items, four of which go into the dough. Do not let the simplicity fool you – the result is extraordinary.
Step-by-Step Instructions | Crusty Artisan Bread Recipe
Follow these steps carefully the first time, then adjust to your preferences as you bake it again and again. This method uses an overnight cold ferment and a Dutch oven for the best results.
- Mix the dry ingredients. In a large mixing bowl, whisk together the bread flour and sea salt until evenly combined. Make a small well in the center of the flour mixture. This helps the yeast and water integrate evenly throughout the dough from the start.
- Add the yeast to the water. Measure your warm water and sprinkle the active dry yeast over the surface. Let it sit for about 5 minutes until it becomes slightly foamy – this tells you the yeast is alive and active. If the yeast does not foam, it may be expired and you should start fresh.
- Combine wet and dry ingredients. Pour the yeast mixture into the well you made in the flour. Stir with a wooden spoon or flexible spatula until a shaggy, sticky dough forms with no dry flour remaining at the bottom of the bowl. The dough will look rough and messy at this stage – that is completely normal and expected.
- Cover and let rise at room temperature. Cover the bowl tightly with plastic wrap or a damp kitchen towel. Let the dough rise at room temperature (around 70-75°F / 21-24°C) for 12-18 hours, ideally overnight. You will know it is ready when the surface is dotted with bubbles and the dough has roughly doubled in size.
- Optional cold ferment for more flavor. After the room-temperature rise, you can place the covered bowl in the refrigerator for an additional 8-24 hours. This slows fermentation further, developing an even more complex, slightly tangy flavor. Take the dough out of the fridge about 1 hour before shaping to let it come back to room temperature.
- Prepare your work surface and shape the dough. Generously flour a clean work surface, then turn the dough out onto it. The dough will be sticky and loose. Using floured hands, gently fold the edges toward the center to form a rough ball. Flip the dough seam-side down and use your hands to tuck the dough underneath itself in a rotating motion, creating surface tension that helps the loaf hold its shape in the oven.
- Second rise in a floured proofing basket or bowl. Line a medium bowl with a clean kitchen towel and dust it heavily with flour (or use a banneton proofing basket if you have one). Place your shaped dough seam-side up into the bowl. Cover loosely with the edges of the towel and let it rest for 1-2 hours at room temperature until it looks puffy and relaxed.
- Preheat your oven and Dutch oven. About 30 minutes before baking, place your Dutch oven (with its lid on) into your oven and preheat everything to 475°F (245°C). The Dutch oven needs to be screaming hot – this is what creates that explosive initial rise and the crackling crust. Do not skip this preheating step.
- Score and load the dough. Cut a piece of parchment paper large enough to act as a sling. Turn your dough out onto the parchment, seam-side down. Using a sharp knife, lame, or razor blade, slash the top of the dough with a confident single cut about 1/2 inch deep at a slight angle. This scoring allows the bread to expand in a controlled, beautiful way and prevents it from bursting unevenly.
- Bake covered for the first phase. Carefully remove the screaming-hot Dutch oven from the oven, lift the dough using the parchment paper sling, and lower it into the Dutch oven. Put the lid on and return it to the oven. Bake covered at 475°F for 30 minutes – the trapped steam from the dough itself creates the ideal crust-developing environment inside the pot.
- Bake uncovered for the crust. After 30 minutes, carefully remove the lid of the Dutch oven. Continue baking uncovered for another 15-20 minutes, until the crust is a deep golden brown, almost mahogany in color. This uncovered phase is what gives you that signature crackly artisan crust. The internal temperature of a fully baked loaf should read 200-210°F (93-99°C) on an instant-read thermometer.
- Cool completely before slicing. This step is non-negotiable. Lift the loaf out of the Dutch oven and place it on a wire cooling rack. Let it cool for at least 45 minutes to 1 hour before cutting into it. The interior of the bread is still cooking and setting up during this cooling period – cutting too early gives you a gummy, undercooked crumb, no matter how perfect the crust looks.
Make It Ahead and Batch Prep Guide | Crusty Artisan Bread Recipe
This crusty artisan bread recipe was practically designed for meal prep. The long fermentation process means most of the “work” happens while you sleep or go about your day, making it incredibly easy to fit into a weekly cooking routine. Once you establish a rhythm, you can have fresh homemade bread ready almost any day of the week with minimal active effort.
The best strategy for batch prep is to mix two or three batches of dough on Sunday evening and stagger the fermentation times. Place one batch in the fridge immediately for a slow 48-72 hour cold ferment. Let the second batch ferment at room temperature overnight and bake Monday morning. Use the third batch for mid-week baking. This gives you a steady rotation of fresh bread without having to mix new dough every day.
You can also bake two loaves at once if you have a large enough oven and two Dutch ovens. Bake both on the same day, let them cool completely, then slice one and freeze it in individual portions for quick access throughout the week. Keep the second loaf at room temperature for immediate use. This two-loaf approach takes the same amount of active time and doubles your output instantly.
Another great batch prep trick is to prepare a large quantity of the dry ingredient mix – flour and salt pre-weighed and combined in zip-lock bags or airtight containers. When you are ready to bake, just add water and yeast, and you have cut your prep time nearly in half. Label each bag with the date and the amount of water and yeast to add so you never have to measure the same things twice in the same week. Mediterranean weekly meal prep guide
Common Mistakes to Avoid | Crusty Artisan Bread Recipe
Even a simple recipe has its pitfalls. These are the most common errors home bakers make with this type of loaf, and knowing them in advance will save you a lot of frustration.
- Using water that is too hot. Water above 120°F (49°C) will kill your yeast before it even has a chance to work. Always test the water temperature – it should feel comfortably warm on your wrist, not hot. Aim for 100-110°F (38-43°C) every time.
- Not preheating the Dutch oven long enough. A lukewarm Dutch oven produces a loaf with a pale, soft crust instead of that dramatic bakery-style crunch. Give it a full 30 minutes at 475°F before you bake – the pot needs to be genuinely blazing hot all the way through.
- Cutting into the loaf too soon. This is the hardest mistake to avoid because the bread smells incredible straight from the oven. But slicing before the loaf has cooled for at least 45 minutes gives you a dense, gummy interior that undoes all of your hard work. Patience here is truly rewarded.
- Under-fermenting the dough. If your dough has not developed visible bubbles and roughly doubled in size after the first rise, it is not ready to shape. A dough that has not fermented enough will bake into a dense, flavorless brick. Give it more time rather than less – over-fermentation at this yeast quantity is very hard to achieve with a cold ferment.
- Skipping the scoring step. Scoring is not decorative – it controls where and how the bread expands in the oven. Without it, the crust can burst unpredictably at weak spots, giving you an uneven loaf that does not rise to its full potential. One confident slash is all you need.
- Using too much flour when shaping. Adding excessive flour to the work surface during shaping makes the dough stiff and difficult to develop surface tension. Use just enough to prevent sticking, and rely on the folding and tucking technique to build structure in the dough rather than flour alone.
Notes, Tips and Variations | Crusty Artisan Bread Recipe
Substitutions
You can substitute up to one-third of the bread flour with whole wheat, spelt, or einkorn flour for a more wholesome, nutty loaf. Go beyond one-third whole grain and the gluten structure weakens, which can result in a denser crumb – not necessarily bad, but different from the open, airy texture of a classic artisan loaf.
All-purpose flour works as a substitute for bread flour if that is what you have. The crumb will be slightly less chewy and the rise a touch less dramatic, but the flavor and crust will still be excellent. Avoid cake flour or self-rising flour – neither has the protein content needed for proper gluten development.
Dietary Variations
This recipe is naturally vegan and dairy-free as written, making it suitable for a wide range of dietary preferences. If you follow a plant-based Mediterranean diet, this loaf pairs beautifully with hummus, baba ganoush, white bean dip, and other legume-based spreads.
For a gluten-free version, you will need a dedicated gluten-free artisan bread recipe using a blend of rice flour, tapioca starch, and xanthan gum – this specific recipe is not adaptable to a gluten-free format without significant reformulation. If you are gluten-sensitive rather than celiac, you may find that the long fermentation of this recipe makes the bread easier to digest than a standard commercial loaf, as the extended fermentation partially breaks down some gluten proteins.
Cooking Tips
If you do not own a Dutch oven, you can still bake a great loaf. Place a shallow baking pan on the bottom rack of your oven and fill it with boiling water when you put the bread in – this creates a steam-filled environment that mimics the Dutch oven effect. Bake the bread on a preheated baking stone or heavy sheet pan for the best results.
For an even darker, more caramelized crust, brush the top of the dough lightly with water just before scoring and loading it into the Dutch oven. Some bakers also add a light dusting of semolina or rice flour to the outside of the shaped dough before baking, which adds a pleasant crunch and a slightly nutty note to the exterior. These are small touches that make a noticeable difference in the finished loaf.
Topping Ideas and Flavor Boosters | Crusty Artisan Bread Recipe
One of the greatest things about a crusty artisan bread recipe is how easily it takes on different flavors. Here are some topping and mix-in ideas that are especially well-suited to Mediterranean cooking.
- Za’atar and olive oil – brush the dough with olive oil and sprinkle za’atar generously over the top before the final rise for a deeply aromatic, Middle Eastern-inspired loaf
- Kalamata olives – fold roughly chopped pitted olives into the dough after the first rise for a savory, briny bread that pairs perfectly with cheese and tomatoes
- Fresh rosemary and sea salt – press whole rosemary sprigs into the surface of the dough just before baking and finish with a sprinkle of flaky sea salt
- Sun-dried tomatoes and basil – fold chopped sun-dried tomatoes and torn fresh basil into the dough for a loaf that tastes like summer in the Italian countryside
- Sesame seeds – roll the shaped dough in sesame seeds before the second rise for a nutty crust that is a nod to Turkish and Levantine bread traditions
- Roasted garlic – squeeze an entire head of roasted garlic into the dough and fold it in for a mellow, sweet, deeply savory variation
- Feta cheese and dill – fold crumbled feta and fresh dill into the dough for a Greek-inspired loaf that is incredible with cucumber and tomato salad
- Nigella seeds (black seed) – sprinkle over the top of the dough before baking for a slight peppery bitterness and beautiful visual contrast
- Cumin and coriander – add a teaspoon of each to the dry flour mixture for a warm, earthy North African-inspired flavor profile
- Lemon zest and thyme – stir finely grated lemon zest and fresh thyme leaves into the dough for a bright, herby loaf that complements fish and seafood beautifully
- Dukkah crust – press a thin layer of dukkah (Egyptian nut and spice blend) onto the surface of the loaf just before baking for a uniquely crunchy, aromatic exterior
Who This Recipe Is For | Crusty Artisan Bread Recipe
This crusty artisan bread recipe has been designed to work for a wide range of home cooks and meal preppers. If any of the following descriptions sound like you, this recipe belongs in your regular rotation.
- Mediterranean diet followers who want to bake their own whole grain-friendly, additive-free bread as part of a clean eating lifestyle
- Beginner bakers who want to start their bread-making journey with a simple, forgiving recipe that delivers professional-looking results
- Meal preppers who batch-cook on weekends and want a bread they can slice and freeze for convenient weekday use
- Families who want to replace store-bought sandwich bread with a healthier, more flavorful homemade alternative
- Dinner party hosts who want to impress guests with a beautiful, bakery-style centerpiece loaf that cost almost nothing to make
- Clean eaters and label readers who want full control over every ingredient that goes into their food
- Anyone who loves mezze – this bread is the perfect vehicle for hummus, tzatziki, baba ganoush, and all of your favorite Mediterranean dips and spreads best Mediterranean mezze platter ideas
- Experienced bakers looking for a reliable, endlessly customizable base recipe they can build upon with different flours, add-ins, and techniques
Storage and Meal Prep Tips | Crusty Artisan Bread Recipe
Refrigerator
Storing artisan bread in the refrigerator is not ideal for texture – the cold temperature actually accelerates staling in bread. However, if you need to keep a cut loaf for more than two days, wrap it tightly in plastic wrap or a beeswax wrap and store it in the fridge for up to 5 days. Revive refrigerated bread by warming individual slices in a toaster or in the oven at 350°F for 5-8 minutes.
Uncut, whole loaves keep best at room temperature. Store your unsliced loaf in a bread bag, a clean kitchen towel, or a bread box for up to 2 days. Avoid sealing it in an airtight container while it is still warm or the steam will soften the crust. Let it cool fully before storing.
Freezer
This bread freezes extremely well, making it a perfect candidate for meal prep batching. Let the loaf cool completely, then slice the entire thing before freezing. Place the slices in a single layer on a baking sheet and freeze for 1 hour until solid, then transfer to a zip-lock freezer bag. This prevents the slices from sticking together, so you can grab exactly how many you need without defrosting the whole bag.
Frozen slices keep their quality for up to 3 months. You can also freeze whole unsliced loaves if you prefer – wrap tightly in plastic wrap and then in aluminum foil before placing in the freezer. Defrost a whole loaf overnight at room temperature, then refresh it in a 350°F oven for 10-15 minutes to bring the crust back to life.
Reheating
For frozen slices, you have two easy options. Drop them straight into the toaster from frozen – they will be perfectly warm and crispy in 3-4 minutes with no defrosting needed. Alternatively, place them on a baking tray in a 375°F oven for 8-10 minutes, which produces a slightly more oven-fresh result.
To reheat a whole loaf that has gone a bit stale, run the entire loaf briefly under cold running water to wet the exterior, then place it directly in a 400°F oven for 10-12 minutes. The steam from the water evaporating inside the crust revives the loaf dramatically – the crust crackles again and the interior becomes soft and warm. This is a classic technique from French and Italian home cooking that genuinely works wonders.
Nutrition Facts | Crusty Artisan Bread Recipe
The following nutrition information is an estimate per serving, based on one loaf cut into 10 slices. Values will vary depending on the specific flour blend used.
| Nutrient | Per Slice (1/10 of loaf) |
|---|---|
| Calories | 145 kcal |
| Protein | 5g |
| Total Carbohydrates | 29g |
| Dietary Fiber | 1g (2-3g with whole wheat blend) |
| Total Fat | 0.5g |
| Saturated Fat | 0g |
| Sugar | 0g |
| Sodium | 270mg |
Swapping one cup of bread flour for whole wheat flour increases the fiber content to approximately 2.5-3g per slice and adds more B vitamins, iron, and magnesium – a worthwhile upgrade that barely affects the taste or texture of the finished loaf.
FAQs | Crusty Artisan Bread Recipe
Can I make this crusty artisan bread recipe without a Dutch oven?
Yes, absolutely. While a Dutch oven gives you the best results by trapping steam and producing that signature thick crust, you can replicate the effect using a regular oven. Place an empty metal baking pan or cast iron skillet on the bottom rack of your oven while it preheats. When you put your bread in, pour one cup of boiling water into the pan – the steam this creates mimics the Dutch oven environment. Bake on a preheated pizza stone or heavy baking sheet for the best crust development. The results will not be identical, but they will still be excellent.
Why did my bread not rise properly?
The most common culprits are yeast that is past its expiration date, water that was too hot and killed the yeast, or a room that was too cold for the fermentation process. Always proof your yeast in warm water before mixing – if it does not foam within 10 minutes, the yeast is dead and needs to be replaced. If your kitchen is cool (below 65°F/18°C), the dough will rise more slowly – simply give it more time, or place the covered bowl in a slightly warm oven with just the light on, which provides gentle warmth.
Can I use sourdough starter instead of commercial yeast?
Yes, and the results are spectacular if you have an active starter. Replace the commercial yeast with about 100g (roughly 1/2 cup) of active, bubbly sourdough starter, and reduce the water slightly to about 1 1/4 cups. The rise time will be longer – typically 12-18 hours at room temperature for the first rise depending on the strength of your starter. The flavor will be more complex and tangy, which aligns beautifully with traditional Mediterranean bread-making practices that predate commercial yeast by thousands of years.
How do I get the big, open holes in the crumb like a bakery loaf?
Open, airy crumb structure comes from high hydration, long fermentation, and gentle handling during shaping. Make sure your dough is sticky and quite loose after mixing – resist the temptation to add more flour to make it easier to handle. During shaping, use a light touch and preserve as many of the gas bubbles as possible rather than knocking them all out. The preheat phase of baking, with the Dutch oven lid on, also plays a critical role – the rapid steam burst in those first 30 minutes is what drives the dramatic oven spring that opens up the crumb.
Is homemade artisan bread healthier than store-bought bread?
In most cases, yes – especially when baked with high-quality flour and using a long fermentation method. Commercial bread often contains added sugars, preservatives, dough conditioners, and highly processed oils that you simply do not need in a homemade loaf. The long fermentation process used in this crusty artisan bread recipe also partially breaks down phytic acid, which can improve mineral absorption. When combined with whole grain flour options and the absence of artificial additives, homemade artisan bread is a genuinely wholesome choice that fits comfortably into a Mediterranean diet framework.
Conclusion | Crusty Artisan Bread Recipe
Baking a crusty artisan bread recipe at home is one of the most rewarding things you can do in the kitchen. It costs almost nothing, requires very little active effort, and produces a loaf that is genuinely superior to anything you can buy at most supermarkets. More than that, it connects you to a baking tradition that has been at the heart of Mediterranean food culture for thousands of years.
Whether you are a first-time bread baker or someone who has been working with dough for years, this recipe gives you a dependable foundation to work from. Start with the basic four-ingredient version, master the technique, and then start exploring the flavor variations that excite you most. Za’atar and olive oil one week, roasted garlic the next – the possibilities are genuinely endless.
Give this recipe a try this weekend, and let us know how it turns out in the comments below. Share your loaf photos, your favorite topping combinations, or any questions you have along the way. Happy baking – your kitchen is about to smell incredible.