
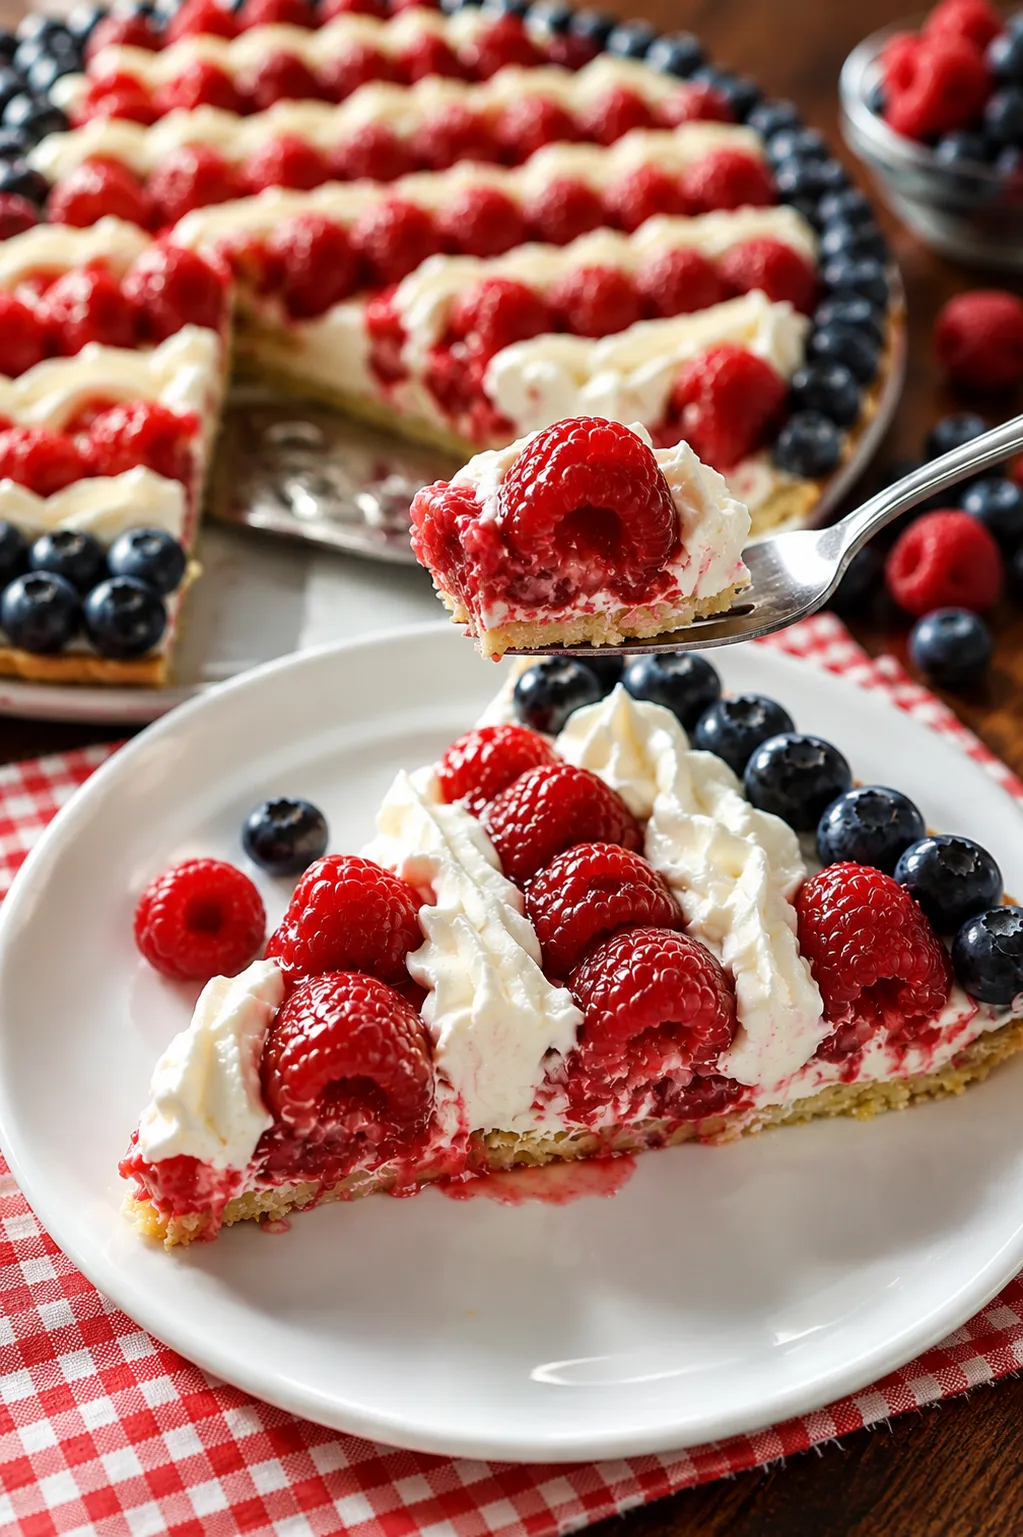
THE BEST N°1 American Flag Fruit Pizza Recipe | Healthy Patriotic Summer Dessert
American Flag Fruit Pizza Recipe is Fresh, colorful, and incredibly easy to make, this American Flag Fruit Pizza is the perfect patriotic dessert for Fourth of July celebrations, Memorial Day cookouts, summer picnics, and family gatherings. Inspired by Mediterranean-style eating, it combines fresh berries, a lighter cream cheese topping, and a wholesome crust for a balanced treat that’s naturally rich in vitamins, fiber, and protein without feeling overly heavy. In this guide, you’ll learn everything from the history of fruit pizza to expert preparation tips, meal prep strategies, storage advice, and delicious variations.
Table of Contents
Introduction
Summer desserts don’t have to be loaded with artificial ingredients or excessive sugar to impress a crowd. This colorful fruit pizza delivers fresh berries, creamy yogurt-enhanced frosting, and a lightly sweetened crust that tastes indulgent while fitting beautifully into a Mediterranean-inspired eating pattern.
Whether you’re planning a holiday barbecue or simply looking for a beautiful centerpiece dessert, this guide will show you exactly how to make it successfully every time.
A Personal Note
One of my favorite parts of Mediterranean cooking is celebrating seasonal produce. During berry season, colorful fruit naturally becomes the star of the table, making desserts like this both beautiful and nourishing. Recipes that showcase fresh ingredients always remind me that simple foods often create the most memorable meals.
Origins of the Dish
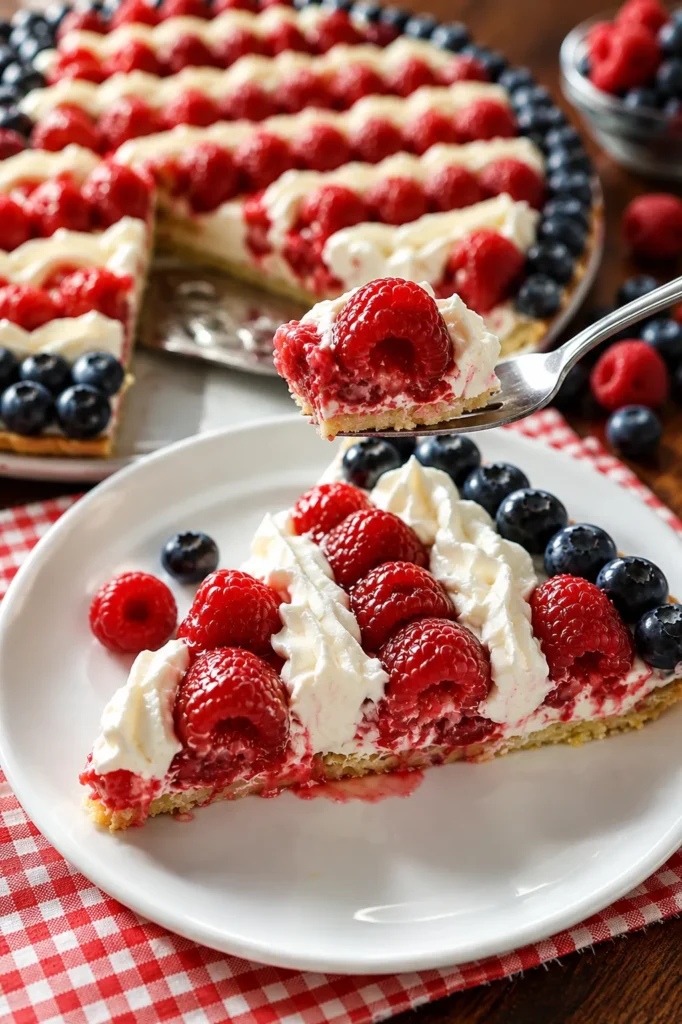
Fruit pizza first gained popularity in the United States during the 1980s as a festive dessert featuring a sugar cookie crust topped with cream cheese frosting and colorful fruit. Since then, it has become a staple for patriotic holidays because berries naturally create the iconic red, white, and blue flag design.
While the original versions were often quite rich, today’s healthier adaptations borrow ideas from Mediterranean eating by emphasizing fresh fruit, moderate sweetness, and more balanced ingredients. Greek yogurt replaces part of the cream cheese, reducing fat while increasing protein, and whole-grain flour adds fiber to the crust without sacrificing flavor.
The result is a dessert that still feels celebratory while fitting more comfortably into an everyday balanced lifestyle.
Why You’ll Love This Recipe
This recipe is designed to be as practical as it is beautiful.
- Ready in about 45 minutes plus chilling time
- Perfect for holidays and summer entertaining
- Meal-prep friendly for parties
- Naturally colorful without food coloring
- Higher in protein thanks to Greek yogurt
- Easy to customize with seasonal fruit
- Beginner-friendly with simple ingredients
- Budget-friendly using common grocery staples
Health Benefits
Fresh ingredients do more than make this dessert look stunning—they also contribute meaningful nutrition.
Berries
Strawberries, raspberries, and blueberries provide antioxidants, vitamin C, and fiber that support immune health and digestion while naturally sweetening the dessert.
Greek Yogurt
Greek yogurt adds high-quality protein while reducing the amount of cream cheese needed. Protein also helps promote fullness.
Cream Cheese
Using a moderate amount provides richness without overwhelming the dessert. Choosing reduced-fat cream cheese keeps the texture creamy while lowering saturated fat.
Whole Wheat Flour
Replacing part of the all-purpose flour with whole wheat flour increases dietary fiber, helping stabilize energy levels after eating.
Honey
Instead of relying entirely on refined sugar, honey contributes natural sweetness while allowing the fruit flavors to shine.
Ingredients
Sugar Cookie Crust
- 2¼ cups (280g) all-purpose flour
- ½ teaspoon baking powder
- ¼ teaspoon salt
- ¾ cup (170g) unsalted butter, room temperature
- ¾ cup (150g) granulated sugar
- 1 large egg
- 2 teaspoons vanilla extract
- ½ teaspoon almond extract (optional but recommended)
Cream Cheese Filling
- 8 oz (226g) full-fat cream cheese, softened
- 1 cup (240ml) heavy whipping cream, cold
- ½ cup (60g) powdered sugar
- 1 teaspoon vanilla extract
- 1 teaspoon fresh lemon juice
- Pinch of salt
Fruit
- 2½–3 cups fresh raspberries
- 1½ cups fresh blueberries
Use only firm, fresh berries.
Do not use frozen fruit.
Equipment
- 12-inch pizza pan
- Parchment paper
- Electric mixer
- Large star piping tip (Wilton 1M or Ateco 824)
Step 1: Make the Cookie Crust
Preheat the oven to 350°F (175°C).
Line a 12-inch pizza pan with parchment paper.
Whisk together:
- flour
- baking powder
- salt
Set aside.
Beat together:
- butter
- sugar
for 3-4 minutes until light and fluffy.
Don’t rush this step.
It creates the tender cookie texture.
Add
- egg
- vanilla
- almond extract
Mix until smooth.
Gradually add the flour mixture.
Stop mixing once the dough comes together.
Do not overmix.
Press the dough evenly into a 12-inch circle.
Aim for about ¼ inch thick.
Slightly raise the outside edge.
This keeps the filling from sliding off.
Bake for 14–16 minutes.
The center should still look pale.
Only the edges should become lightly golden.
Do not overbake.
Cool completely.
About one hour.
Step 2: Make the Filling
Beat the cream cheese for 2 minutes until completely smooth.
No lumps.
Add
- powdered sugar
- vanilla
- lemon juice
- pinch of salt
Beat another minute.
In another bowl whip the heavy cream until stiff peaks form.
This is extremely important.
The whipped cream gives the filling its bakery-style thickness.
Using a spatula,
gently fold the whipped cream into the cream cheese.
Don’t stir aggressively.
Fold until smooth.
You should have a light, fluffy frosting that holds its shape.
Step 3: Assemble
Spread about half of the filling over the cooled cookie.
Leave a small border around the edge.
Make it approximately ¾ inch thick.
Transfer the remaining filling into a piping bag fitted with a large star tip.
Pipe thick stripes exactly like the image.
Don’t make tiny decorative swirls.
Make long, generous ribbons.
Step 4: Add the Fruit
The picture uses mostly raspberries.
Place raspberries closely together between the frosting stripes.
Don’t leave gaps.
They should almost touch.
Fill the outside edge with blueberries.
Pack them tightly.
The more berries,
the more luxurious it looks.
Step 5: Chill
Refrigerate for 2 hours.
The filling firms up beautifully.
Step 6: Slice
Use a sharp knife.
Wipe the knife clean after every cut.
Serve cold.
Bakery Secrets (These Make the Biggest Difference)
1. Use full-fat cream cheese.
Low-fat cream cheese won’t hold the decorative piping as well.
2. Whip the cream separately.
Don’t mix everything together at once.
Whipping the cream first creates a lighter, more stable filling.
3. Chill the bowl.
For best results, chill the mixing bowl and beaters before whipping the cream.
4. Dry the berries thoroughly.
After washing, spread them on paper towels and let them air-dry for 30–60 minutes. Excess moisture can cause the filling to become runny.
5. Don’t overbake the crust.
The crust should remain soft and chewy in the center with lightly golden edges. It will continue to firm up as it cools.
6. Assemble close to serving.
For the freshest look, decorate with the berries no more than 2–4 hours before serving.
Make It Ahead Guide
This dessert is ideal for entertaining because much of the work can be completed ahead of time.
Bake the crust one day in advance and store it tightly covered at room temperature.
Prepare the cream filling up to two days ahead and refrigerate it separately.
Wash and thoroughly dry the berries the day before serving.
For the freshest appearance, assemble the dessert no more than six hours before serving. This helps prevent excess moisture from softening the crust.
If preparing for a large gathering, make two pizzas rather than one oversized version for easier serving and transport.
Common Mistakes to Avoid | American Flag Fruit Pizza Recipe
- Spreading the cream filling onto a warm crust
- Using wet berries that release excess moisture
- Overbaking the crust until dry
- Adding fruit too far in advance
- Cutting immediately without chilling
- Overloading the crust with excessive toppings
Notes, Tips & Variations | American Flag Fruit Pizza Recipe
Ingredient Substitutions
- Swap Greek yogurt for skyr.
- Use mascarpone for a richer dessert.
- Replace honey with maple syrup.
- Try peaches, cherries, kiwi, or blackberries.
Dietary Variations
Lower Carb
Use almond flour and a sugar substitute in the crust.
Higher Protein
Increase the Greek yogurt and reduce cream cheese slightly.
Gluten-Free
Use your favorite 1:1 gluten-free baking flour blend.
Vegetarian
The recipe is already vegetarian.
Dairy-Free
Use dairy-free cream cheese and coconut yogurt.
Texture Tips
- Chill the dough before baking for crisp edges.
- Dry fruit carefully after washing.
- Refrigerate before slicing for cleaner servings.
- Use a sharp knife wiped clean between slices.
Topping Ideas & Flavor Boosters | American Flag Fruit Pizza Recipe
Customize your fruit pizza with extra flavors.
- Toasted sliced almonds
- Chopped pistachios
- Unsweetened coconut flakes
- Lemon zest
- Orange zest
- Chia seeds
- Hemp hearts
- Fresh mint
- Dark chocolate shavings
- White chocolate drizzle
- Honey drizzle
- Cinnamon
- Vanilla bean
- Pomegranate seeds
Who This Recipe Is For | American Flag Fruit Pizza Recipe
This recipe works especially well for:
- Busy families needing a make-ahead dessert
- Summer party hosts
- Fourth of July celebrations
- Beginner bakers
- Mediterranean lifestyle followers
- Weight-conscious eaters looking for balanced treats
- Fitness enthusiasts wanting more protein in desserts
- Anyone who enjoys fresh seasonal fruit
Storage & Meal Prep Tips | American Flag Fruit Pizza Recipe
Store leftovers in an airtight container in the refrigerator for up to 3 days.
For the best texture, avoid freezing the fully assembled fruit pizza, as the fruit can become watery when thawed. However, the baked crust freezes well for up to 2 months when wrapped tightly.
If meal prepping, keep the crust, cream topping, and fruit separate until the day you plan to serve. Glass containers with airtight lids work best for preserving freshness.
Serve chilled straight from the refrigerator.
Nutrition Facts | American Flag Fruit Pizza Recipe
Estimated per serving (1/10 pizza)
| Nutrient | Amount |
|---|---|
| Calories | 255 |
| Protein | 9g |
| Carbohydrates | 29g |
| Fat | 11g |
| Fiber | 4g |
| Sugar | 16g |
Nutrition values are estimates and will vary depending on ingredient brands and portion sizes.
Frequently Asked Questions | American Flag Fruit Pizza Recipe
Can I make this fruit pizza the night before?
Yes. For the best texture, prepare the crust and cream layer ahead of time, then add the fruit within a few hours of serving.
What fruits work best?
Blueberries, strawberries, raspberries, blackberries, kiwi, peaches, mango, cherries, and grapes all work well. Choose firm, fresh fruit that won’t release too much liquid.
Can I use frozen berries?
Fresh berries are strongly recommended. Frozen fruit becomes soft and watery after thawing, which can make the topping runny.
How do I keep the crust from becoming soggy?
Make sure the crust has cooled completely before adding the topping, dry the fruit thoroughly after washing, and assemble the dessert close to serving time.
Can I make this recipe gluten-free?
Absolutely. Substitute a high-quality 1:1 gluten-free flour blend in the crust while keeping the remaining ingredients the same.
Conclusion | American Flag Fruit Pizza Recipe
This American Flag Fruit Pizza combines fresh summer berries, a creamy protein-rich topping, and a lightly sweetened crust into a dessert that’s as beautiful as it is delicious. It’s easy enough for beginners, impressive enough for holiday gatherings, and flexible enough to fit a Mediterranean-inspired lifestyle.
If you make this recipe, experiment with your favorite seasonal fruits or healthier ingredient swaps, then share your experience and personal variations in the comments. Your creative twist may inspire someone else’s new favorite summer dessert.